When you create something wonderful, you want to protect it or brand it with your signature style. When it comes to the images and videos we create and share online, protecting them from hackers and unauthorized use is a big task. The digital world is huge and preventing someone else from copying your most important work is only possible by adding a watermark to it. Add a custom designed company logo, text, brand name or symbol; whatever the design, the choice is entirely yours.
But the problem is how to add a watermark, especially on iOS and Mac devices. Well, the answer is to choose fantastic software to help you create and apply a watermark with quick and simple steps. We will give you a rundown on how to add a watermark in iMovie as it is the best video editing tool in the world from Apple.
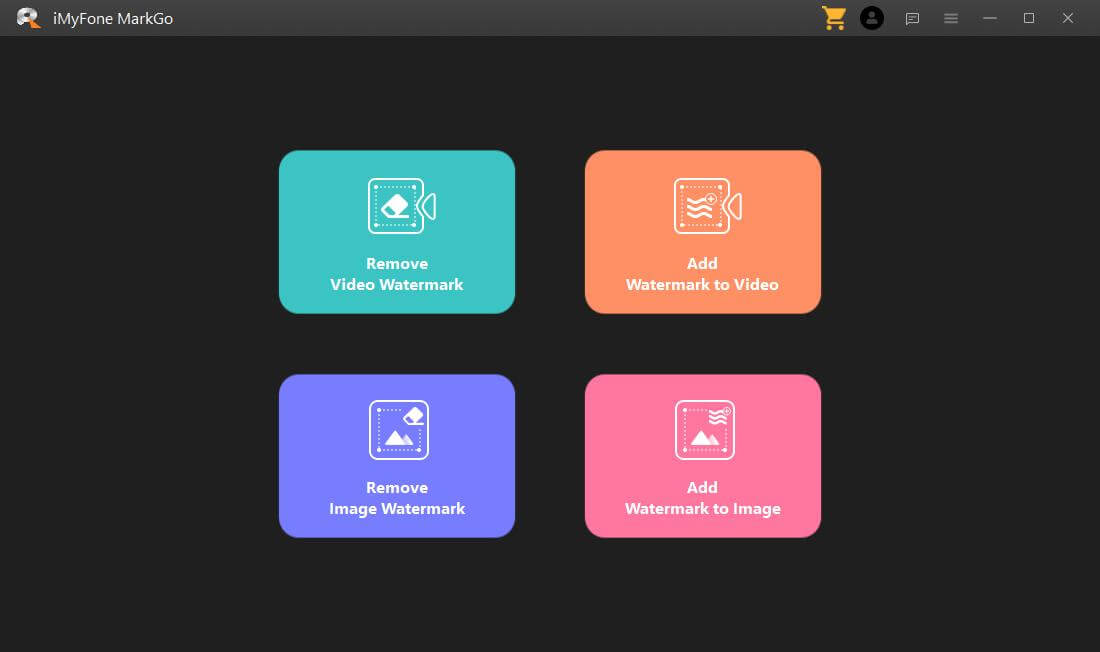
Part 1: Watermarking software much better than iMovie-iMyFone MarkGo

iMyFone MarkGo has been used for almost all purposes related to editing watermarks, for so if you want to add watermark to your photo/video, you can easily use iMyFone MarkGo for better results. You don’t have to worry about how to use it as all the steps are mentioned below.
How to use iMyFone MarkGo
Watch the video tutorial to learn more about MarkGo
Step 1: Upload the image or video
Click the Upload button and choose the image or video whose watermark you want to remove.
Step 2: Use the Add Text/Add Image tool to add a watermark area
Click the Add Text button /Add Image to add a watermark area, then you can drag the watermark area, you can also edit the text as you like.

Step 3: Click the preview button
You have now successfully added the watermark! Look at the details of your images and make small adjustments.
Step 4: Export the video/image
After adding the image/video watermark successfully, you can export It now.
Part 2: How to add a watermark in iMovie?
iPhone and Mac users can use iMovie to both edit videos and add watermarks. Being a powerful video editor, the software provides you with extensive tools to make your videos more attractive. The app, with its simplicity, tends to make things easy for beginners, especially. From basic editing to using advanced editing tools, the software gives your videos a sharp and elegant look.
Next comes the watermark part. Watermarking in iMovie is as simple as the general editing tool. To mark up your videos with iMovie video editing app, you don’t need to have complex technical knowledge. Just follow the guide below and add a watermark to your videos in no time.

Tip #1: Use the Logo as Your Watermark in iMovie
To add a logo watermark to your videos using iMovie, you must first Create a logo for your brand.
Step 1: Use an Adobe photo editor to import your logo and set an appropriate dimension for the logo background.
Step 2: The logo properties must match the dimensions of the video. For example, if the video is 720p, the resolution should be 1280×720, and if the video is 1080p, the resolution would be better set to 1920×1080.
Step 3: Place the logo in the desired position within the video.
Step 4: Change the background setting to “Transparent”
Step 5: Save the logo in PNG format.
Once you have created the watermark, you can configure it in two of the following ways:

Place full screen watermark
To place the watermark on your video in full screen using iMovie, follow these steps:
Step 1: Drag and drop the logo you created into The timeline. Place it where you want it to appear in your video.
Step 2: Choose Cut from the pop-up menu.
Step 3: Set the logo duration, which is how long you want the watermark to appear on the video. Since this is a logo, it needs to appear throughout the entire video, so set the logo duration to the entire video.
Step 4: Adjust the “Opacity” of the logo.
Step 5 – Next, go to “Fade” and adjust the slider so that the watermark looks even across the entire video.
Place the watermark in the corner of the screen
You can also place the watermark somewhere on the screen. the corner of the screen in the video. To do so, follow the procedure below:
Step 1: Drop the logo on the timeline and adjust its duration.
Step 2: In the previous tab, select the Picture-in-Picture option. Arrange the size and position of the logo within the video.
Step 3: Preview the video to get a better idea of the position of the logo within the video.
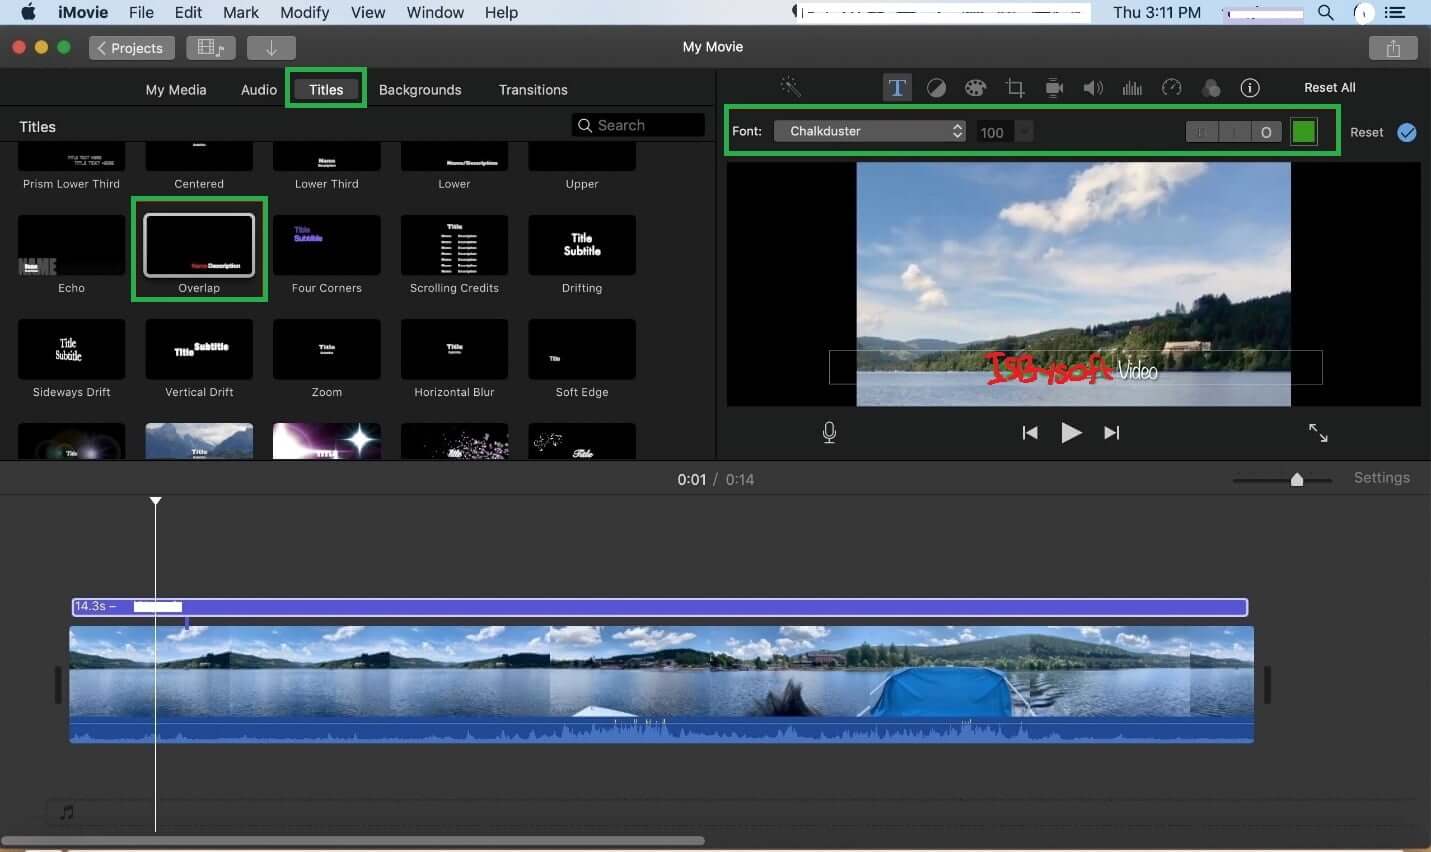
Tip #2: Watermark Text in iMovie
Some people prefer to mark their videos with their initials or signature, making it their trademark of water. For that, you must first create your text-based watermark, and then start with the following guide:
Step 1: Drag and drop the video onto the timeline or click Click on the “Import File” option to load the video you want to add a watermark to.
Step 2: In the tab above, select the “Titles” option. Choose a style of your preference.
Step 3: Continue reviewing the sample text in the preview window.
Step 4: Choose the text style you want as your watermark.
Step 5: To ensure that the text appears throughout the video, drag the edge of the video to the end of the timeline.
Step 6: Customizing the text will add style to your watermark. Change the color, font, alignment and style of the text and make your text watermark more visible to viewers.
Step 7: Before saving the video, take a look at it to make sure the watermark is in the correct position.
Tip #3: Add a Watermark on Mac Using iMovie
Since iMovie is compatible with Apple devices, Mac users can also use iMovie to add a watermark of water to your videos.
Step 1 – Before proceeding to add the watermark on the videos, make sure to create a semi-transparent or fully visible watermark by going to the “New File” option in iMovie .
Step 2: Remember to adjust the size of the watermark according to the dimension of the video to ensure that the watermark appears consistent with the video.

Step 3: Open Finder on your Mac device and drag your video into iMovie.
Step 4: Next, bring your newly created logo into the iMovie platform using Finder.
Step 5: Adjust the duration of the logo according to the video.
Steel 6: Select the “Save” option.
Conclusion
Note: iMovie is a famous video editing and watermarking software used by iPhone, Mac and iOS users. Simplicity and ease of use are what make this software a number one choice among iOS users. For Android/PC users, we have a fantastic alternative that can help you edit your watermark in minutes.
For Android and iPhone users looking for high-quality watermarking software, iMyFone MarkGo is a better alternative. Apart from being compatible with the two most popular operating systems (mobile phone and PC), the software is packed with features that help users to unleash their creativity and further enhance their watermark.
The final product created by iMyFone MarkGo is of superior quality, while the editing process is quick and easy. The user interface is so smooth that even beginners in the world of watermark editing will easily understand it.
.