How to Make a Resume in a Word Document
Most resume templates you’ll find online are already formatted for Microsoft Word. But if you’re looking for how to make a great resume in Microsoft Word that’s simple yet professional, we’ve got you covered.
MS Office makes it easy to create a professional, well-formatted resume for any industry and offers a number of attractive resumes. Resume templates for you to customize to meet your needs.
We’ll show you how to create a Word resume in seven easy steps.
1. Choose a template for your resume document. Word
Creating a resume in Word starts with choosing the right template. Open Word and search for “resume” by selecting the search icon in the upper right corner.
This will open a variety of options. Choose “templates”, which will display your choice of resume templates, and then select the one you like best:

For our example, we chose the Microsoft Word “Bold” resume template.
2. Type your name and contact information at the top
Now that you have the template open, start by editing your resume header at the top of the page:
At a minimum, must include your:
- Full name
- Email address
- Phone number
This is what a properly formatted header looks like in Word:

Optionally, you can also include your current job title in the header of your resume to immediately advertise your professional experience.
3. Write a compelling resume introduction
Next, add a new section in your Microsoft Word document directly below your header for your resume introduction.
The best introduction for the Most job seekers use a summary resume. This is because resume summaries can be modified for a wide variety of industries and experience levels.
A good resume summary lists your major job-related accomplishments and skills in one to five sentences. , working as a sales pitch that shows you’re the most qualified person for the job.
Here’s an example of what a well-written resume looks like on a Microsoft Word resume:

4. Summarize your work experience
The work experience section is the heart of your resume, as it shows that you have the qualifications and skills to do the job. It will also take up most of your resume.
To get started, click on the section of your Microsoft Word document labeled “Experience”.
Then list your work experience in order Reverse chronological, meaning your most recent job title is placed at the top of the experience section. Remember to only include experience that is relevant to the job you are applying for.
For each job you list, please provide the following basic information:
- Job Title
- Company name
- Company address (city and state)
- Dates of employment
You must also enter three to five Resume bullet points describing your duties and accomplishments under each job title. Remember to use strong action verbs to showcase your skills and highlight accomplishments on your resume by quantifying them using numbers and percentages.
Here’s an example you can follow to write your own work experience section:
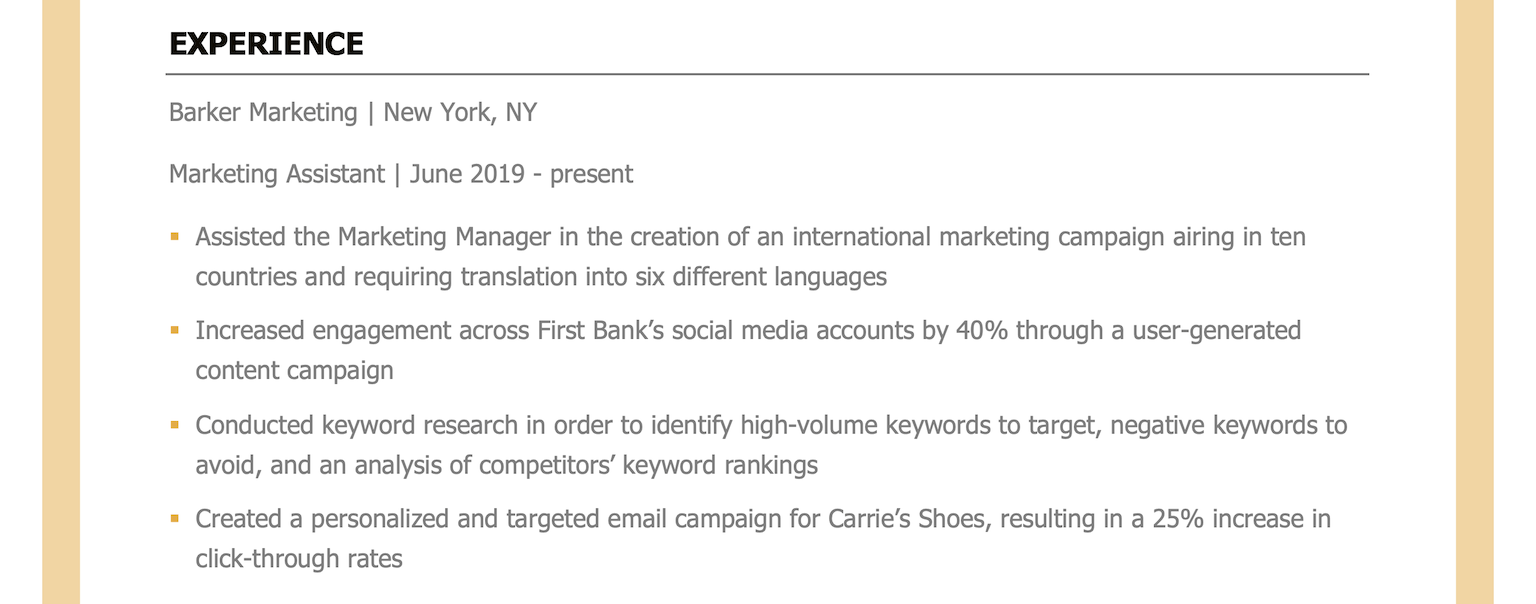
In this example, the candidate’s title, company name, location, and dates of employment are clearly displayed. Using bullet points, action verbs, and concrete numbers to quantify your achievements gives hiring managers a good idea of what you can bring to the table.
5. Add your educational history
Next, fill out the educational resume section in your Microsoft Word template.
If you already have a few years of work experience, keep your educational history brief. All you need to do is include the following details for each school you attended:
- School and its location
- Degree and major
- Graduation (or early graduation date)
- Awards, honors, and GPA (if 3.5 or higher)
However, if you are writing a resume without work experience, or just graduated from college, consider adding more details to your education section.
For example, including extracurricular activities or relevant courses in the education section of your resume helps employers have a better idea of your skills and qualifications.
Here is an example of a well-written resume education section:

6. List your relevant job skills on your Word resume
Add a skills section to your MS Word resume to demonstrate that you have the necessary experience to do the job you are applying for.
Be sure to highlight all of the skills mentioned in your job listing, and include a variety of hard and soft skills to show employers that you have a variety of strengths to offer.
Here’s an example of what your skills section should once you have completed your Microsoft Word resume:
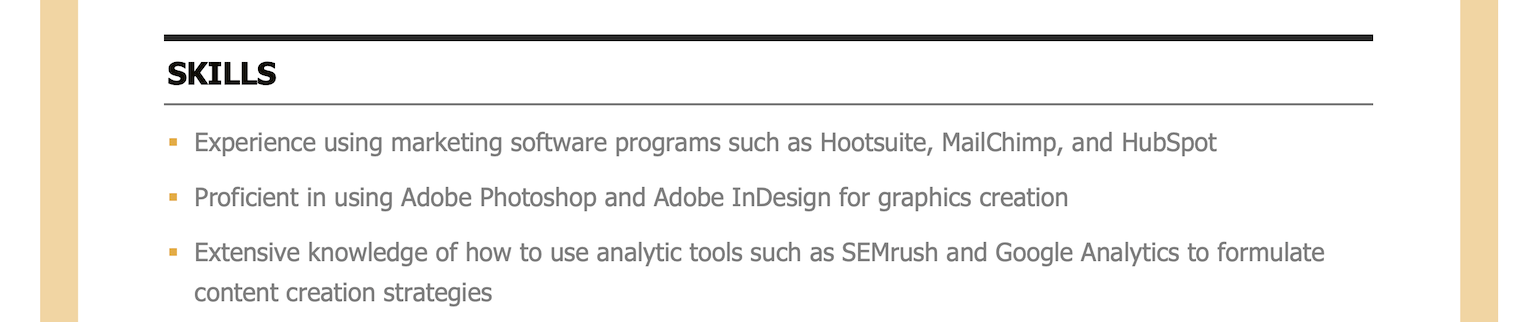
You can also choose to further simplify this section by listing your skills without using complete sentences. This can help save space, especially if you’re using a two-column format.
Also, be sure to list the same skills as those listed in the job listing. This is an essential step in getting approved by applicant tracking software (ATS), which filters out job applications that don’t meet employers’ requirements.
Include key resume skills in your resume description job ensures you have an ATS-friendly resume that isn’t automatically rejected before it lands on the hiring manager’s desk.
7. Include professional accomplishments and awards at the bottom
Finally, consider adding an extra section to your Microsoft Word resume for things like awards, achievements, or volunteer work.
This will usually go in the bottom of your resume, like this:

Tips for a Professional Resume Format in Word
You’ll probably need to do some fine-tuning to get your Microsoft Word resume just right . Here’s how to make some key adjustments to your resume format:
Adjust your margins
Keep your resume information visually balanced across the page by paying careful attention to formatting of your resume in Word. If you’re having trouble keeping your resume length to one page, try adjusting your resume margins.
You can do this in Microsoft Word by selecting “Layout” and then clicking “Margins”:
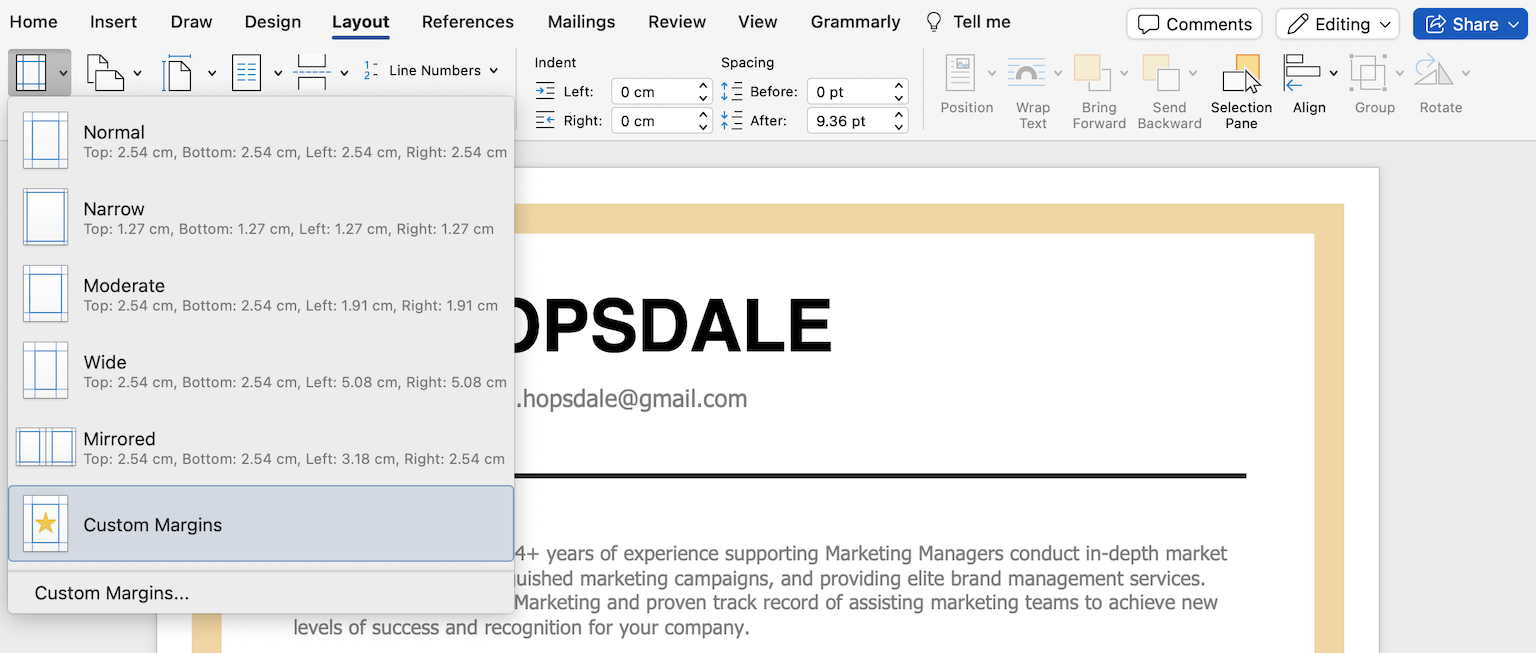 You can then choose a different preset for your margins (such as “Narrow”) or set your own by clicking “Custom Margins”. However, we recommend keeping the margins between 0.5″ and 1″ to ensure your resume is easy to read.
Change the line spacing
If you need to include more information on In a section, consider adjusting the line spacing, which is the amount of space between each line of text.
The easiest way to do this is to click the “Line and Paragraph Spacing” icon and select “Paragraph and Line Spacing”. Line Spacing Options”:
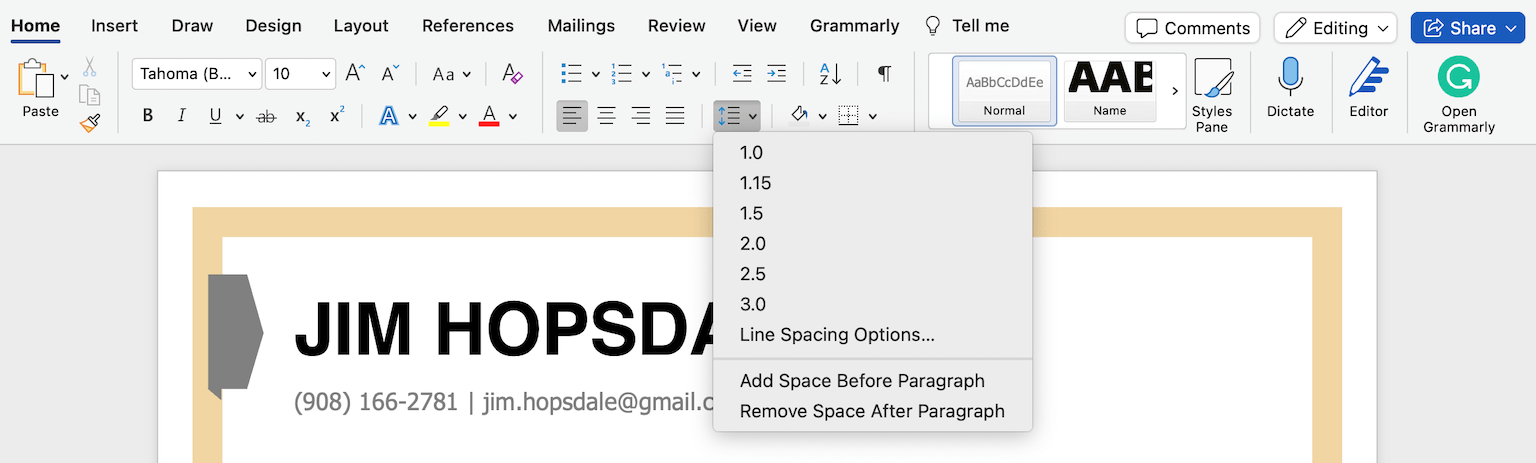 You can go to “Spacing” to change the size of the “Before” and “After” line breaks, and to “Line spacing” to choose how much space is between each line.
Add Horizontal Lines
Horizontal lines help break up the information on your resume and make it easier for employers to read, and there are a few different ways to add it. Add them to your Word document resume:
- The most basic way is to press shift + the hyphen key to create an underscore, then hold until you have a line the size you want , in the position you want. You can also use the asterisk key to do this.
- If you need the line to span the width of the page, hit the dash key three times, hit enter, and one will appear. You can do the same with tildes, asterisks, and equal signs for a slightly different look.
- Finally, you can click the “Borders” icon and choose “Horizontal Line” and a wrapper line will be added. one line for you.
.