Last updated: December 8, 2022
Yes, it is possible to create a WordPress website completely free. So whether you’re a blogger, web developer, business owner, or just someone looking to try new things, there are no more excuses to avoid building your own website.
So, open a new tab on your computer and follow this step-by-step guide, and you’ll have a new free website up and running in minutes.
Hosting and Setting Up Your Free WordPress Website
Domain and hosting are the foundations of a website. No website can exist without them. The Domain is the identity of your website. People can type it into a browser and instantly go to your website. And the hosting is where all the information and files of your website are stored. It’s like a computer that sends your website information to people who are looking for it at any time from anywhere in the world.
You can usually buy the domain name separately and pay for a service different to host it on their servers. . But the cost-effective way is to buy them together.
However, since we are trying to build a website for free, we can get a subdomain from free hosting providers like:
<ul
</ ul
Free hosting providers often come with limitations on various aspects necessary to run a website. That’s why it’s important that you compare them on the following 8 factors:
- Subdomain – Does the host offer a free subdomain?
- Bandwidth – How much data can transfer the website to your visitors in a certain period of time?
- Disk space: how much space is available on the server to store your website content such as database, pages, images, videos and files?
- Number of websites: how many websites can you run with the same plan?
- Email accounts: how many email accounts do you get with the plan?
- Uptime and speed: What is the average uptime and speed of the websites hosted by the provider?
- Support: Does the provider offer support? If so, how?
- Limitations: Does the provider have other usage limitations?
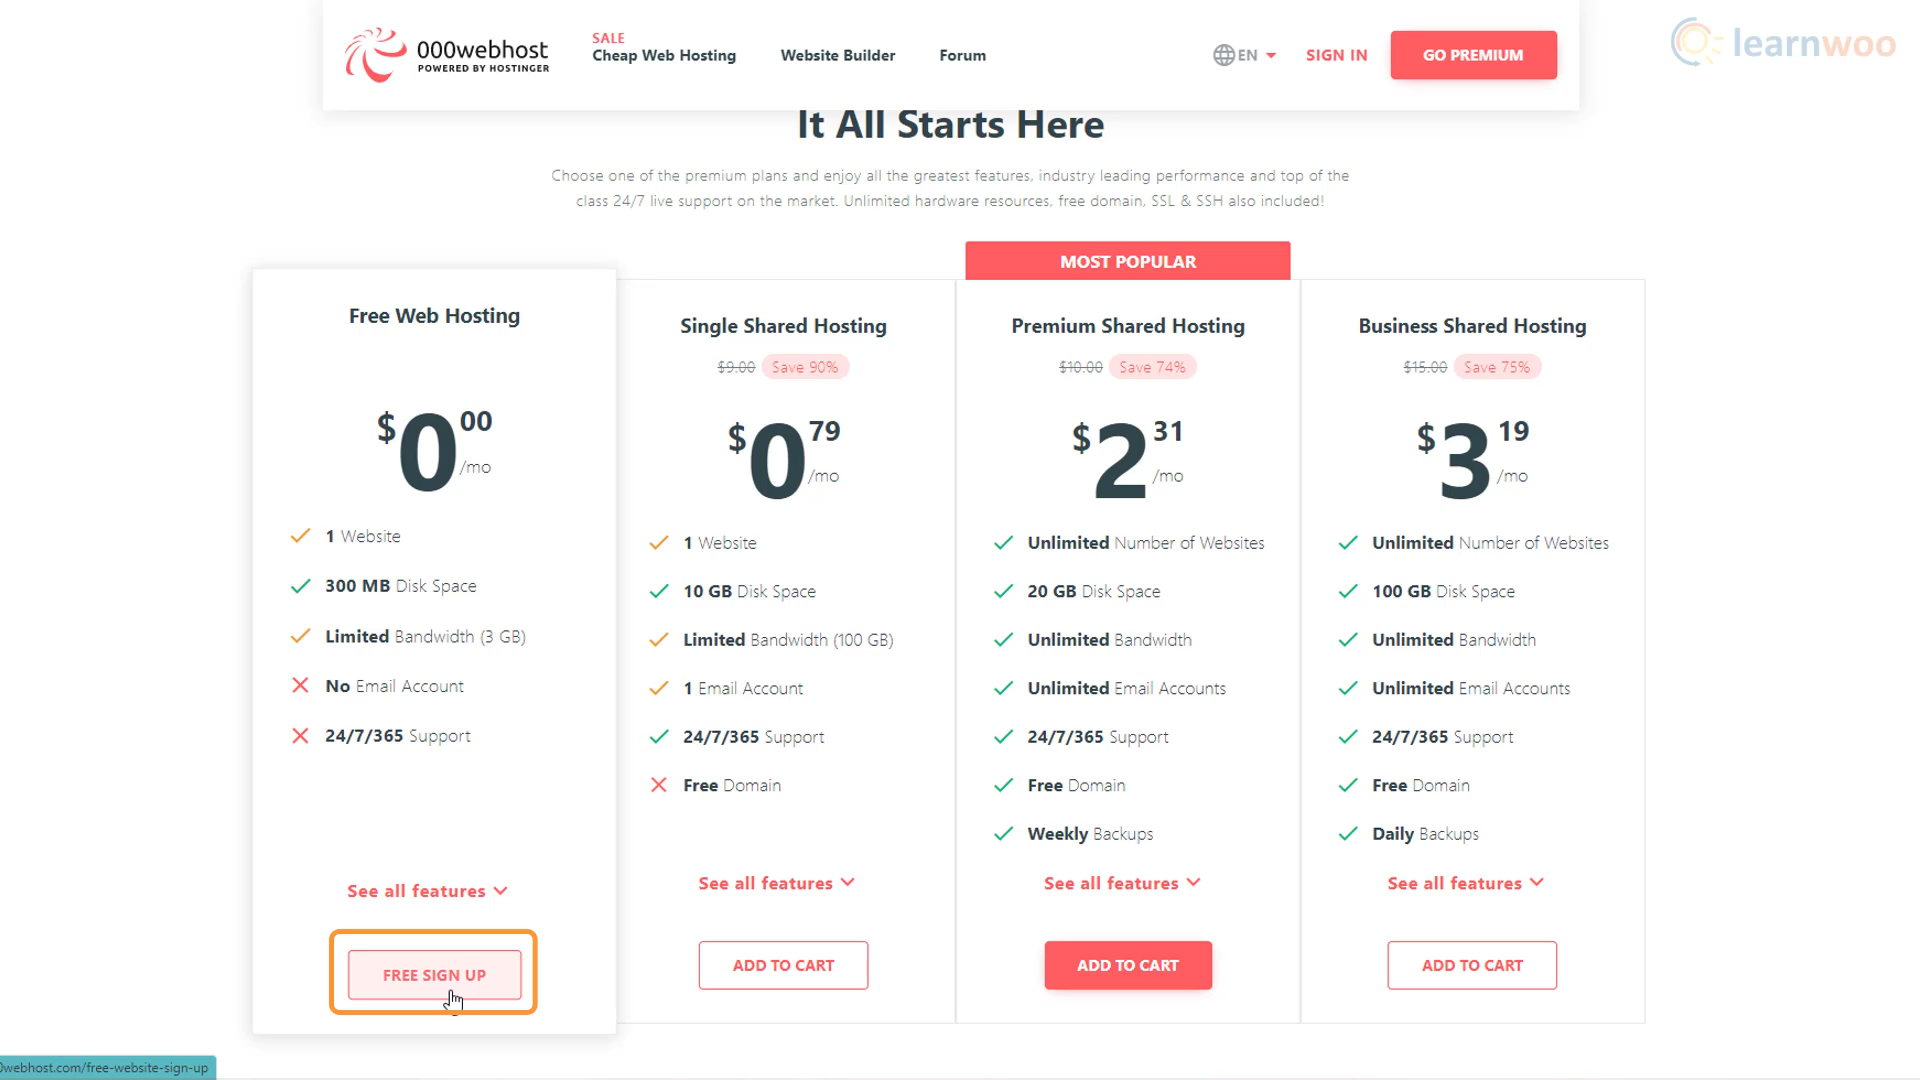
This is the best option since 000WebHost is listed as a provider of reliable free hosting after comparisons and is part of Hostinger, a well-known service provider in the industry. So head over to their website by clicking on this link. Scroll down to see the plans and click the “Free Sign Up” button. Provide your email address and assign a password for your 000WebHost account.
After your email has been verified, a setup wizard will guide you through 5 simple steps:
Step 1: Choose the type of website; whether you want to create a blog, an online store, a web development site or something else.
Step 2: If you choose a blog, you will have to choose the topics about the ones you will write.
Step 3: 000WebHost will recommend installing the Chrome browser for optimal performance. If you already have it, you can click Skip.
Step 4: In the next step, you’ll need to name your website and create a password for it.
Step 5: Finally, you must choose the CMS you will work with. For us, it’s WordPress. When you click on it, a popup window will ask you to create an admin username and password for your WordPress website. You will need these credentials each time you want to log in to the backend of your website.

After About 60 seconds of loading, your free WordPress website will be active on the Internet. You can click the “Go to Settings Page” button and use your WordPress credentials to log in to your website.
Import a layout template

Your website has been created. But the default version with a sample page and content doesn’t look like much. So let’s start building and designing it. Go to the backend of your website by adding “/wp-admin” to the end of your URL. This is where we control the basic components of our website, such as posts, pages, themes, plugins, and settings.

You’ I will notice that the dashboard and website is a bit messy at the moment. Let’s start cleaning it up. Go to the Plugins tab and click on it. You will see that Triple Zero Webhost has pre-installed some plugins. To maintain a fast website, it is important install only the plugins that are absolutely necessary. The pre-installed plugins are not needed, so you can simply remove them. Select all the plugins, choose “Disable” from the dropdown menu and click Apply Finally, select them all again, choose Remove in dropdown menu and click Apply.

Now you can start creating a page. Hover over the “Pages” tab on your dashboard and click “Add New”. This is the default WordPress block builder. You can start by adding a page title. Press the enter button to start a new paragraph, and use the plus icon to add other types of blocks like images, headers, galleries, lists, and citations.

But building every page and post on our website in this way requires a lot of time, effort, and also some design know-how. Therefore, it is a much better option to import pre-built templates and edit them according to our needs.
Hover over the “Appearance” tab in your WordPress dashboard and click “Themes” . Then click the “Add New” button to add a new theme. Use the search bar to find the Astra theme. Hover over the first few search results and click Install. Then activate it.
To choose a template, click “Get Started” on the next page.
Next, choose Elementor as your page builder, as it’s the easiest to use. In the popup window, you can explore Elementor’s vast library of templates. Use the filter at the top and select “Free” to narrow your search. If you like a website template, click the “Import Entire Site” button at the bottom right. Then click Import again and wait for the process to complete.

When the import is complete, your site Free WordPress website will look like a professional one. You’ll even have pages and posts with sample content.

Now, you just need to replace the sample content with your own. Go to any page or post you want to customize and click the “Edit with Elementor” button at the top.
Elementor allows you to create complex web pages with highly customizable drag and drop widgets. To edit any text, you can simply select it and write your own. You can format the text (change font, size, line height, and more) in the Style section of the editing menu. To replace an image, simply select it and use the “Choose Image” option in the edit menu.

When you are done editing the page, you can publish the changes to the live website via the “Update” button at the bottom.
However, you cannot edit the header and footer sections of your website with Elementor. For that, you will need to modify the theme settings using the “Customize” button in the Appearance tab in your WordPress admin.
In customization mode, you can change the site logo by clicking edit icon next to it. In the Menu section, you can rename, replace, and rearrange the elements in the header of your website. The Personalization panel also allows you to customize your website’s footer, sidebar and widgets.

When you’re done, click the “Publish” button at the top. Now when you update the website, you’ll see the changes reflected on the live site.
Creating and importing pages
Now we know how to import and edit a website. template with existing sample content. But what if we wanted to add a new page?The WordPress+Elementor combination also makes it easy. In your WordPress dashboard, hover over the “Pages” tab and click “Add New”.
Give your new page a title. Then click the “Edit with Elementor” button at the top. From here, there are 3 methods to create a new page.

Method 1
Simply you can drag and drop the blocks from the editing section on the left. To add a title to your page, simply drag the “Title” block. Then drag the “Text Editor” block to add a paragraph. Images can be added using the “Image” block and you can even control the spacing between elements using the “Spacer” block. This way, you can build a page block by block from scratch.

Method 2
The second method is to use layout templates for the pages. You can access a library of page templates designed for various purposes through the folder icon. You can use the search bar to narrow down the results. For example, typing “About” will display all “About Us” and “About Me” pages in the template library.

Simply choose a page template you like and click the “Insert” button to import the page to your website.
Method 3
We have already chosen a general layout template for you. our website. But the third method of creating a new page allows us to import specific pages from other website design templates. The third Astra logo icon takes us back to the website’s library of design templates.
When we click on a design template, we can access all the individual page templates that come with it. she. Just click on a page template you like and select “Import Template” at the top. The template will be applied to your blank page.

Click the “Publish” button at the bottom and update your website to view the newly created page .
Moving from a subdomain to a domain
You may notice at the top of the browser that your website is a subdomain, since has another phrase between your website name and the “. com”. Free hosting providers can only set up a subdomain for you.
And while subdomains are good enough if you’re just starting out or trying something new, your audience may not be able to locate you on the internet just knowing your name.
A domain not only makes it easier for people to find you, but it also legitimizes your business or brand. If you want your own dedicated domain, you’ll need to purchase a “.com” domain. However, most hosting providers offer a free domain along with their paid hosting plans.
There are many cheap but great hosting options that can take your website to the next level. If you’ve decided on one, the steps from here on out look something like the following:
Step 1: Explore the provider’s paid plans and choose one based on price, web space, bandwidth and other features .
Step 2: Enter the domain name you want for your website. If it doesn’t exist yet, you can have it. Some domain extensions may be free, others may not.
Step 3: Create an account with the hosting provider using an existing email address and a new password. Also, fill in personal information such as name, address, and phone number for verification.
Step 4 – Select the time period you wish to purchase accommodation for and select or deselect additional services such as domain privacy and SEO features.
Step 5: Enter your card information for payment.

After successfully completing the payment, you will gain access to the dashboard. Here, you can easily move your website from the free subdomain to the new paid domain.
Stuck somewhere? Reach out to us in the comments and we’ll be happy to help.
Watch the video below:
Further reading
- How to set up your WordPress site for a new domain
- How to create a WordPress and WooCommerce eCommerce website?
.