WordPress is the most popular website building platform today.
Therefore, it comes as no surprise that you have chosen to build your new website with WordPress.
However, you may not be sure where to start as it could be overwhelming when you first start.
Well, you can relax – you’ve come to the right place.
To help you on your journey In creating a WordPress website, we will cover the following steps:
Let’s get started…
Why use WordPress to create a website?
We love WordPress and use it to power all of our websites. We are so passionate about it that we can easily think of 10 good reasons to use it.
- It’s free and open source
- It’s completely reliable
- Fully scalable
- Thousands of professional WordPress themes
- Extend features with the plugin
- Great support from a fantastic community
- SEO-friendly
- Secure with options for better security
- Drag and drop page creation
- Great for beginners with a shallow learning curve
There are many more reasons to choose WordPress, but that should give you an idea why you should give it a try!
What’s the difference between Page Builder and a WordPress theme?
There are a couple of key differences between page builders and WordPress themes.
The two can be used together, and you’ll often customize a theme with a page builder, but there are differences. .
A page builder is a set of tools that allows you to create complete layouts. Drag and drop page builders use the concept of blocks. Select a block, a header for example, drag it onto the page and drop it into place and then customize it however you like.
It’s a very easy system to use.
You can create your own WordPress theme with a page builder if you want. All without needing to know how to code or CSS.
Page builders include Elementor, Brizy, Beaver Builder, and Spectra.
You can customize parts of a WordPress theme, but typically use it largely as you install it.
WordPress themes include Astra, Twenty Twenty, and many thousands more.
How to Create a WordPress Website
Step 1 : Sign up and buy a domain name
The first step in your journey to building a WordPress website is to buy a domain name.
If you have already done so , feel free to skip to STEP 2: Choose a Hosting Provider.
If not, then move on as we’ll answer some frequently asked questions when buying a domain.
p>
1.1 What is a domain name?
You probably have already decided on your company name.
Now we need to find you a domain name.
The domain name is the name of your website. It is the name ‘www.’ that people will use to find your website on the Internet.
It’s what they’ll type in the address bar to get to your website.
Let’s say your business name is John’s Pizza; then the ideal would be to have a domain name johnspizza.com.
Since your intention is to create your own WordPress website, then we can assume that you may already know this.
Most users are familiar with this (even if they don’t know the technical term).
1.2 Should you choose a “.com” domain? Name?
Most of us recognize the most common domain extension: .com
All your favorite websites you visit every day: ” google.com”, “facebook.com”, and “netflix.com” all use the universal domain extension .com.
However, you don’t always have to choose what yourself to make your WordPress website.
The domain extension you choose will depend on your business situation, requirements, location, industry, etc.
There are more than 500 domain extensions on the market and ultimately the choice is yours.

We recommend choosing a .com because it is the most common and widely recognized.
1.3 Where can you buy a domain name?
You can buy a domain name from your web host. The cost of buying domain names ranges from $10 to $20 a year.
Here are just some of the most popular options:
- NameCheap
- NameSilo
- HostGator
- SnapNames
- Hostwinds
- Sedo
- Flippa
- Domains Google
And many more…
For the purposes of this guide, we will choose a domain registrar: Namesilo to find and buy a domain name.
When you visit the NameSilos home page, there is an option to browse available domain names at the top.
We are going to create a WordPress website for this guide, and have decided to the name “My WP Website”.
Our goal is to buy the name “mywpwebsite.com”.

However, as you can see, the domain name “mywebsite.com” is already in use.

This is one of the situations where people end up choosing another domain extension like .info, .co, .net, .biz or other.
Alternatively, you can choose another domain name closely related to your business.
We are going to choose something that is similar to “our-wp-website.com”.
Surprisingly, it is available and we will continue Go ahead and buy it.
Most domain registrars will try to sell you a number of features (SSL, domain privacy, website builder). web os, email addresses, etc.).
You may or may not need them depending on your business requirements.
We will leave it up to you to choose whether or not to purchase them .

Once you have purchased a domain name, you can proceed to the next step in your WordPress website creation journey.
Step 2: choose a hosting provider for your WordPress website
The next step in the process of building your WordPress website is to choose a hosting provider.
2.1 What is it a hosting provider?
A good web host is what makes your website (its content, pages, images and files) accessible to its users on the web.
All data from your website is stored on the servers of the service provider. accommodation. Every time a user views or searches for something on your website, it is routed from the service providers’ servers to the visitors’ browser tab.
2.2 Where can you buy hosting?
In some cases, domain registrars like HostGator sell their own hosting services.
There are many players to choose from depending on your needs. This is just a short list:
- SiteGround
- DreamHost
- InMotion
- BlueHost
- HostGator
- Hostinger
The hosting provider you choose depends on your needs, your location, privacy requirements, scalability, speed, reviews, and uptime.
2.3 Choosing a Reliable Hosting Provider
We recommend SiteGround as they provide the best performance and keep your websites secure with advanced tools. They have amazing customer support that can help you at every step.
SiteGround becomes the best option as their servers are specifically optimized for WordPress.
They provide WordPress support, easy WordPress installation, automatic updates, and an in-house built WordPress starter tool to easily launch a website. In addition, they provide a WP caching plugin that improves website performance.
All plans come with free CDN, pre-installed SSL, and daily backups of your website.
Choosing SiteGround:
- Makes WordPress easy to install.
- Offers excellent value for money.
- It is transparent with its options prices.
- It has excellent technical support.
- It has a proven track record with over 1.8 million websites using it.
Let’s see how to set up hosting with SiteGround .
Once you’re on your home page, you’ll see a few options. SiteGround provides managed WordPress hosting as one of their options.
The benefit of going this route (for a beginner or non-techie) is that it eliminates all the confusion. . It makes it really easy to launch a WordPress website, which is what we’re looking for.

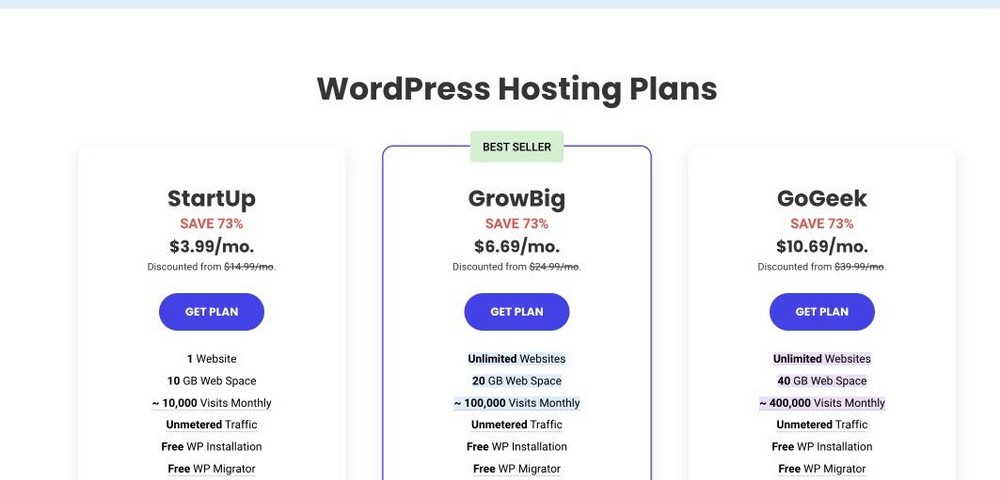
Next, choose which plan you want to start with.
If you purchase through our link today, you can get a discount on your first bill.
- The StartUp plan ($3.99 per month) is suitable for 1 website and can manage up to 10,000 visits per month. This is a perfect plan to start with.
- If you want to get the best site performance and plan to host multiple websites, you can go for the GrowBig plan ($6.69 per month) . It comes with SiteGround’s in-house built plugin – the SuperCacher, which dramatically increases the speed of your site.
- If you’re building a more resource-intensive WordPress website, such as an eCommerce website, choose the GoGeek Plan ($10.69 per month). It has the highest level of server resources and comes with advanced priority support, which means your tickets will be handled first by SiteGround’s most experienced agents.
After choosing a plan, you will need to enter your domain name.
If you already purchased your domain as discussed on Step 1 – then choose the I already have a domain name option and enter your domain name.
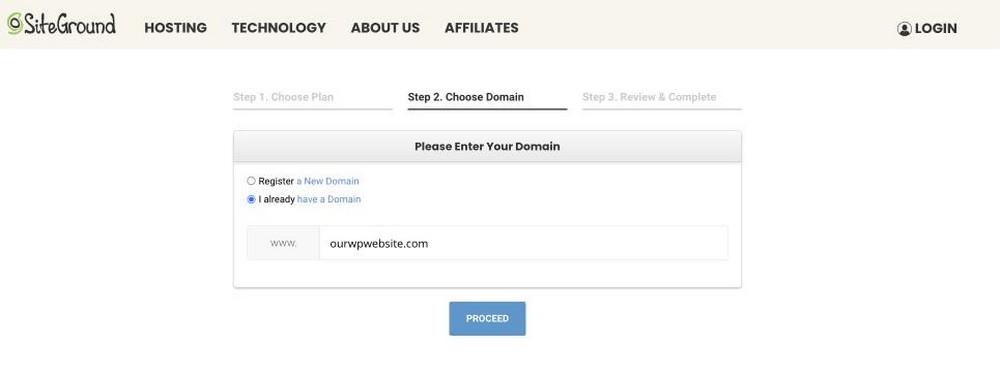
We have written ” ourwpwebsite.com” to match your newly purchased domain name.
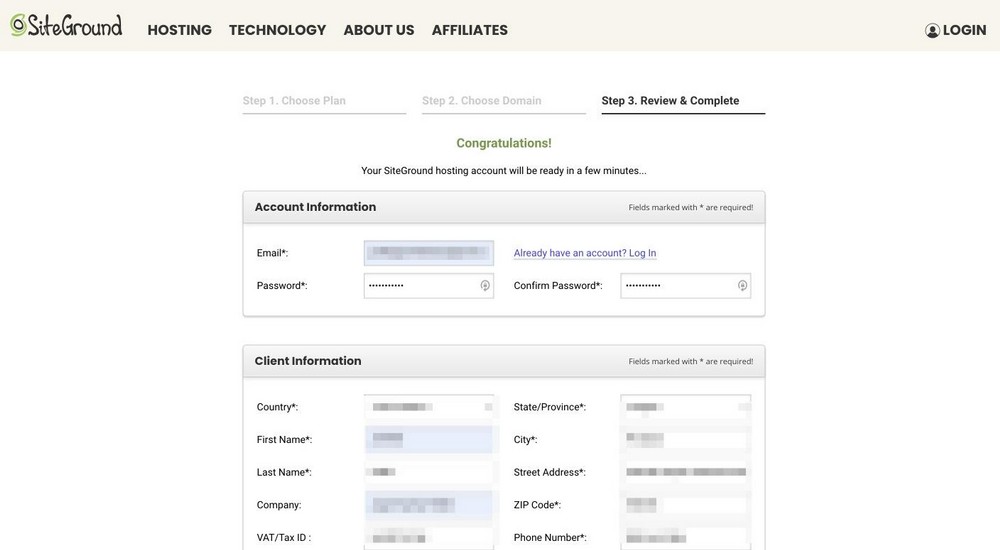
On the next page, SiteGround will ask for your information to complete the purchase.
You must complete the required information:
- Account information
- Customer information
- Payment information.
In the At the bottom of the page, you’ll notice that under “Hosting Services” there are a few options.
The “Term” is the term of your purchase . You can choose several options:
- Trial
- 1 year
- 2 years
- 3 years
This depends on your comfort level and how long you plan to keep the business in business.
Typically, the long term gives you a bigger discount.
The “Data Center” shows you options for where your data will be stored.
This depends on where your main traffic is coming from and also where you are located.
You have the choice between the US, UK, Europe and Singapore.
If you are a business based in Europe, you must comply with GDPR requirements and in this case you must choose Europe as your option.

Once the purchase is complete, you will receive a confirmation.
Once upgraded, this process usually takes u n few hours ours. This will ensure that your website is live and accessible on the web.

One of the many benefits of using SiteGround is that they make it very easy to set up and install WordPress from the client panel.
You can install WordPress without ever leaving SiteGround, which we’ll cover in the next section.
We recommend SiteGround for building your WordPress website due to its simple client control panel and ease of use. use.
How to point your domain to a new web hosting provider
If you purchase your domain name and web hosting from different companies, you’ll need to point the name to your hosting for everything to work.
It’s a simple process but requires a bit of configuration.
- Login to your web server and make a note of the nameservers. There are two nameservers and they will look like this, ns1.dns-parking.com and ns2.dns-parking.com
- Login to your domain registrar and find the nameservers
- Replace the current nameservers with those of your web server
- Save the change
A Once complete, you may need to allow 24-48 hours for the change to propagate. It may happen sooner, but be prepared to wait a bit before everything works as it should.
You’ll know once it’s done when you type your domain name into a browser and land on your website.
Step 3: Install WordPress on Hosting
You can set up your WordPress in just a couple of clicks.
There are a few ways to install WordPress, but we recommend the SiteGroud Wizard as shown in the image below.

Once you select WordPress, you will be prompted to create a website name username and password, and in less than a minute your WordPress account is set up.
Once installed, you can always return to your SiteGround client’s control panel to view your installations (this is useful if you have several websites)
Click the Websites icon on the top menu, and it should show you the list of your websites.

Once click on Site Tools, this tab will open below.
By clicking on WordPress Admin, you should be able to access your dashboard WordPress control.

3.1 Accessing your WordPress dashboard
You can also choose your browser to access your WordPress dashboard.
This is usually “yourdomain.com/wp-admin”.
It will take you to a login screen similar to this one.
Use the username and password you used during the SiteGround installation process.

Related Article: 26 Essential Things to Do Immediately After Installing Your New Site of WordPress.
Step 4: Select and Install a WordPress Theme
You have now created the infrastructure that supports your website (domain name, hosting, and WordPress).
Next, we’ll talk about customizing your website in the following steps.
The first step is to find and install a theme.
4.1 What is a WordPress theme?
Here is the official definition from WordPress.org .
A WordPress theme allows you to customize how your site looks and feels based on your requirements and brand guidelines.
With the help of a theme, you can customize the design, the structure, colors and appearance of your website.
4.2 Free vs. Paid Themes
If you need basic functionality on your website, then you might go with a free theme.
For example, if you are a freelancer and are using your website just to showcase your brand, a free theme would meet most of your needs.
However , there are limitations in terms of what you can change or update.
That’s why there are paid themes.
They offer more customization, personalization, and additional functionality than the free ones. themes.
There are over 10,000+ themes available in the WordPress ecosystem to choose from.
The average price of a paid theme ranges from $40-$60 depending on providers and options.
4.3 Where to find a theme that suits you
You can start with WordPress.org and search for many options.
Log in to your WordPress dashboard.
Click Appearance and then Themes.
You will notice some options there and also the ability to search for other themes.
You also have the option to upload a theme

But, we made you a promise at the beginning of this guide, right?
Remember: A promise to show you how to build a WordPress website in less than an hour and for less than $20 a month.
For that, we recommend the Astra theme. With the Astra theme, you can build any type of WordPress website.
It’s cost-effective, quick to install, and highly customizable (which we’ll cover as we go through this guide).
And, of course, we’re a bit biased because it’s our own subject. However, that is not why we suggest Astra.
However, we recommend Astra due to the great reviews we have received from our customers.
With over 1,653,898 WordPress websites who have installed Astra – we can confidently say it will work for you too.
Check out our list on WordPress.org showing 1,000,000+ installations and 5,600+ 5-star reviews.
Install the Astra WordPress theme
Go to your WordPress dashboard.
Click on Appearance> Themes > Add New
Then, search for Astra and click the button >Install .
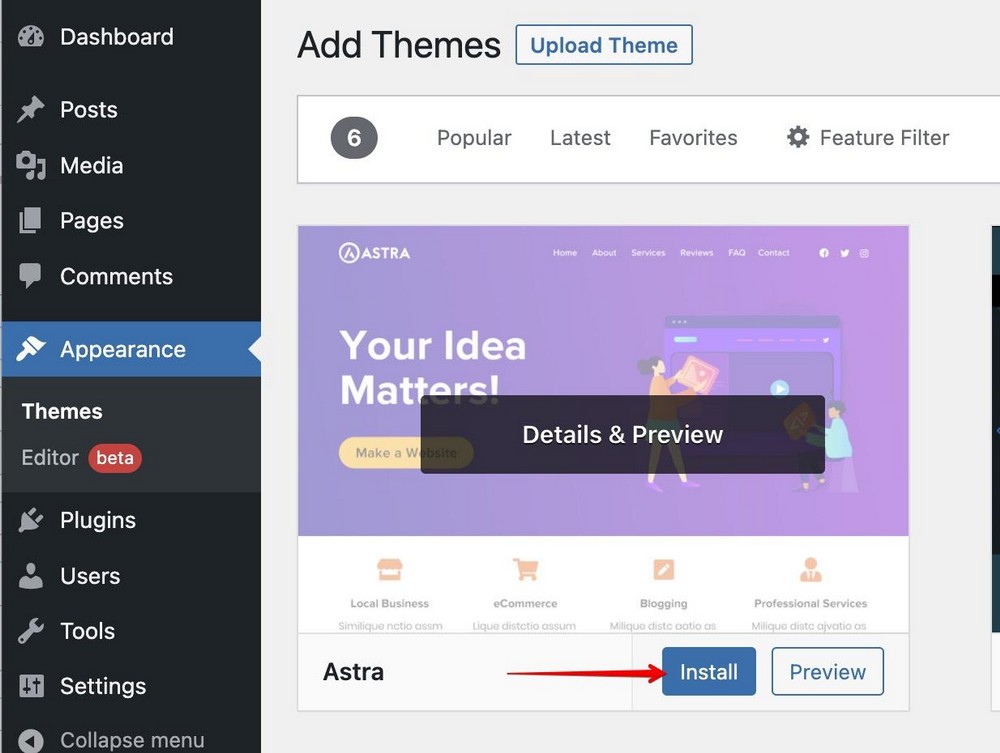
Then click the Activate button to activate the theme. In less than a minute, Astra will be installed.

The best part of using Astra is that you can import ready-made websites with the Starter Template plugin in just a few clicks.
To use launch templates, go to Astra Options in the Appearance tab.

From here select Install import plugin.
You will see a page like the following.

Click Build Your Website Now .
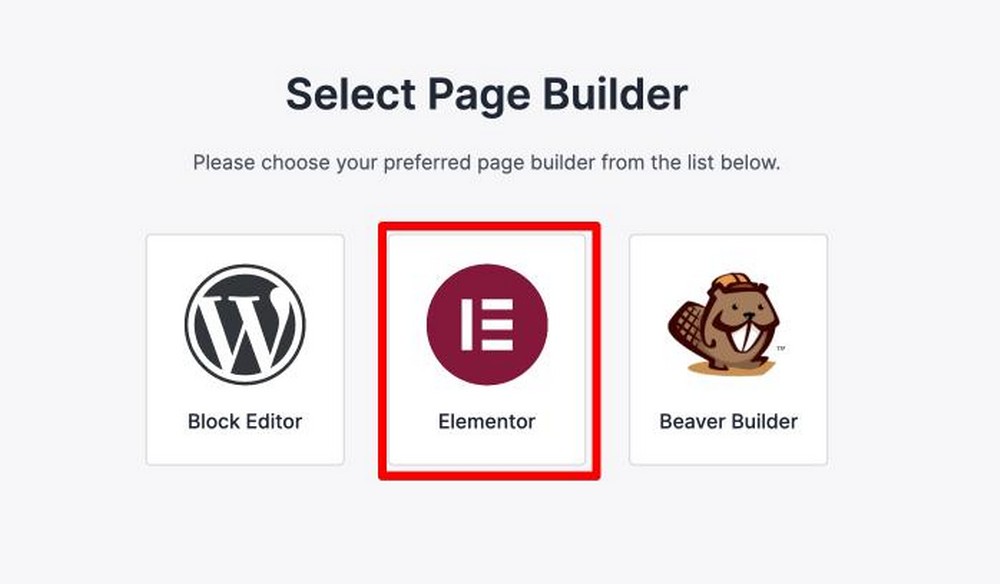
Next, select the page builder you want to build with. In this case, we’re going with Elementor.
Next, choose the type of website you want to build and select the website you want to import.
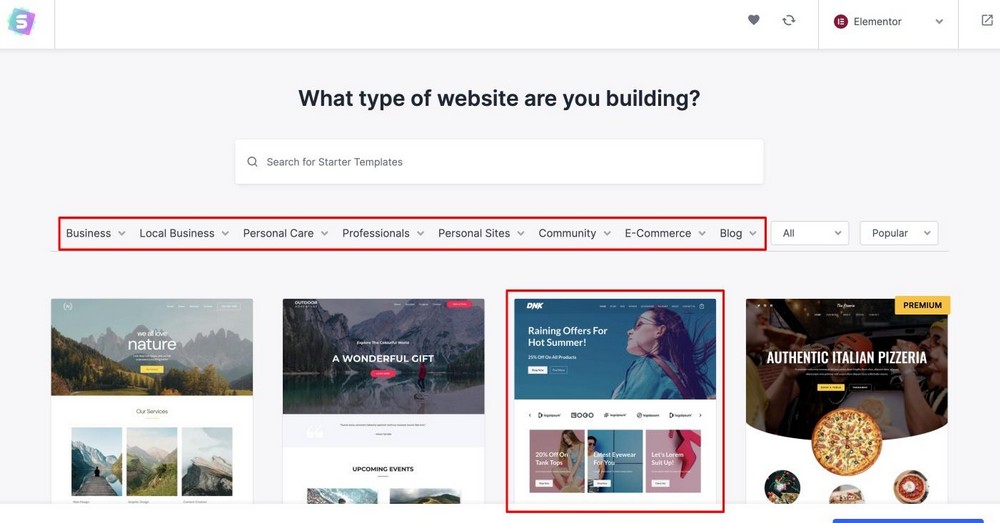
For the purpose of In this article, let’s build an eCommerce website with WordPress.
Select one of 200+ website templates that you like. This will open a customization page where you can change the colors of your website and upload a logo you’ve designed.
Don’t worry if you don’t have anything ready yet. You can customize everything later,
For this tutorial, click Skip and Continue.

In the final stage, you just have to fill in some details and install the template you chose.
You will then find a box asking you to fill in your details (which you can choose to leave if you wish).
Just click Submit and Create My Website and it will start importing the website.

Now, you are ready to do things your way and customize it!
We’ll cover that in detail in the next section of this guide.
Step 5 – Customize and Personalize Your WordPress Website
In this section , we’ll show you how customizing your WordPress website is consistent with your branding and style guidelines (all without having to write a single line of HTML/CSS code).
Go to your WordPress dashboard .
Under Appearance choose Astra Options.
You will see this page showing all the shortcuts, and you can choose which customize.
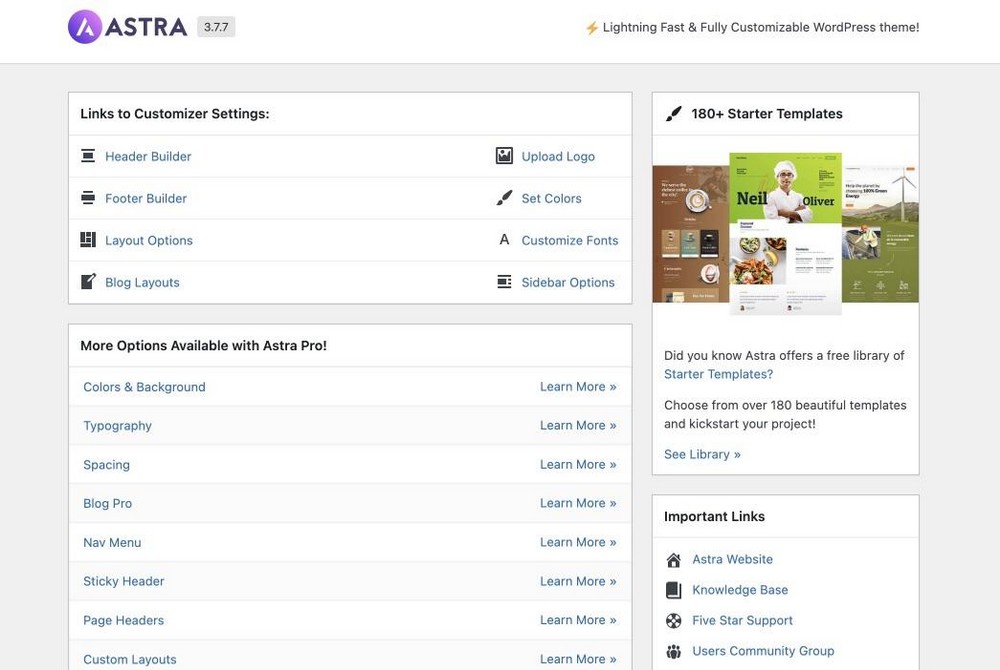
In the next few minutes, we’ll discuss how to update the following using Astra Options:
- Load Logo
- Set Colors
- Customize fonts
- Customize header and footer
- Customize layouts
5.1 Update the logo and title of the site
Go to your WordPress dashboard.
Under Appearancein A Options stra, select the Upload Logo button.
This will take you to the Header Builder page.
From the Header Builder module, click Site Title and Logo
Here you can set the logo for your site. You can have different types of logos depending on the type of header you create.
You can also adjust the width of the logo and add the site title and tagline in this section.
You can also see a view preview live as you make these changes.
Once you’re satisfied, hit the blue Publish button and your changes will be updated live on your site.
5.2 Updating Colors
You may already have brand guidelines for your business and want to ensure your website is consistent with those brand colors.
Go to your WordPress dashboard .
Under Appearance and under Astra Options, choose Set Colors.

This will take you to the customizer settings. Here you can set the color palette for your website.
From here, you can set the colors you want to use. The global color palette is really useful because you don’t have to set colors over and over again.

Take a look at this video showing all the color changes you can make on your website.
In this video, you can see how quickly and easily you can make color changes.
You can also see how the changes impact your website with the help of live preview.
Once you’ve made all the color changes to your website with this customizer, be sure to hit the blue Publish button to make your changes live.
5.3 Typography Update
With the help of the customizer, you can control the fonts and font sizes for each and every element of your website.
Even if you don’t have style guidelines, you can start with some of the defaults that are already included.
Go back to the Global tab and select Typography.
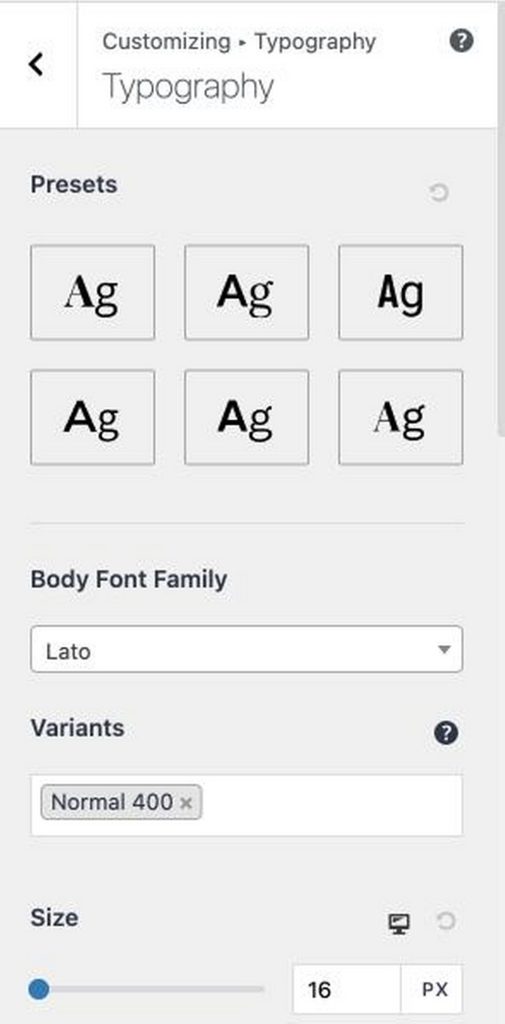
You can edit the preset font, change the sizes based on the title and body, and add any fonts you want.
Like the Global Color Palette, the Global Typography helps you configure fonts for the entire website. This way you won’t have to spend time changing fonts every time.
Take a look at this video – we show you some of the typographic changes you can make with our customizer.
Once you’ve made all the font changes for the fonts for the different sections, be sure to hit the blue Publish button to make the changes live.
5.4 Update
Go to your WordPress dashboard.
Under Appearance and Astra Options, choose Layout Options.
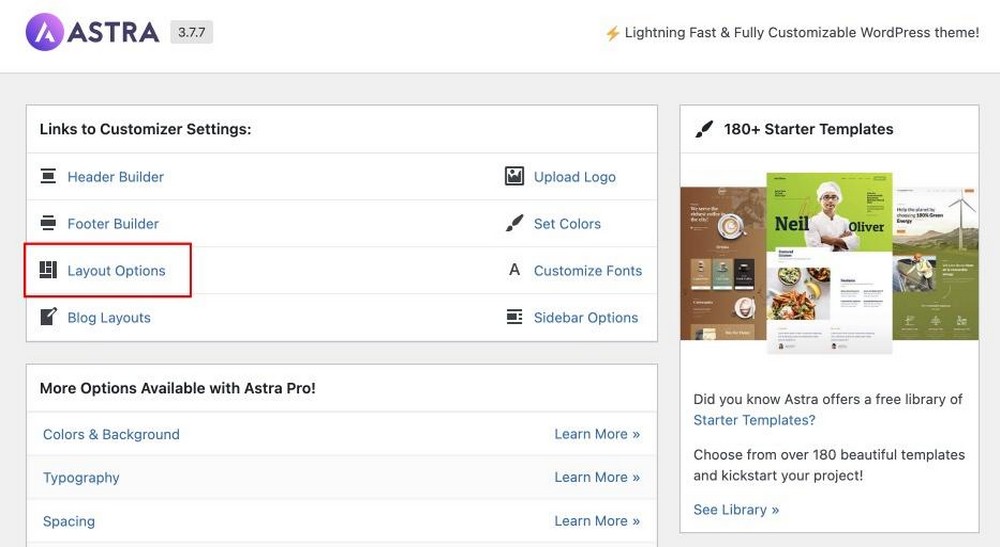
You can see all the options available to update the appearance of your WordPress website.
You have control over how the various elements of your site will eventually look

Once you have made all the changes in the layouts of the different sections, be sure to hit the blue Publish button to make your changes live.
5.5 Customize more with Astra Pro
The free Astra WordPress theme is a great starting point for your website, but if you want to do more, we recommend Astra Pro.
Astra Pro gives you access and control over your website without any limitations on how you can customize it. All this while maintaining maximum performance.
We’ve added a lot of features in Astra Pro compared to the free version of Astra.
Here are some of our favorites:
Site Layouts
Astra Pro comes with a variety of site layouts that you can use to create professional WordPress websites. You don’t need any design skills or coding knowledge to use them; just select the layout that best suits your content and Astra will take care of the rest.

More layout options
Astra Pro gives you more control over the layout of your website with options to customize color, font, and spacing. You can also add a background image or video to your site.
You can customize any area of the site with any color or type.
Header and footer customization
Astra Pro allows you to customize the header and footer of your website with options to add a logo, social media icons and a search bar. You can also change the layout of the header and footer.
Full control over blog layout
Astra Pro gives you full control over your blog layout with options to change the width, alignment, and spacing of your content. You can also choose from a variety of post templates and add custom CSS.

Advanced functionality for course builders
Astra Pro includes advanced functionality for course builders and content, including support for the LearnDash plugin and Lifter LMS. This allows you to create online courses with WordPress and manage your students and classes from a single dashboard.
Step 6: Update WordPress Settings
Once you’ve done all the changes to the front-end as discussed in the previous section, let’s look at some additional settings you need to do.
You have a few settings here to update:
- General Settings
- Write
- Read
- Discussion
- Permalinks
- Privacy
Let’s quickly go through them and also learn how to make the necessary changes.
6.1 General Settings
Go to your WordPress dashboard.
Under Settings choose General Settings.

This is where you set some roles and rules on your website.
For example, default time zone, date format and language.
In addition, you can also configure how you want visitors to register on your website.
Since we have already changed the Site Title and Slogan using the Astra Customizer, you can see that it has already been updated here.

6.2 Writing Settings
Next to Writing section – You’ll notice some of the default settings for your default Post Category and Post Format.
You don’t necessarily need to update this during setup initial of your WordPr website ess, but you may need to at some point.
You can update this type of formatting as you start creating blog posts.

6.3 Reading settings
In the Reading Settings section, you can configure how all your posts or pages will be displayed.
This is what your readers will see when they visit your website.
You can choose what you want to display on the home page when they first visit your website.
Do you want to display a particular page, blog posts, or the homepage? You can configure that here.
For today, you can leave this setting unchanged.

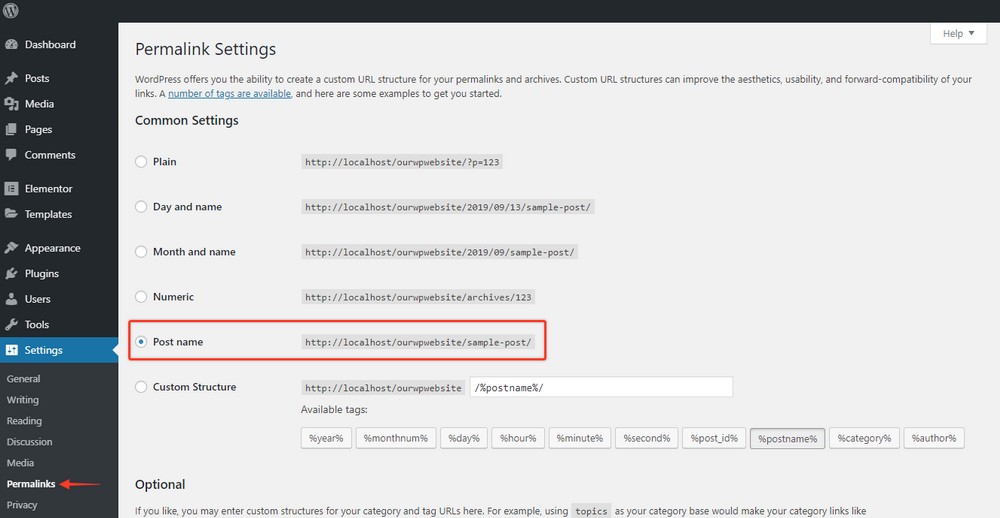
6.4 Permalink Settings
Here are another default setting you can customize: Permalink Settings from your site permalinks.
A permalink is the “permalink” from your posts and pages. This is the format that appears when someone visits a particular page or post on your website.
If you are not a news site and don’t rely on timely content, then the best recommended format would be Post Name option as highlighted in the image below.
Once selected, this will personalize each new page or post as you create it.
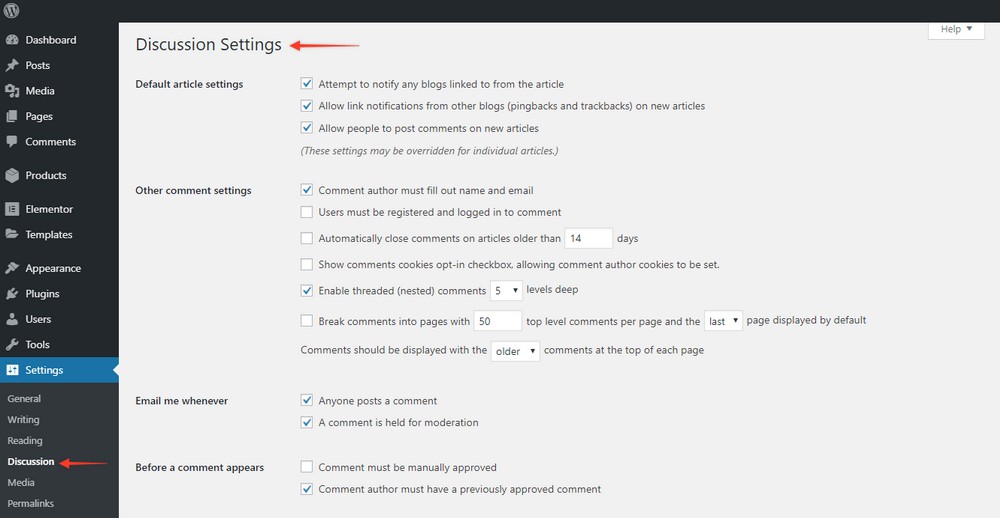
6.5 Discussion Settings
About 20% of the content on WordPress sites comes from the comments section.
Comments are the way your readers interact with your articles, pages, and posts.
There are many reasons to keep comments enabled on your website. The main reason is that it’s an efficient way to communicate with your readers.
In Discussion Settings, you can set how you want to display and moderate comments.
Let’s leave this setting as default for now (as you can see in the image below).
You can come back and change it in the future if you need to.
6.6 Privacy Settings
As a website owner, privacy is not something you should ignore. Why not start your website journey with minimal headaches?
Luckily, WordPress provides a template that you can build on.
Head to your dashboard WordPress.
Under Settings, choose Privacy.
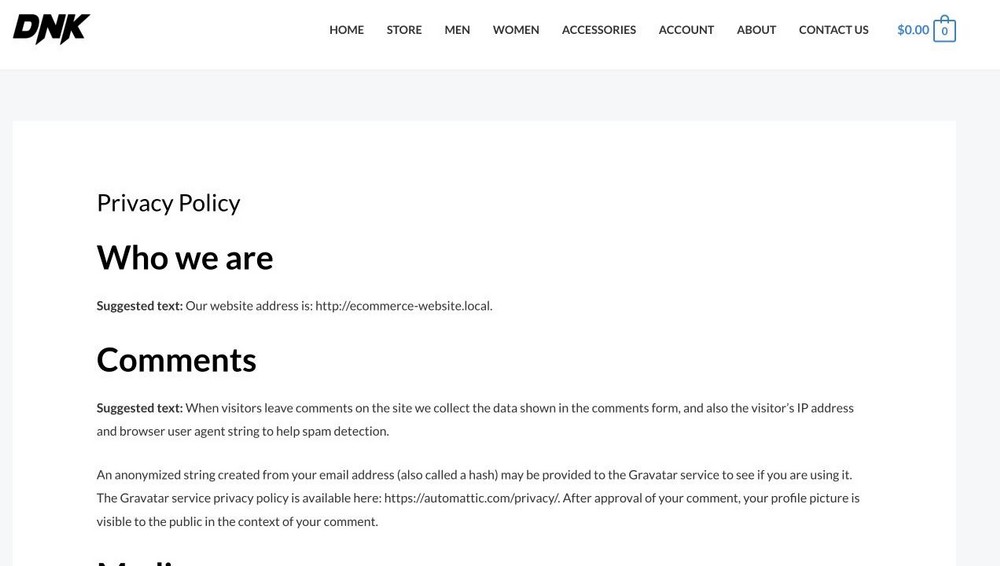
Then click the Preview
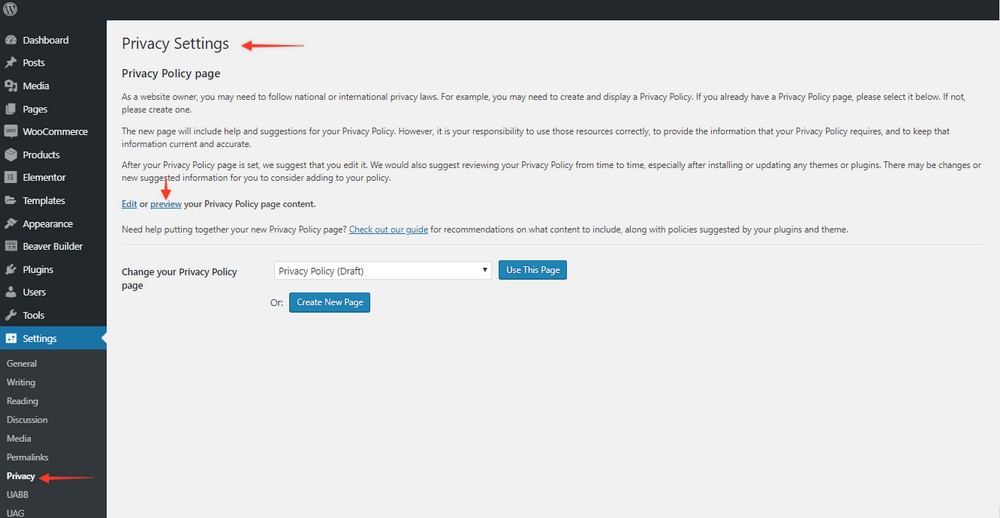
This is the default privacy policy that comes predefined in your template.
You have the flexibility to make changes to your policy based on your business, industry, or region.
 </figure
Additional questions: what is the difference between a page and a post?
So far, we’ve shown you how to update page layouts, blog post layouts, and more. er settings.
To clarify any doubts you may have, page(s) and post(s) are different in terms of their purpose and also how they are displayed on your site web.
A postis timely and usually has an associated date and public author.
A page >at the other extreme is for static messages and timeless content.
It does not display a public author or associated date.
The choice to have a blog and posts is entirely up to you. It depends on your business.
However, you can’t have a website without having at least a few pages.
These are the basic pages that any website should start with:
- A home page
- An about us page
- A contact page
- A privacy policy page
Step 7: Update the WordPress menu
Want to make it more easy for your visitors to find information on your website, right? This is where menus are effective.
In most cases, they appear in the header (top navigation) of your website.
By default, Astra themes They come with default menus.
You can customize the menu names and how they are displayed.
Go to your WordPress dashboard.
In Appearance, choose Custom.

Click the Menu tab from the list of customizable options.
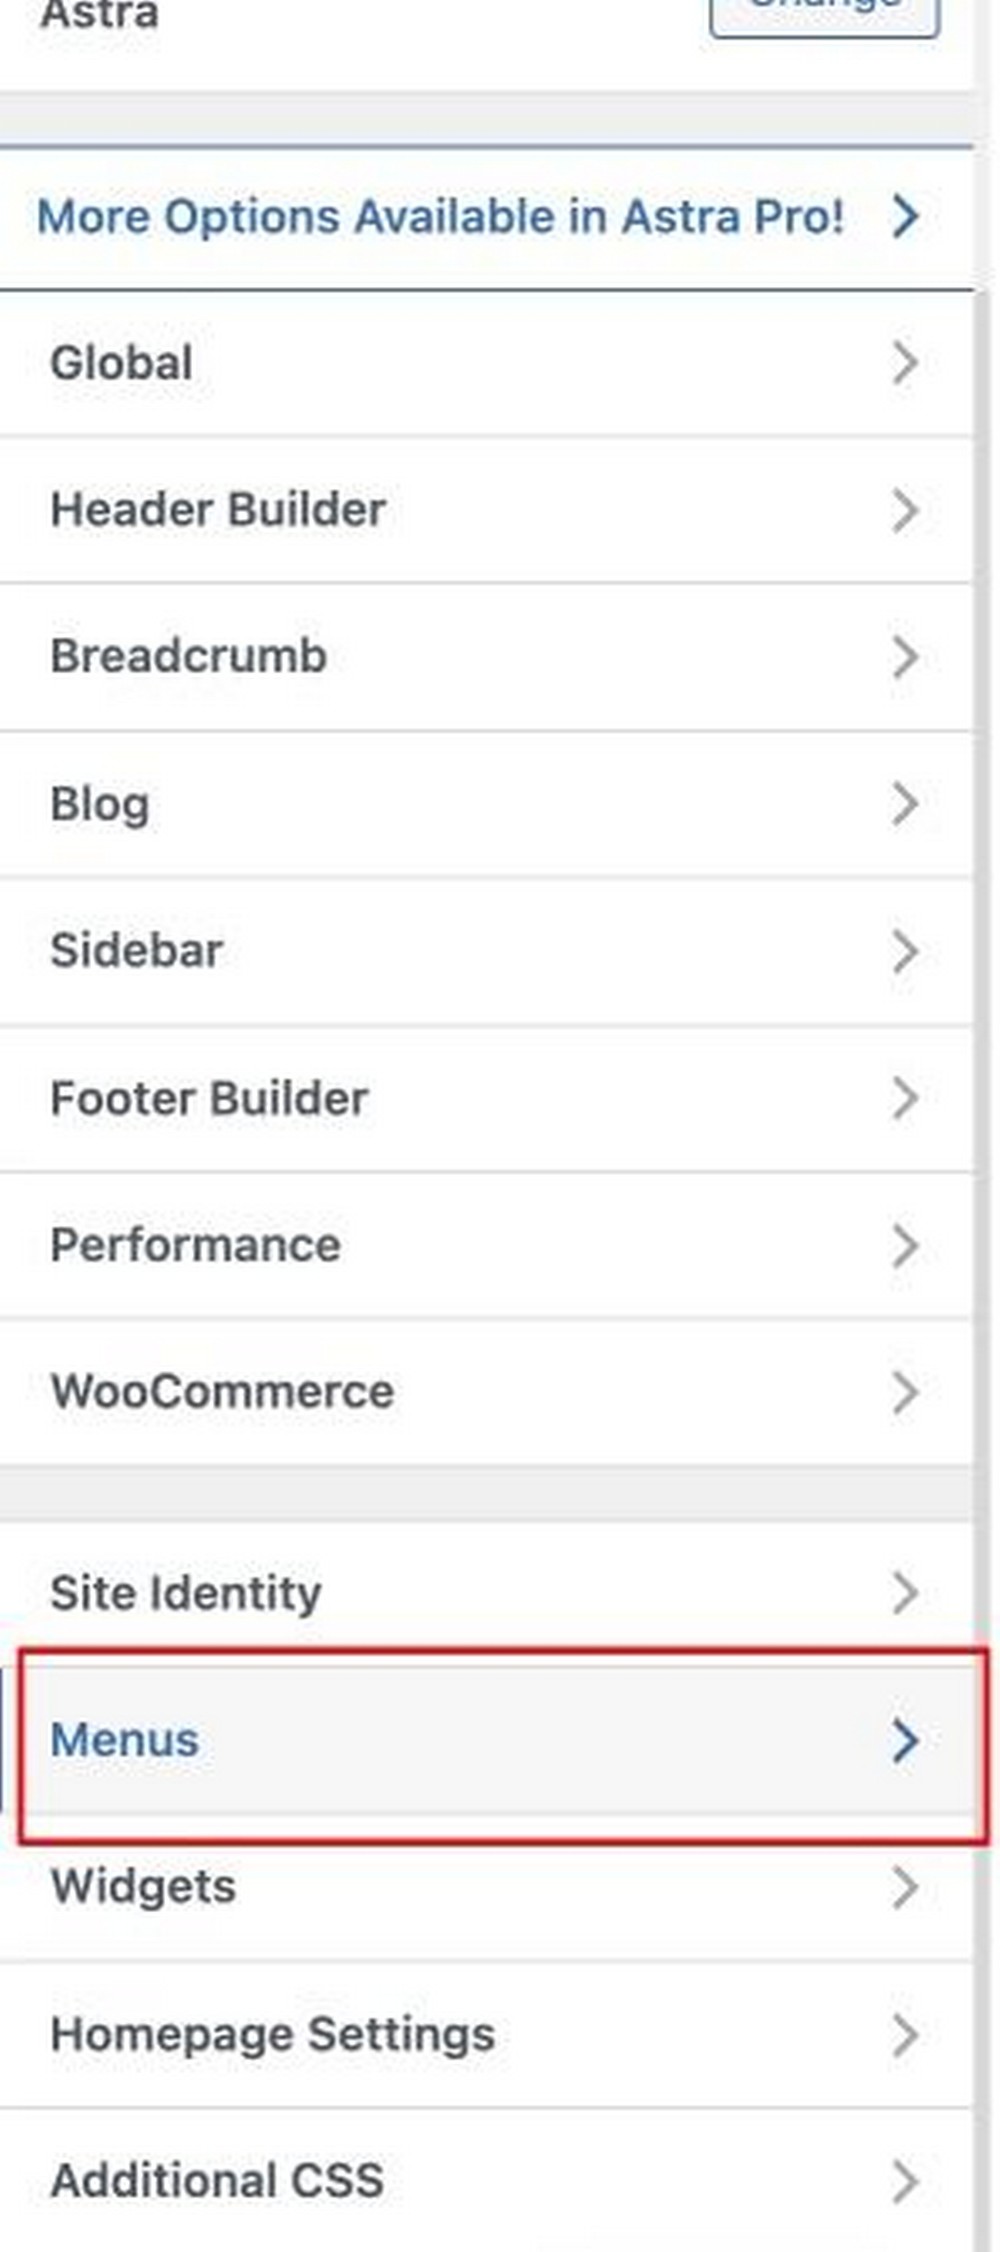
Then it will display all available menus.
For the website we are building in this example, there are four menus depending on your location and products.

Click Main Menu to display the default items in the current menu.
You have the option of making changes to the menu directly from this screen.

You can also make changes to the position of the menus using the Reorder option.
You can also add additional menu items on the same screen.

The goal of optimizing the menu is to make it easier for visitors to find information on your website.
What are widgets and how do you update them?
Have you visited a website in part? icular and noticed you have some elements in the sidebar?
Is it:
<ul
These can be configured using widgets, and allows you to customize the appearance of the sidebar.
The default WordPress widgets are sufficient for many sites.
However, you will notice additional options based on the theme they have installed.
Go to your WordPress dashboard.
Under Appearance choose Widgets.
You will notice the list of current widgets on your website.
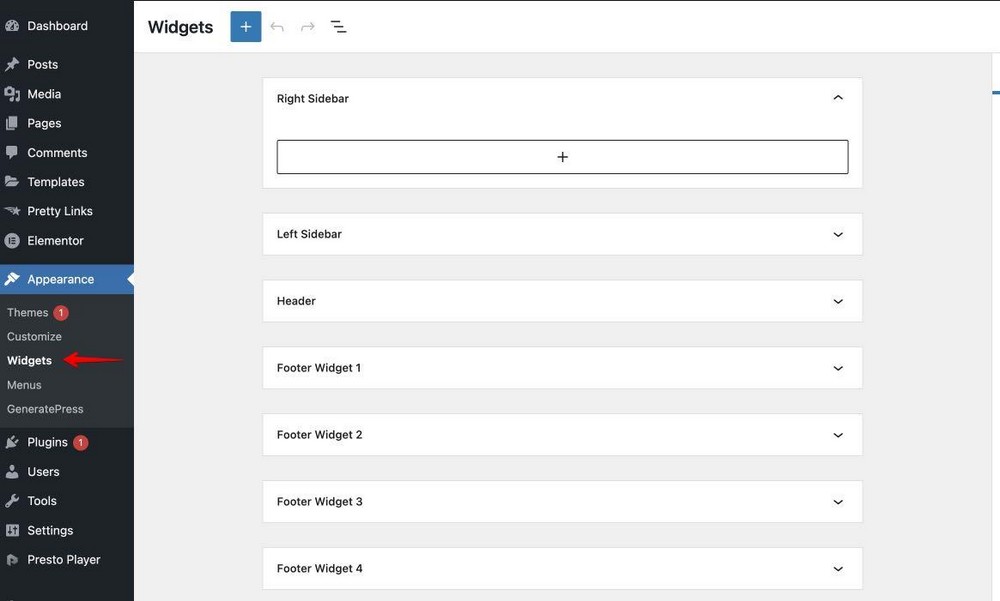
Each tab here represents where you have placed the widgets.
It’s easy to add or customize any of the widgets existing ts. Just click any of the tabs to open the widgets in the specific location.

From here, you can select the “+” icon to add a new widget.
Or, edit the existing widgets by clicking on them.
Finally, once you’re done, click the Update button to update the widgets.
Step 8 – Install the Required WordPress Plugins
WordPress allows you to quickly set up a website using its free CMS. However, there are limitations to what you can do out of the box.
To fill in the gaps, WordPress supports a large library of plugins.
A plugin is software (some free , some paid) that you can install within WordPress to add new features or enhance existing ones.
There are over 59,000 plugins to choose from in the WordPress plugin repository.
We recommend getting started with some plugins when launching your WordPress website.
If you use the Astra theme, you will get some basic plugins like WPForms, Elementor and others, but there are some additional plugins you might like to try.
Plugins like these:
- Akismet – To stop spam
- UpdraftPlus – To back up your website
- WordFence – To increase the security of WordPress
- Yoast SEO – To boost your website’s SEO efforts
- Google Site Kit – Pa to use Google Analytics
- Ultimate Addons for Elementor – To add features to Elementor page builder
- Pre-post checklist t: to get you in the habit of posting
- ShortPixel – to reduce the size of image files to make the page load faster
- W3 Total Cache – to speed up WordPress performance in general
- Yet Another Related Post Plugin (YARPP): To keep people on your website
This is just the tip of the iceberg.There are many more plugins you’d like to try once you’re up and running.
Check out this list for our other plugin recommendations.
8.1 How to Install WordPress Plugins
You can install a plugin in seconds.
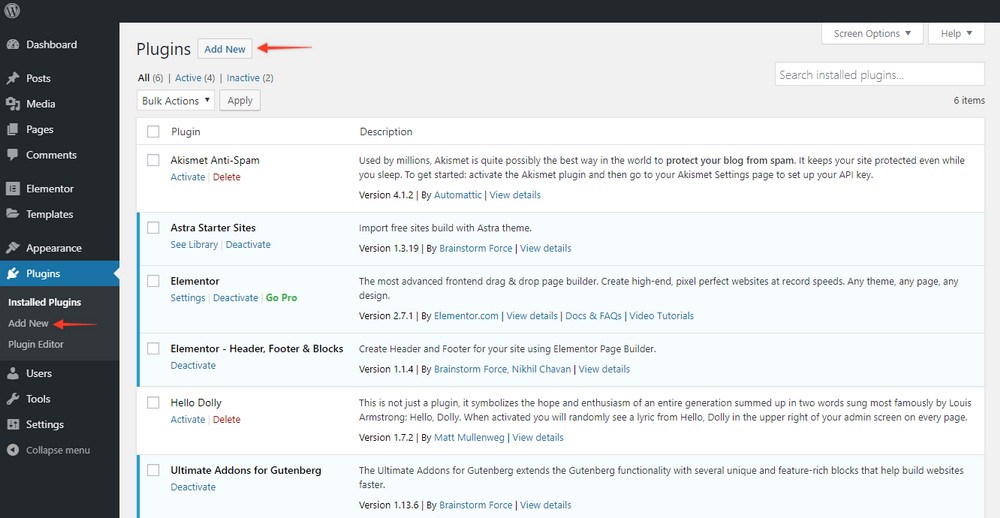
To install a plugin, go to the WordPress dashboard.
Click on Plugins , and this will display the list of your existing plugins.

To browse and add new plugins, choose either of the two Add New buttons.
One is just below Installed Add-ons in the left sidebar. The other is at the top of the page.
Of all the plugins we have recommended, backups are crucial.
Therefore, we want to install a free backup plugin called Updraft Plus on our new WordPress website.
We’ve created a video explaining how this plugin works:
You can follow the same procedure for the other plugins we have recommended in the list here.
Common Mistakes You May Encounter When Building a WordPress Website
Building WordPress websites is a quick and easy process, but there are times when things go wrong.
The following are the 3 most common errors you will encounter and how to fix them.

White Screen of Death
The White Screen of Death is a very common error which you will see when setting up WordPress.
This is often caused by a theme or plugin incompatibility and is very easy to fix.
- Login to WordPress if you can and disable all plugins
- Enable them one by one testing your site each time
- As soon as you see the white screen of death, disable the last plugin you enabled. If your site works again, leave the plugin disabled.
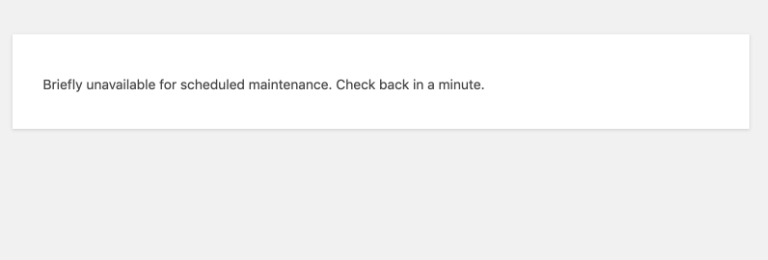
Stuck in maintenance mode
WordPress has a specific mode that stops interactions while updating. This is called maintenance mode and it usually only lasts a few seconds.
Occasionally, you’ll find your website gets stuck in maintenance mode.
Here’s how to fix it.
- Login to your web server using FTP (details will be in your welcome email)
- Navigate to the root folder of your website at /public_html
- Delete the .maintenance file inside that root folder
Test your website again and it should now work as it should .
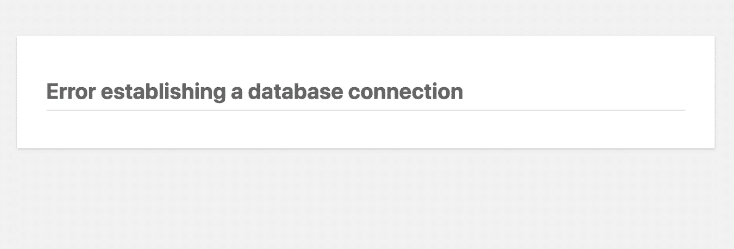
Error establishing a database connection
The error establishing a database connection is a common WordPress error that is usually seen after installation.
Although it sounds serious, p or in general it is very easy to solve. and it just means there is an error in a configuration file.
Usually the database name or w login will not be correct and a simple change will fix the error.
- Login to your web server using FTP (details will be in your welcome email)
- Open the wp-config-php inside a text editor
- Check the database name, database username, database password, and database host for errors. Use the details you recorded when you set up WordPress and double check all names and spelling
- Correct the error and save the file
If you downloaded the file to your computer , you’ll need to upload it to your host for it to work. If you used the web server’s text editor, you should change the file in-place.
Try again and everything should work now!
Celebrate the launch of your new web site WordPress
As promised, we’ve shown you how to create your own WordPress website in less than 60 minutes!
Now you can use your website however you want, expand it, add new pages, publish a few posts, or tweak it until it’s perfect.
We’ve created a downloadable website launch checklist just for you so you never miss a step.

If at any point during setup you need guidance, you can refer to this guide for any help.
We also have additional information in our knowledge base to help you with any questions about the themes and page builders we have discussed. do in this guide.
To get started with your WordPress website, head over to our library of website templates.
.