email forwarding allows you to:
- send emails to multiple people in your company
- use role-based emails like sales@yourcompany.com
- send and receive emails under multiple brands or domains
gives you much more flexibility on how you send and receive emails.
what is email forwarding?
Email forwarding redirects incoming mail from one inbox to another. it’s like mail forwarding, where mail goes from an old address to a new address.
People use email forwarding to share different email addresses with different people, to funnel all incoming email from multiple emails to a single inbox, and for many other uses.
If you want to delve into the technicalities of server-based vs. client-based forwarding and the underlying code, check out their wikipedia page. we are going to focus on how to make email forwarding work with g suite.
advantages of email forwarding
You can use email forwarding to solve several common business problems, making email more responsive and streamlined.
manage multiple brands
If you run all of your consumer-facing business on retail.com and all of your enterprise-level business on biz.com, you can funnel everything from both brands into the same inbox. this is essential if people in your company manage multiple brands.
manage emails in another email tool
many organizations use g suite as a business hub. and sometimes people prefer to use another email tool like outlook.
if that’s the case, using forwarding allows them to keep their g suite account while forwarding their emails to an email address connected to another tool.
role-based email
You can also use email forwarding to set up role-based email addresses, such as sales@biz.com, marketing@biz.com, or support@biz.com.
This gives your customers a unique email address based on what they need. support issues are sent to support@biz.com and can be answered by anyone who provides support in your organization.
internal email lists
In addition, you can set up forwarding so that emails sent to one address go to multiple inboxes. this is perfect for setting up internal email lists. you can add all members of the product team to the alias product@company.com. then any time you need to send an email to the entire product team, just send an email to product@company.com and it will be sent to the entire team without the need to add each individual to your email.
additional privacy
It also has the advantage that you can use forwarding to hide your main address from the inbox. this helps with security by protecting your logins. if the email you use to log in is publicly available, that’s one less step someone has to take to get into your accounts. this also keeps your personal email less cluttered since fewer people will have it.
catch near misses
you can use email forwarding to handle misspelled names. If you have team members with names that can be misspelled, such as robin/robyn, amy/amie/amey, or last names that are relatively difficult to spell, such as krzyzewski, it makes sense to set up aliases for those errors. emails will reach their intended recipients even if some letters are in the wrong places.
email forwarding options in g suite
The easiest way to set up email forwarding in g suite is to assign an alias to a user. this is very easy to do.
First, go to the user profile of the person you want an alias for. then click the arrow below the “user information” section:
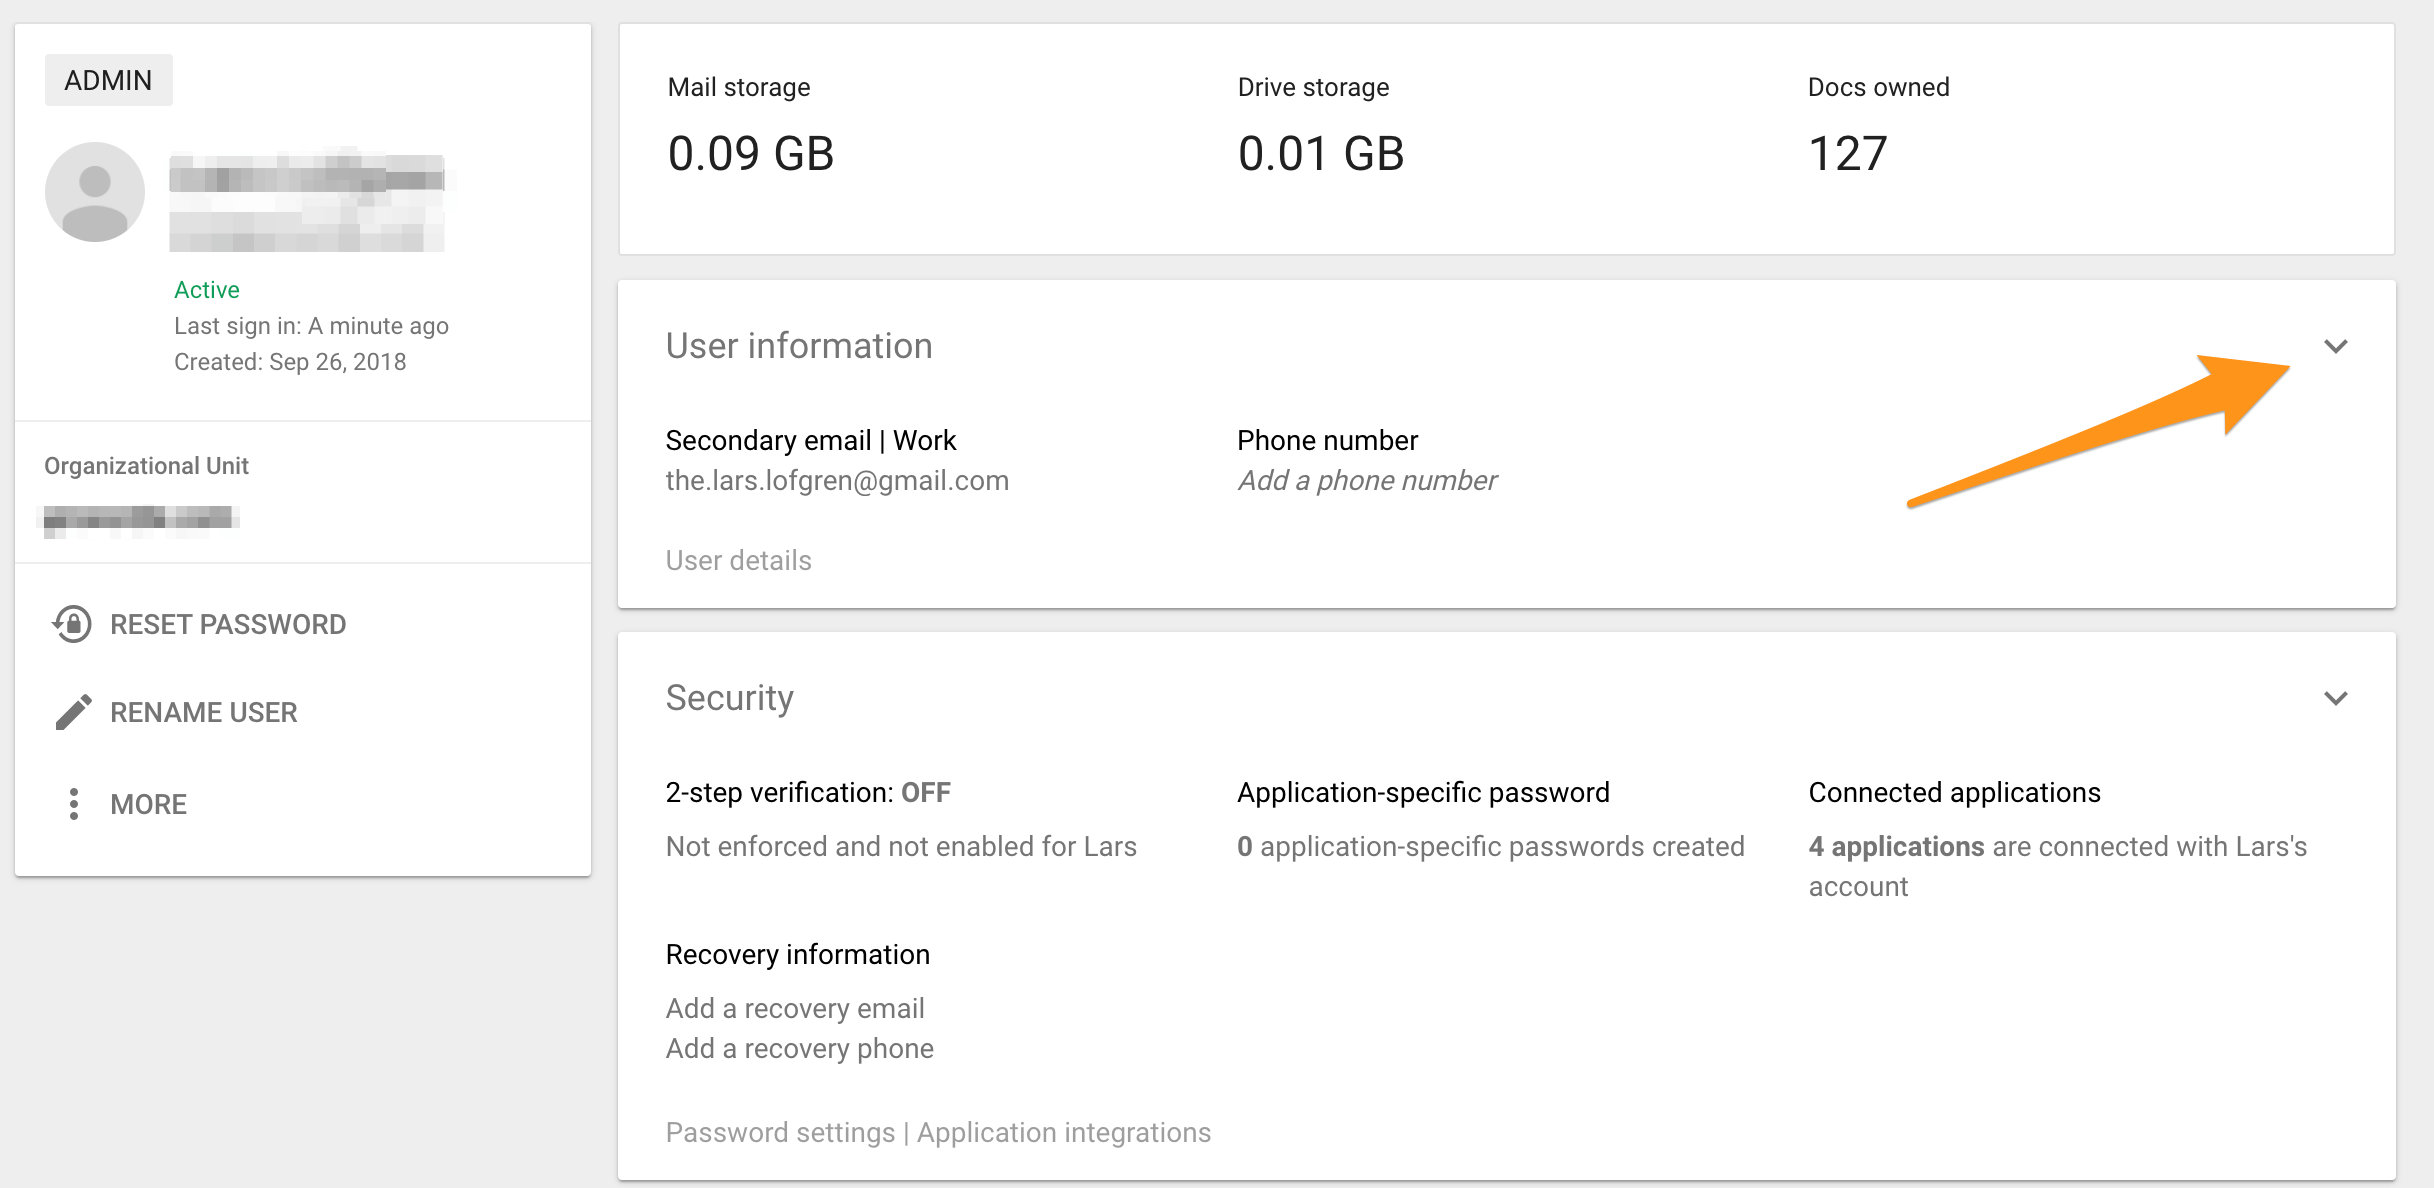
You will see an aliases section in the next window. here where you can the aliases you want for a given user. here is an example:
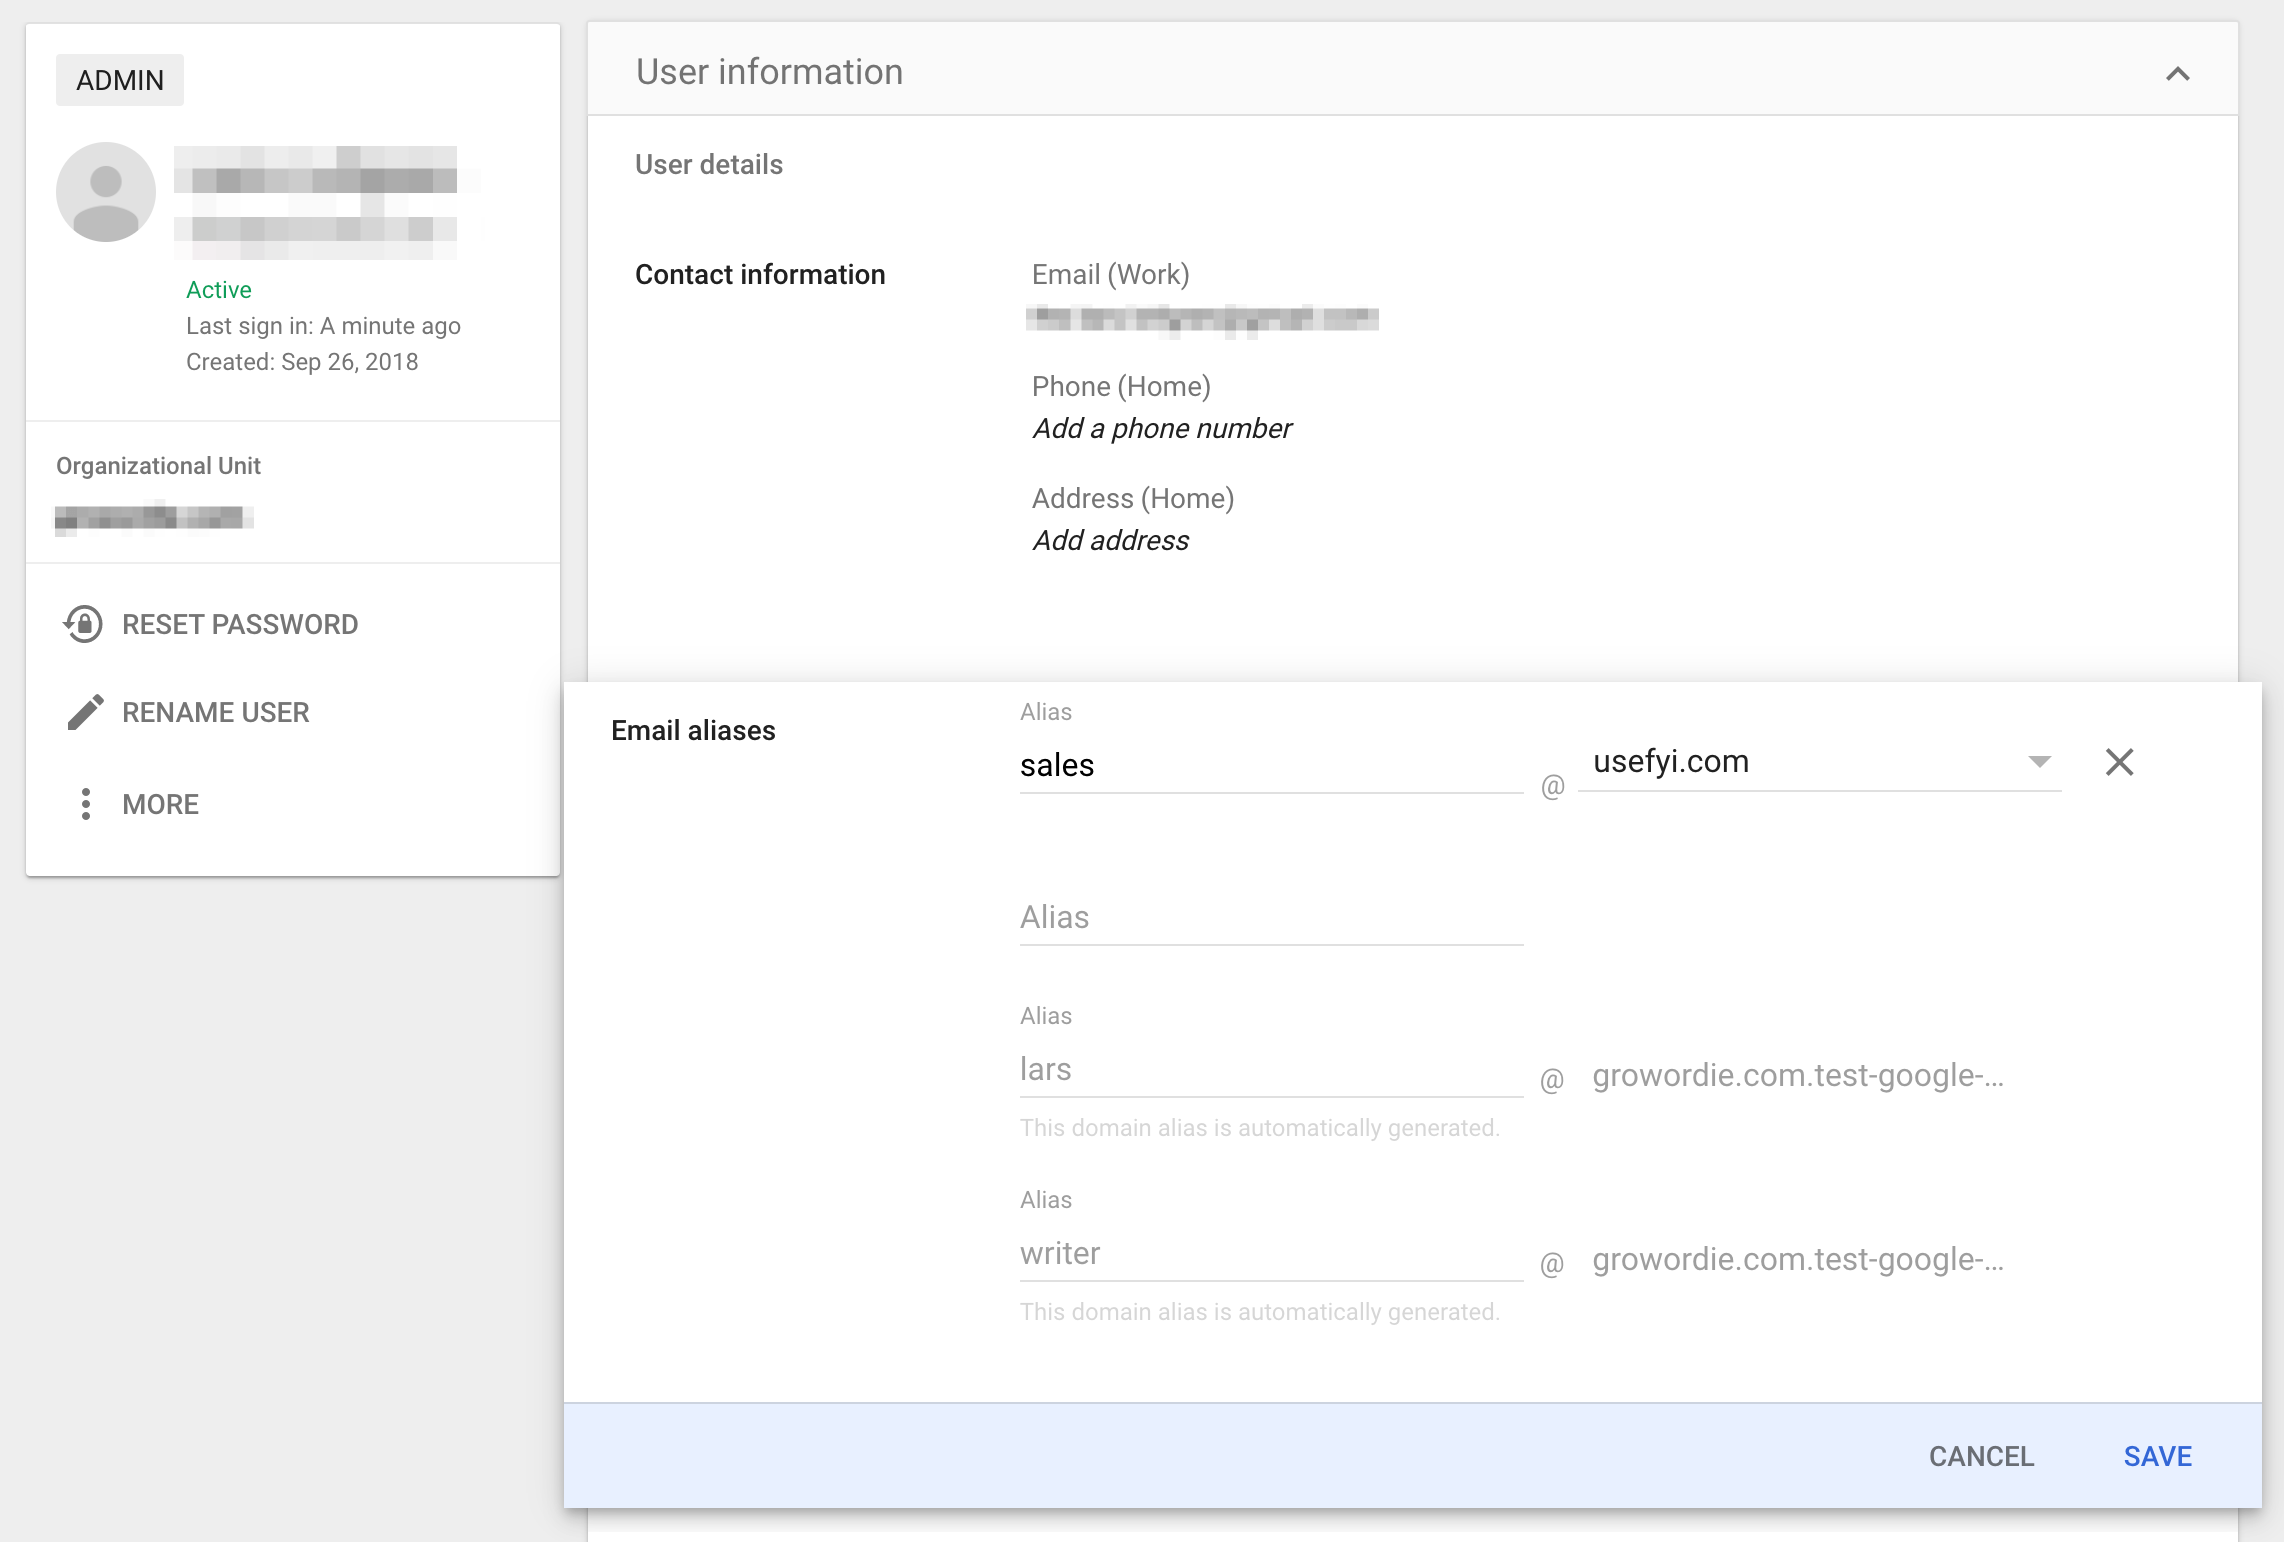
this alias will send emails addressed to sales@usefyi.com to the user.
The alias method is the best option for simple email forwarding.
g suite recipient mapping
g suite administrators can use recipient mapping, creating a virtual user table that routes emails according to a central plan. you’ll need to use this for larger organizations or more complicated email routing.
In your admin console, go to Applications > suite g > gmail > advanced settings and make sure the top level of your organization table is highlighted in the top left of the screen.
scroll down to the recipient address map, it’s under routing, the subtitle at the end of the page, hover your mouse over it and select configure.
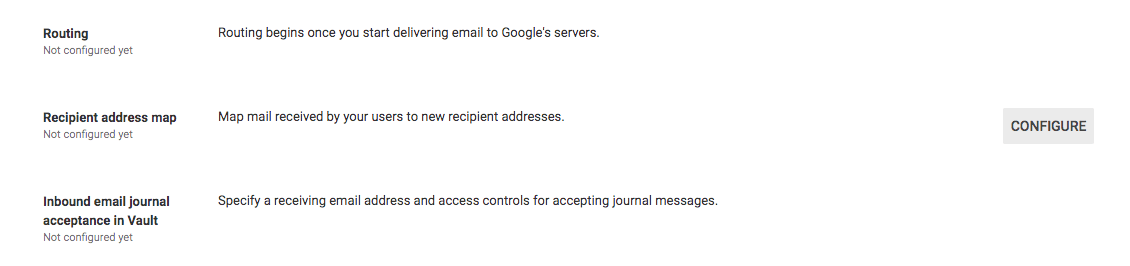
If you already have some rules set up here, perhaps enacted by a previous admin, you’ll see locally enforced or inherited in the recipient address map, and you’ll need to edit them.

You can select all incoming messages or only external incoming messages. if you choose “also route to original destination”, these emails will go both to the new address you are about to specify and to their original destination inbox. otherwise, only the new address you specify will receive them.
then enter the address maps. these must be two addresses on one line, separated by a comma. first add the original destination address, then the address you want the emails to be redirected to.
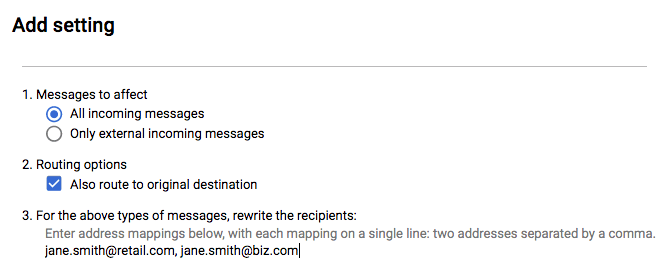
must be full working email addresses and are case sensitive.
Managing email forwarding in this way allows you to control email forwarding centrally, better manage role-based emails and email forwarding across the entire organizational unit or department, and prevents the need for forwarding at the individual user level. because it is managed by the administrator, it also avoids the kind of chaos that can arise in a large organization where people handle this kind of technical issue themselves.
has some limitations:
- You can assign a maximum of 5,000 recipient addresses to other addresses.
- You can assign each individual recipient address to a maximum of 12 addresses.
email forwarding options in gmail
but what if you don’t have admin access to your g suite? can you still set up some kind of email forwarding?
yes you can. Within gmail itself, you can use two types of email forwarding.
1: forward email to another account
This is the option we’ve been discussing the most. it simply forwards incoming emails to another account. create a new account, help@biz.com, then when customers send email to that account, it forwards incoming emails to real human user accounts.
You can only set this on the desktop. it is not available through any of the gmail mobile apps. so the first thing you need to do is open gmail using the account you want to forward from.
go to settings > forwarding and pop/imap and click add a forwarding address.
Enter the address of the account you want to forward emails to. click next > proceed > ok, and gmail will send a confirmation email to the address you entered, so you’ll need to open that account and click the verification link. you’ll need incognito mode or another browser here.
then go back to the account you are forwarding from, refresh the page and click forward and pop/imap again. this time select forward a copy of incoming mail to and choose what happens to the originals of the mail that arrives at this email address. it makes sense to keep copies, at least initially.
why use it?
- it’s easy to set up and users can set it up themselves, although only g suite administrators can add user accounts to a g suite account.
- users can choose where your mail is forwarded.
that means this is a good option if you use gmail as a hub for many users who prefer another inbox, for example.
what are the disadvantages?
- it is restrictive: users can only set one forwarding address
- administrators have no visibility or control over this. If you’re an admin and don’t like the sound of it, don’t worry: you can disable the feature for all users in the admin console under apps> suite g> gmail> advanced settings.
2: filters
If you prefer to forward only specific emails, you can use filters instead of account-based forwarding. Taken to the extreme, you can create a set of if-this-then-that rules for multiple chained inboxes, route messages to the right person or account, archive messages, and more without doing any manual work.
Click the down arrow next to the search box on the gmail account you want to set filters for. enter your search terms, as if you were doing a normal search.
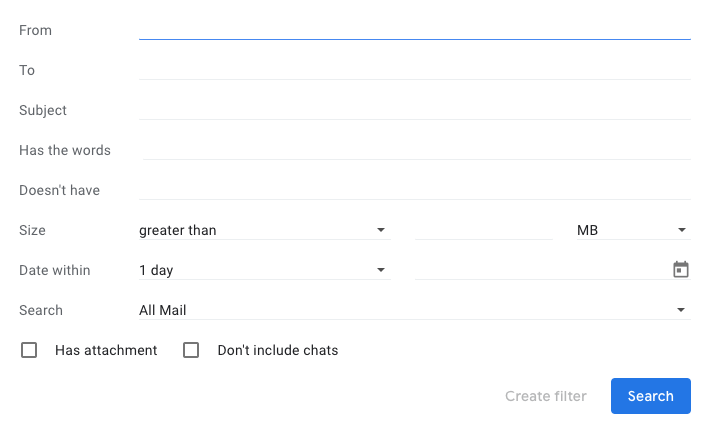
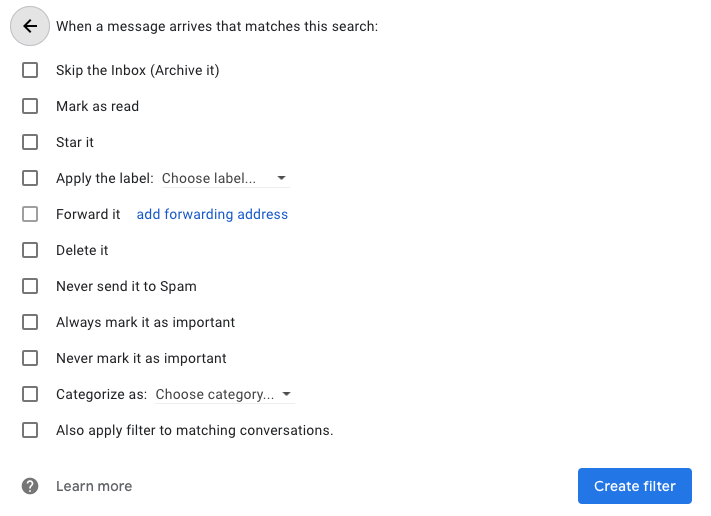
then select “create filter” to make that search a permanent filter. decide what you want it to do from the list of options and confirm create filter to set it.
If you choose to forward these emails, you will need to add a forwarding address; select that option and it will return you to the pop/imap section of gmail. here you will add the email address you want the emails to be forwarded to. don’t click “create a filter”, that will take you back to the start of the filter creation process.
You can also create a filter directly from an email in your inbox. check the box next to a message or a group of messages, then go to the three stacked dots to the right of the options menu and select it to get this:
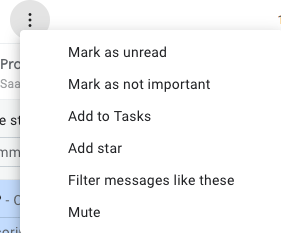
choose “filter emails like these”.
why use it?
is more adaptable. you can forward emails based on what’s in your subject line, email body, and more. that’s especially useful for role-based email setups, allowing you to segregate emails for support based on the feature they mention, for example.
what are the disadvantages?
- Users can create up to 20 filters pointing to other inboxes. that might not be enough, or it might be enough to create confusion that makes things worse, instead of better.
- admins have no control or visibility, just like account forwarding, this is totally user driven. (And again, admins can’t do this, but they can turn it off for everyone in the admin console.)