Would you like to use your Outlook and Microsoft 365 account to improve email deliverability for your WordPress site? The Microsoft 365/Outlook.com Mail Program for WP Mail SMTP allows you to securely use the Microsoft API to authenticate emails from your site.
In this tutorial, we will show you all the necessary steps to configure the mail program microsoft 365/outlook.com in wp mail smtp.
- what is the microsoft 365 / outlook.com mail program?
- how to get started with wp mail smtp
- set up a microsoft azure account
- save configure and authorize wp mail smtp
- send a test email
- faqs
what is the microsoft 365 / outlook.com mail program?
Microsoft offers not only email address/inbox services, but also a tool to improve the deliverability of your emails. They do this through an API, which means you don’t have to enter any sensitive login details in your WordPress admin area (which is more secure than a traditional SMTP). the microsoft/outlook mail program can send up to 1000 emails per minute, which is much higher than the limits of most other mail programs.
- cost: free.
- email requirements: the free service only works with email addresses based on microsoft (eg, [protected email], [protected email], and office 365 emails). only paid outlook (office 365) accounts can use a domain-based sender email address.
- In a nutshell: the microsoft api is a free solution and secure for email delivery. however, microsoft’s configuration requirements are more complex than most other mail options in wp mail smtp. also, the api tends to cause minor delays (up to a couple of minutes) in email deliveries.
getting started with wp mail smtp
To get started, you will first need to install and activate the wp mail smtp plugin.
once you have installed and activated the plugin, go to wp mail smtp » settings. in the general tab, you will see the mail configuration settings.
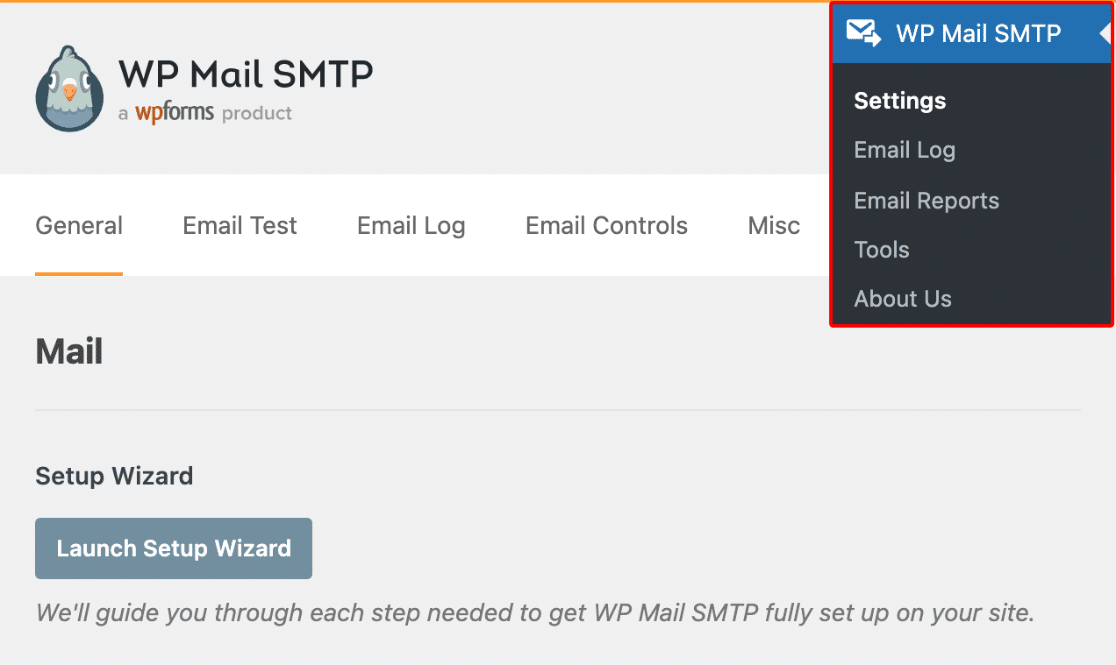
We will cover how to complete this setup in the following sections.
go ahead and skip the email and name settings for now. we’ll cover them in a later step.
You’ll first want to scroll down to the mail section. from here, select the 365 / outlook option.
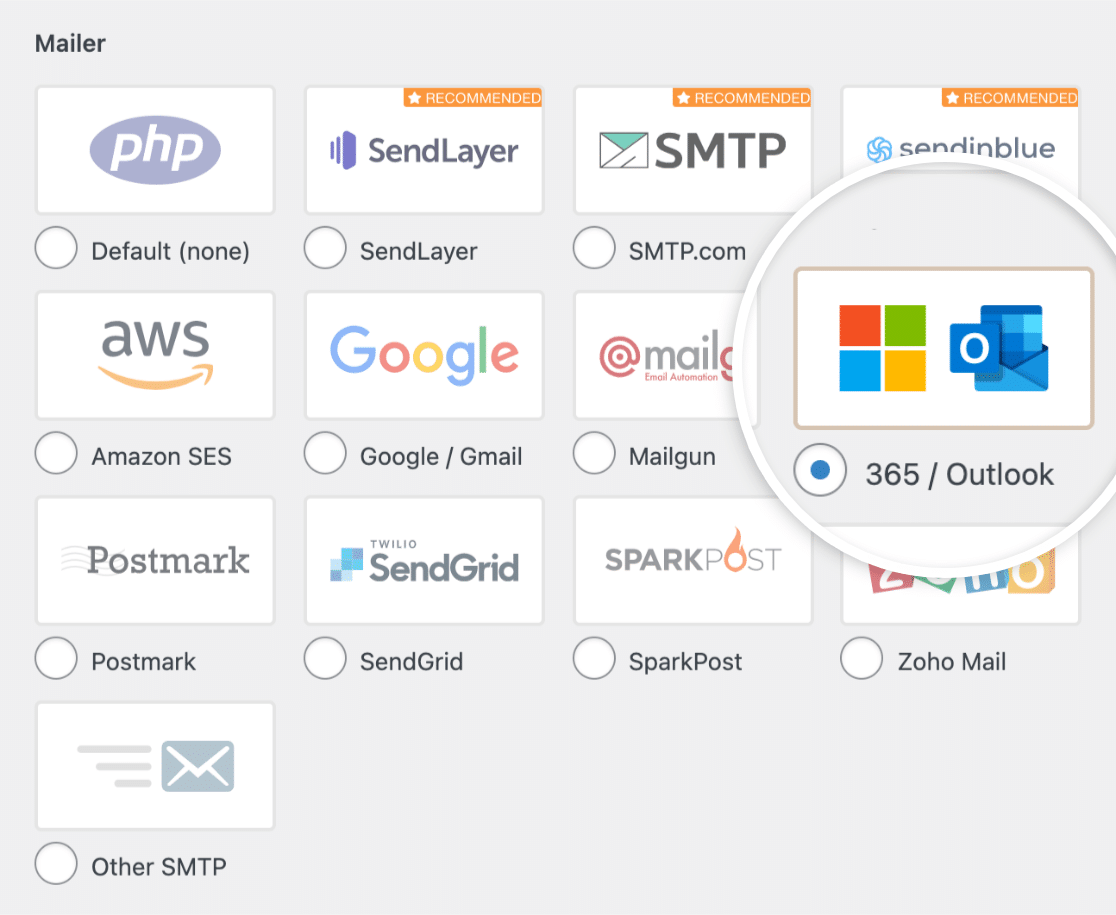
Now that you’ve chosen the Microsoft 365 / outlook.com mail app, you should see a new section appear titled 365 / outlook.
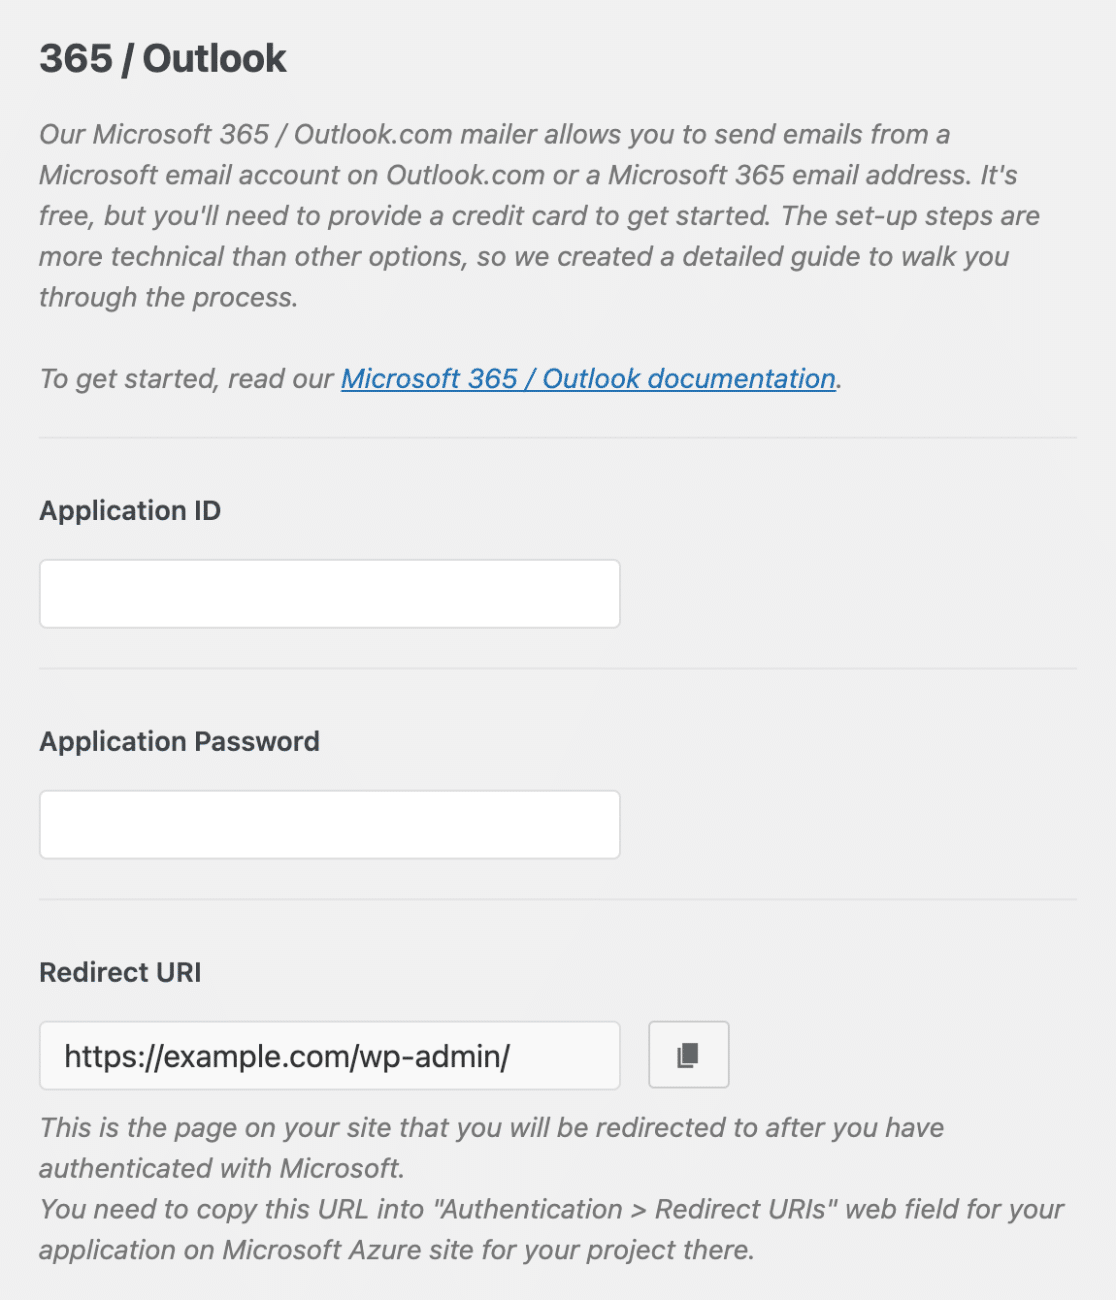
To generate the information needed for this section, you will need to set up a web application in your microsoft azure account. this process requires no coding and we’ll show you exactly what to do in the next step.
make sure to keep this wp mail smtp settings open in a separate tab or window as it will be back soon.
set up a microsoft azure account
To continue with the setup process, you will need to have a microsoft azure account.
Because you most likely already have a Microsoft email account (via Hotmail, Live, Outlook, Microsoft 365, etc.), you can simply sign in to Microsoft Azure using your existing account credentials.
if you need to create a new account, you can click this link to sign up for a free microsoft azure account.
you will then need to open the azure portal, if you are not automatically redirected.
create an app id
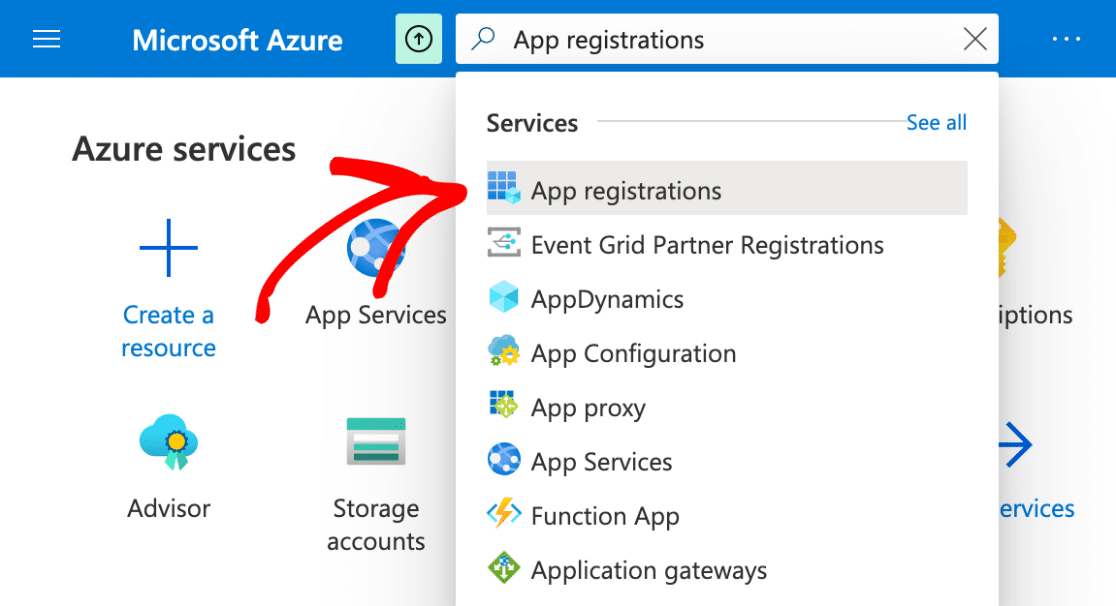
once the azure portal is open, type application logs in the search bar at the top of the page.
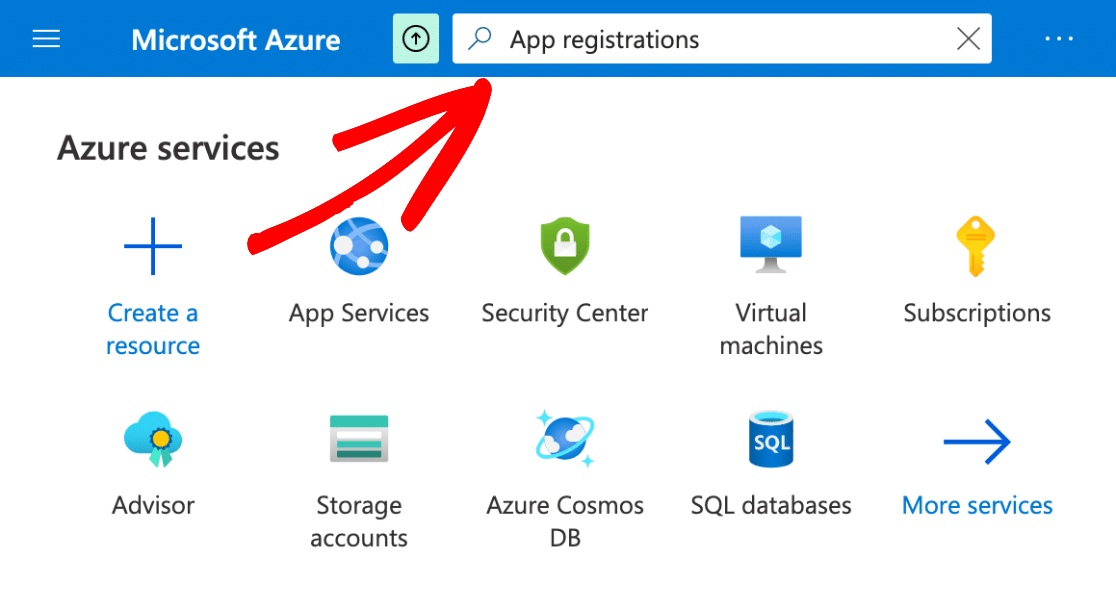
You will then see a dropdown menu with a list of services. go ahead and click application logs.
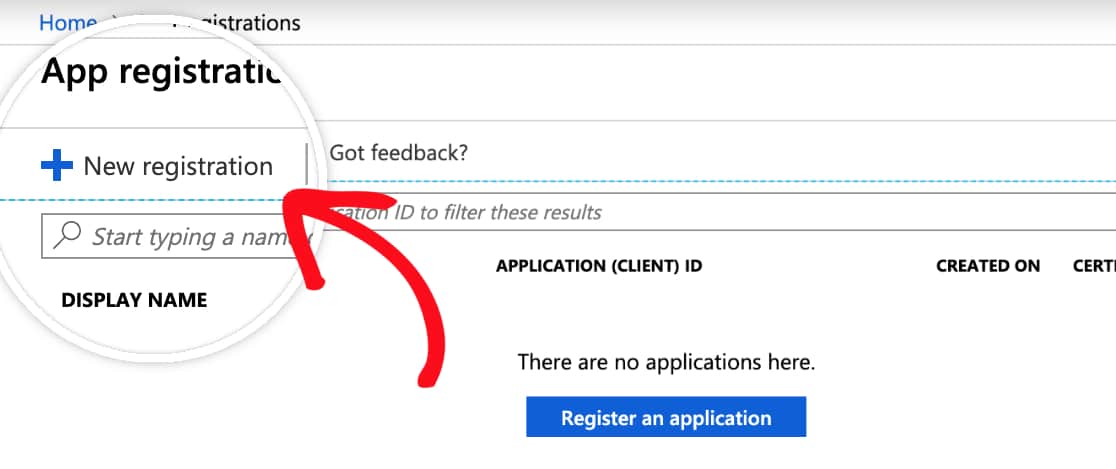
at the top of the application logs page, you will need to select the + new log option.
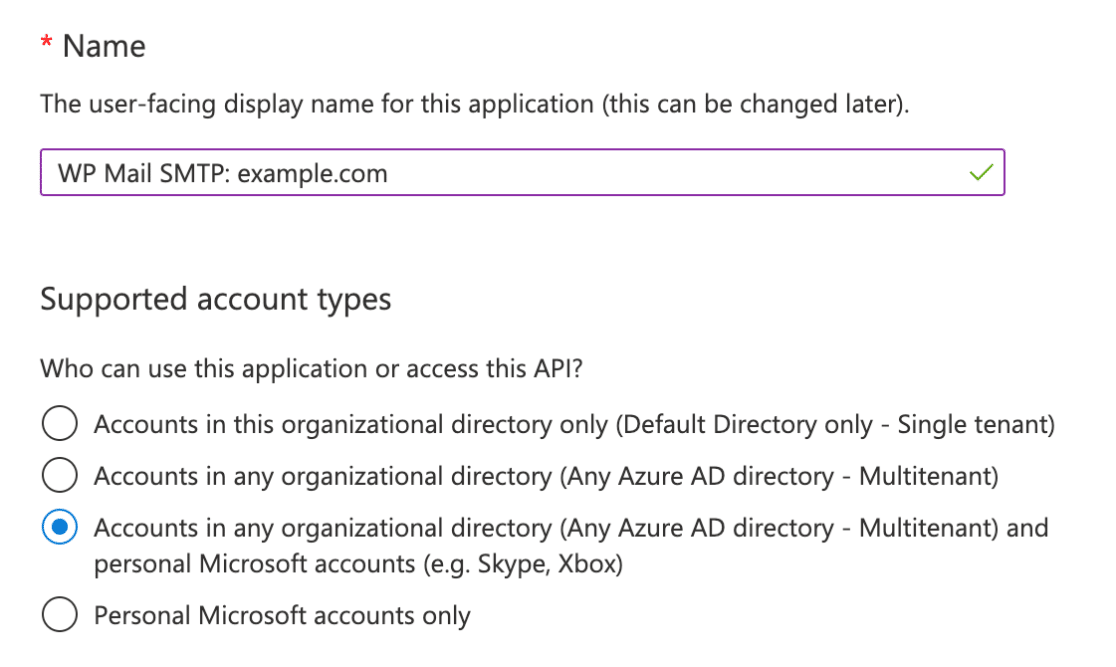
In the application registration form, these are the details you will need to fill in:
- name: This is for your personal organization only, so we recommend naming it something like “wp mail smtp: yourdomain.com”.
- supported account types: select accounts in any organization directory and microsoft personal accounts.
- redirect uri: for the first dropdown menu, leave this setting to web. then for the second field you will need to copy this value from your wp mail smtp settings (see below).
To find the redirect uri, you’ll need to go back to the tab or window where you left your site’s wp mail smtp settings open. in the outlook / 365 section, you will see a field called redirect uri.
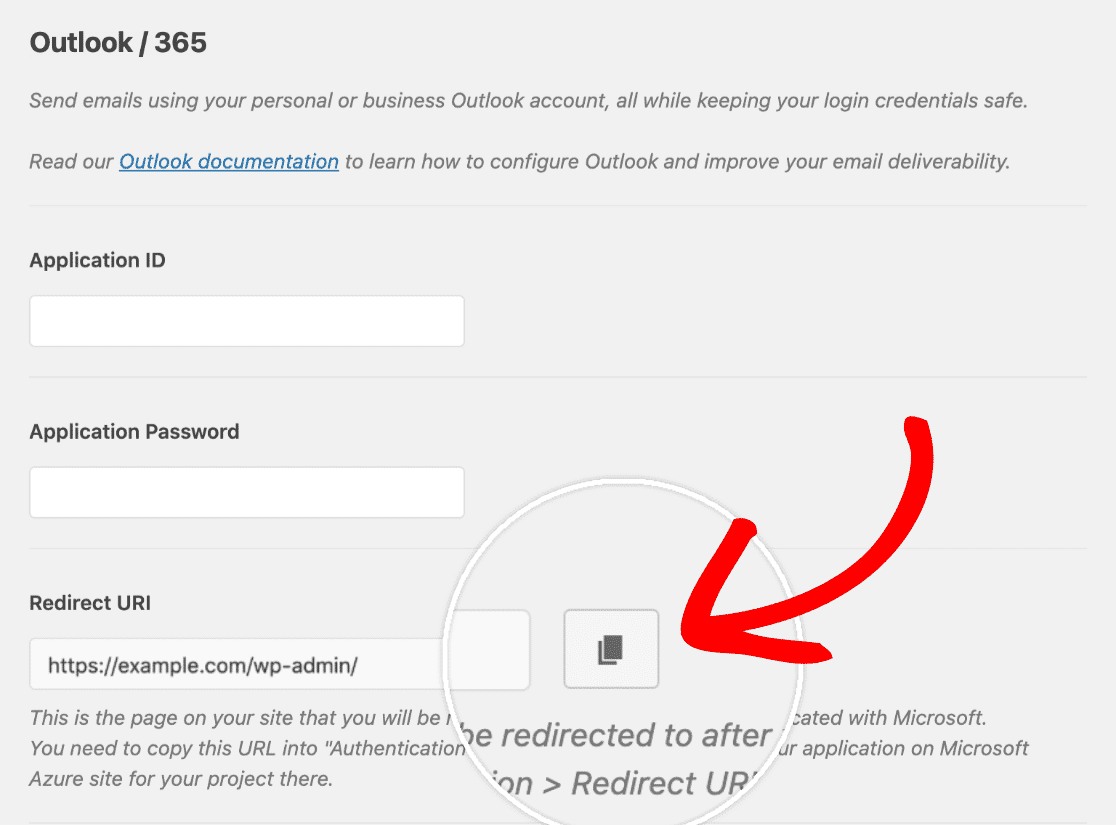
You will need to copy this value and then paste it into the microsoft azure application registration form. make sure to keep both windows/tabs open in your browser, as we will continue to switch between the two.
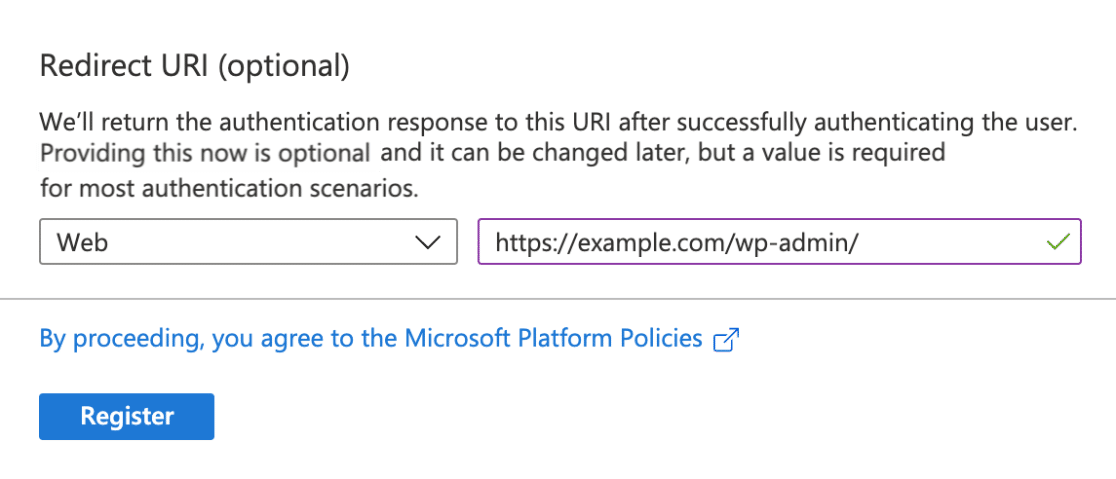
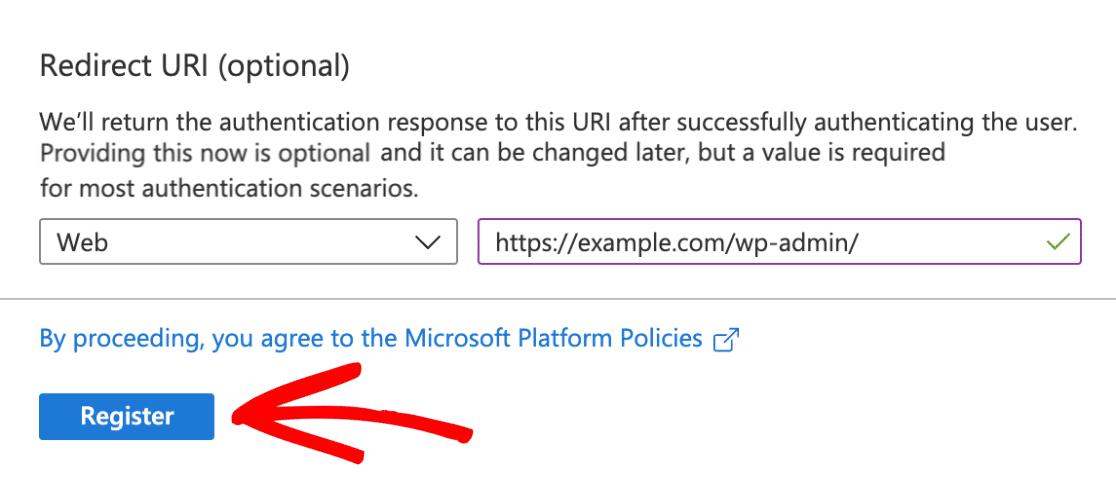
When you’re ready, click the register button to continue.
As soon as this registration form is submitted, you will be redirected to the overview page. here you will find your application (client) id. go ahead and copy this value.
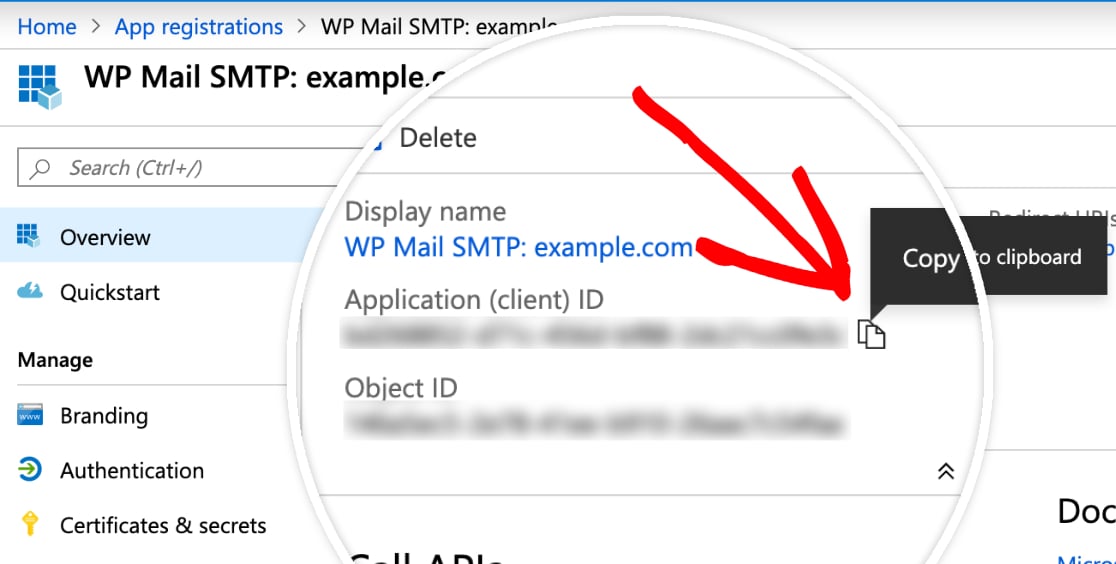
once you have copied the application (client) id, you will need to paste this full value into your wpmail smtp settings, in the field labeled application id.

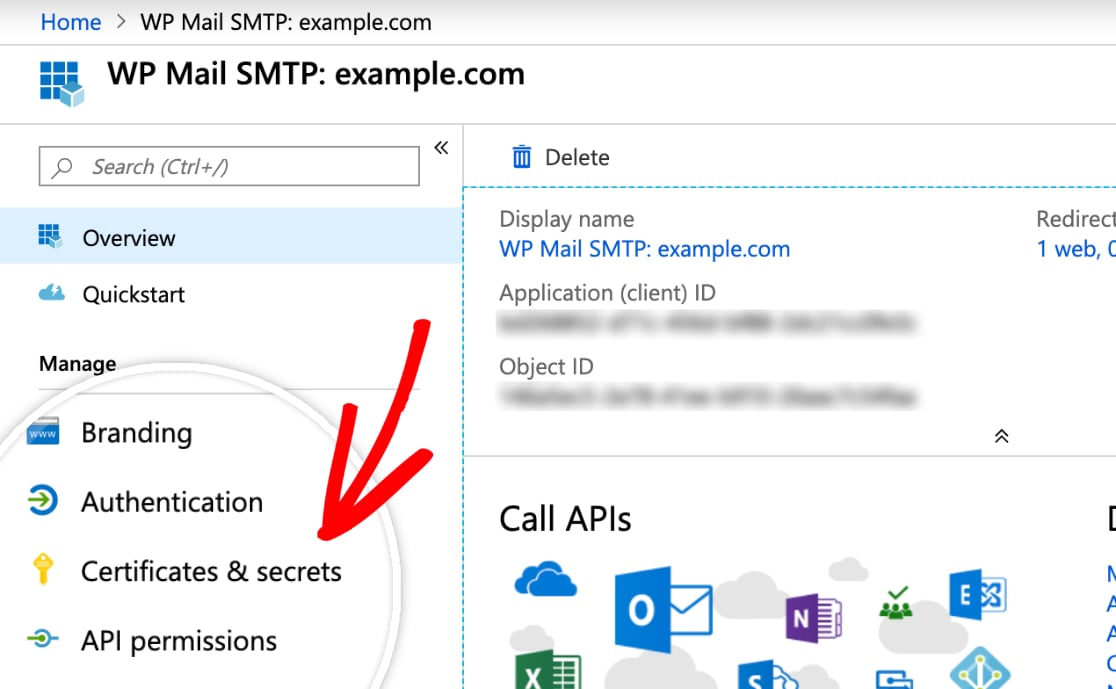
create an app password
Next, we will need to generate a password for this application. to do this, click certificates & secrets in the left sidebar.
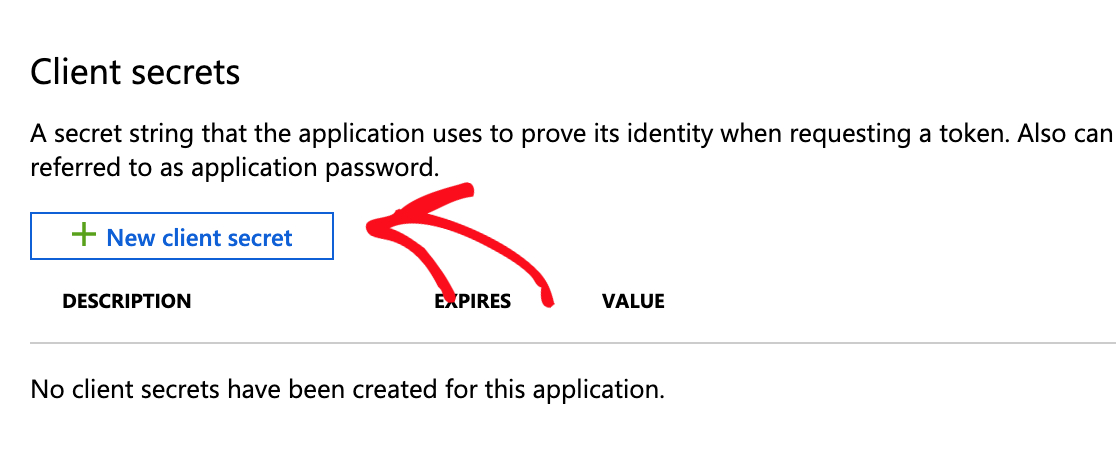
On this screen, go to the client secrets section. then select + new client secret.
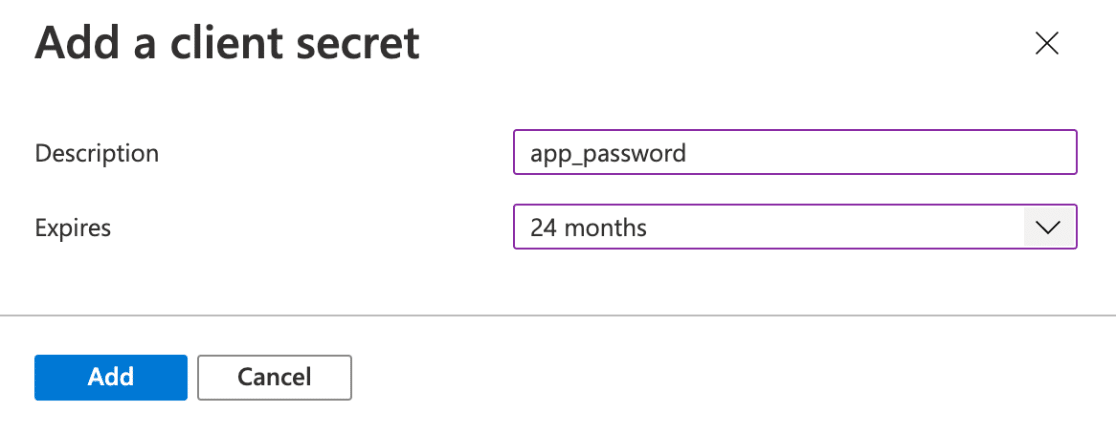
an overlay will appear, and here you will need to fill out a short form:
- description: This name is for your own use only, so we recommend a simple, logical name like app_password.
- expires: 24 months
After submitting the client secret form, the application password will be generated. go ahead and copy the password into the value column (not the secret id column), and go back to your wpmail smtp settings.
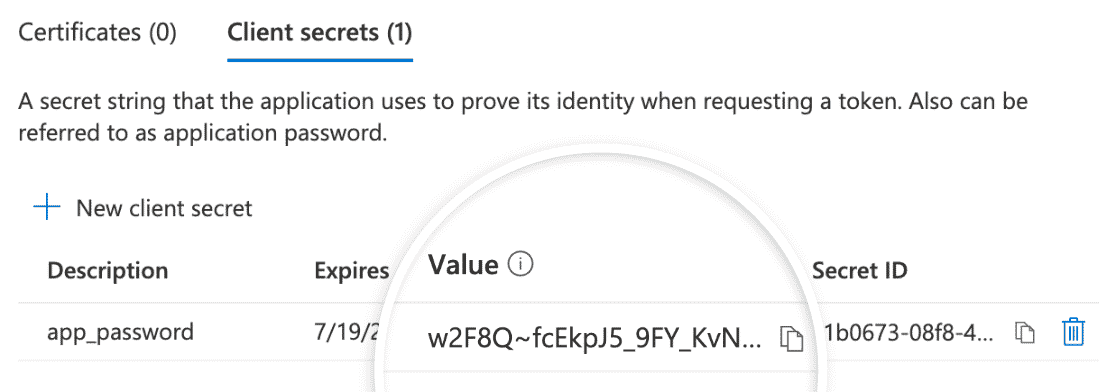
once you’ve returned to the tab or window where your settings are still open, paste this value into the application password field.

save settings and authorize wp mail smtp
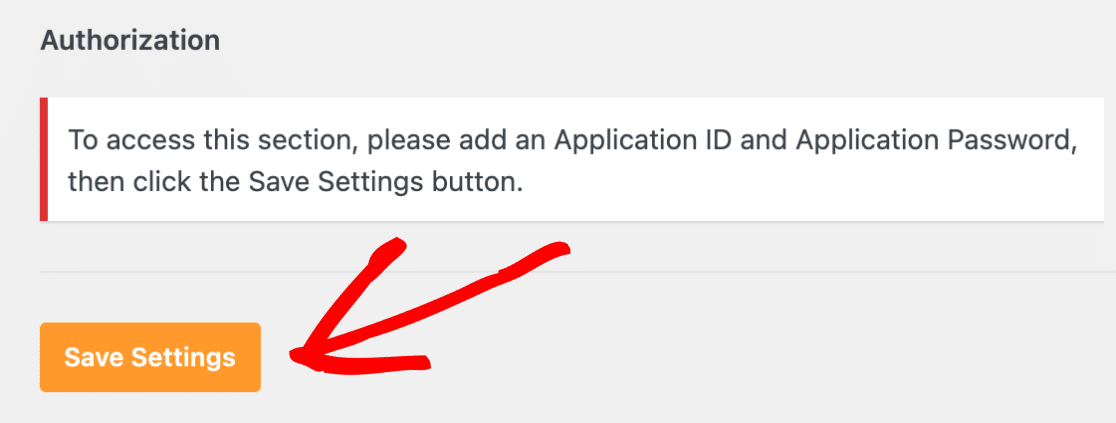
once you’ve added your app id and password, click the save settings button at the bottom of the page.
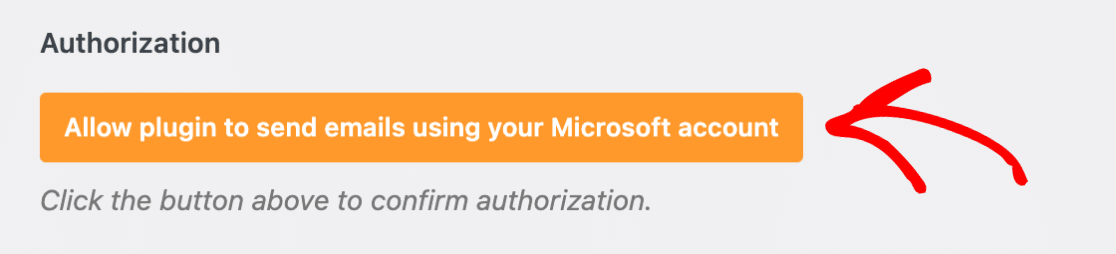
After you’ve saved your settings, you’ll need to scroll down to the authorization section. You should now see a button labeled Allow plugin to send email using your microsoft account. go ahead and click this button.
once you’ve clicked the button, you should be redirected to a microsoft permissions form.
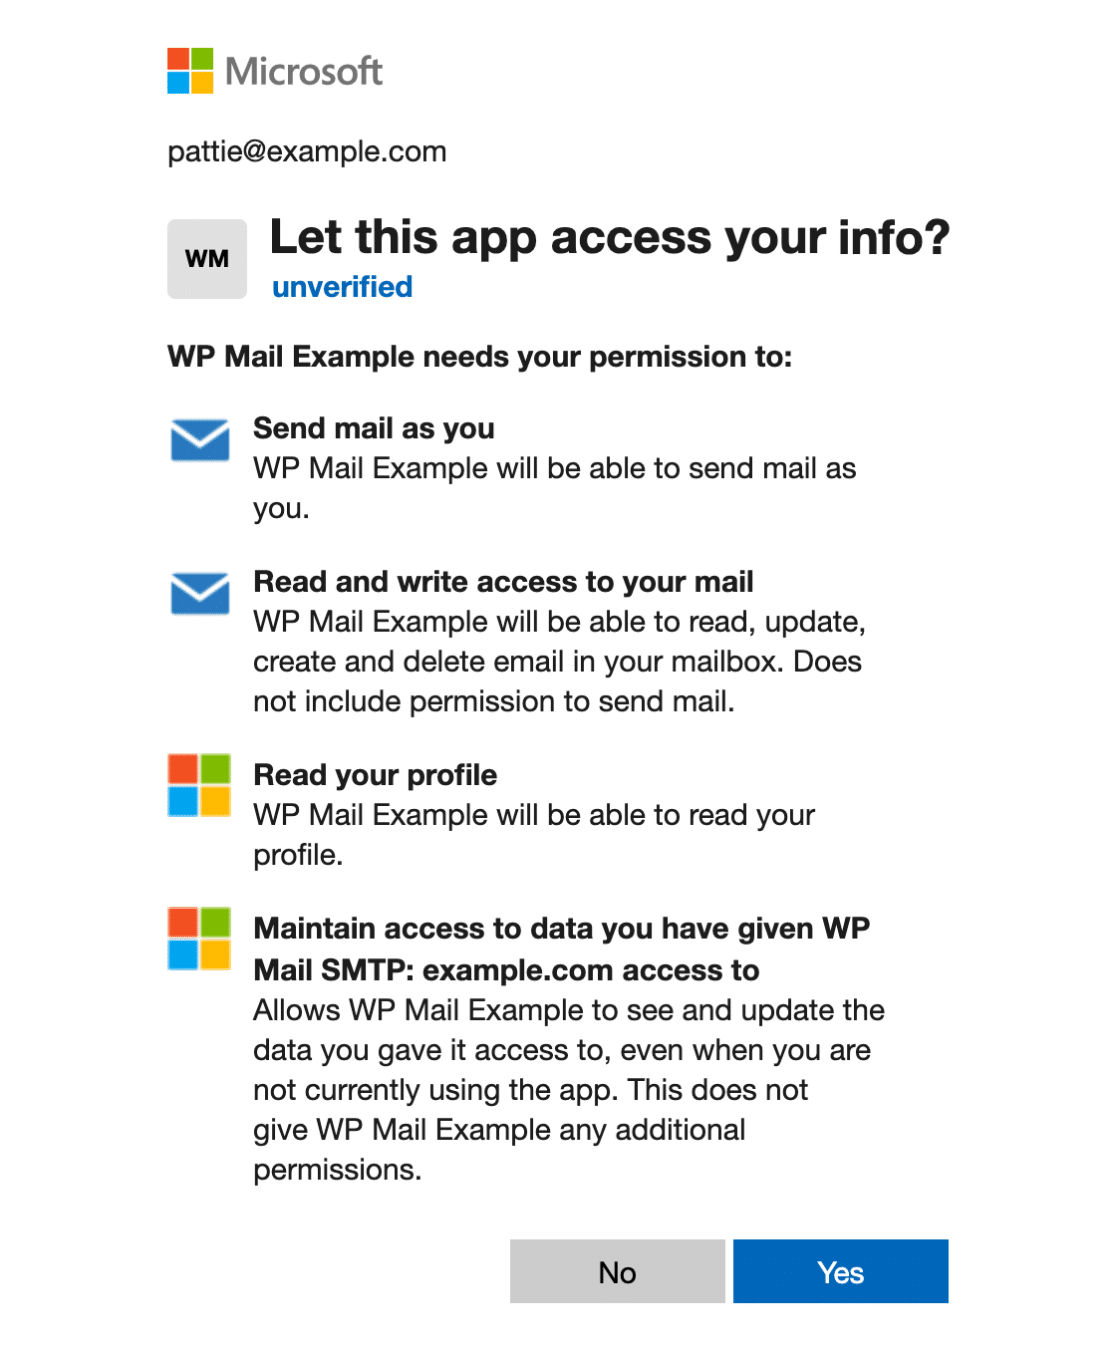
at the bottom of this form, click yes.
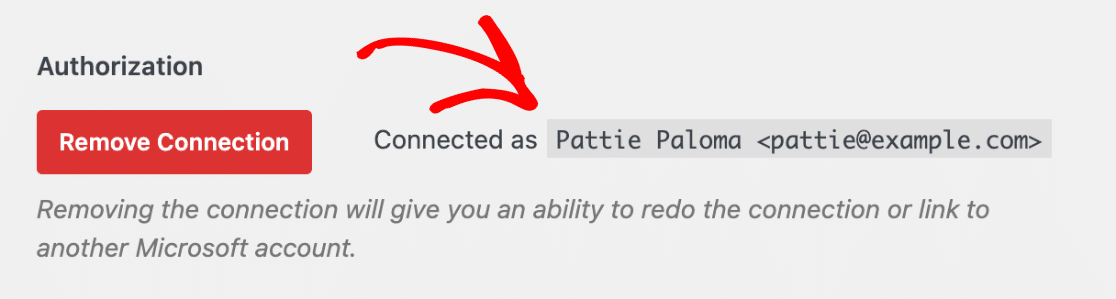
then you will be redirected to your wp mail smtp settings. At the top of this setting, you should see a notification letting you know that you’ve successfully connected your microsoft account.

then, in the authorization section at the bottom of the page, you should also see the name and email address you used to authorize the connection.
of email
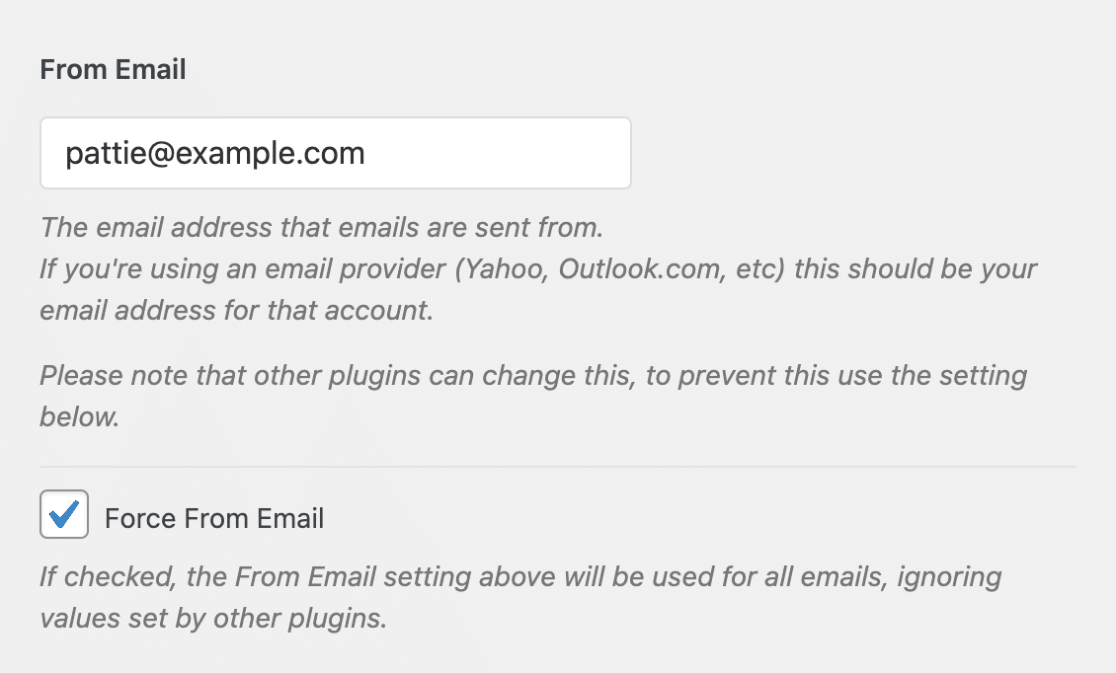
Now that your Microsoft API is configured and connected, you can now enter an email address. You will need to use the same email address that you used to authorize your connection. this email address can be found in the authorization section of your settings.

go ahead and enter this same email address in the email address field in your settings.
We also strongly recommend checking the force email box. selecting this option will prevent you from having to edit email settings in other areas of your site.
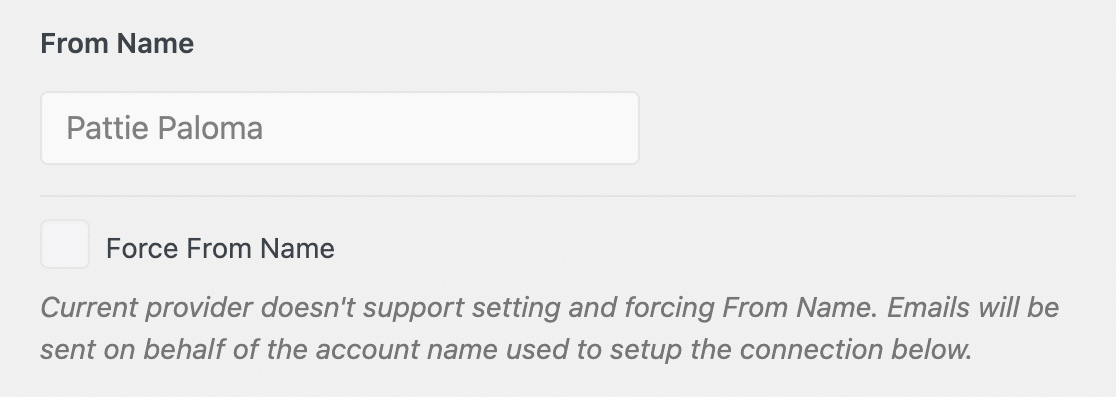
of the name
microsoft 365 / outlook.com mailer does not support changing or forcing the name of. your emails will be sent on behalf of the account name used to authorize the connection.
sending a test email
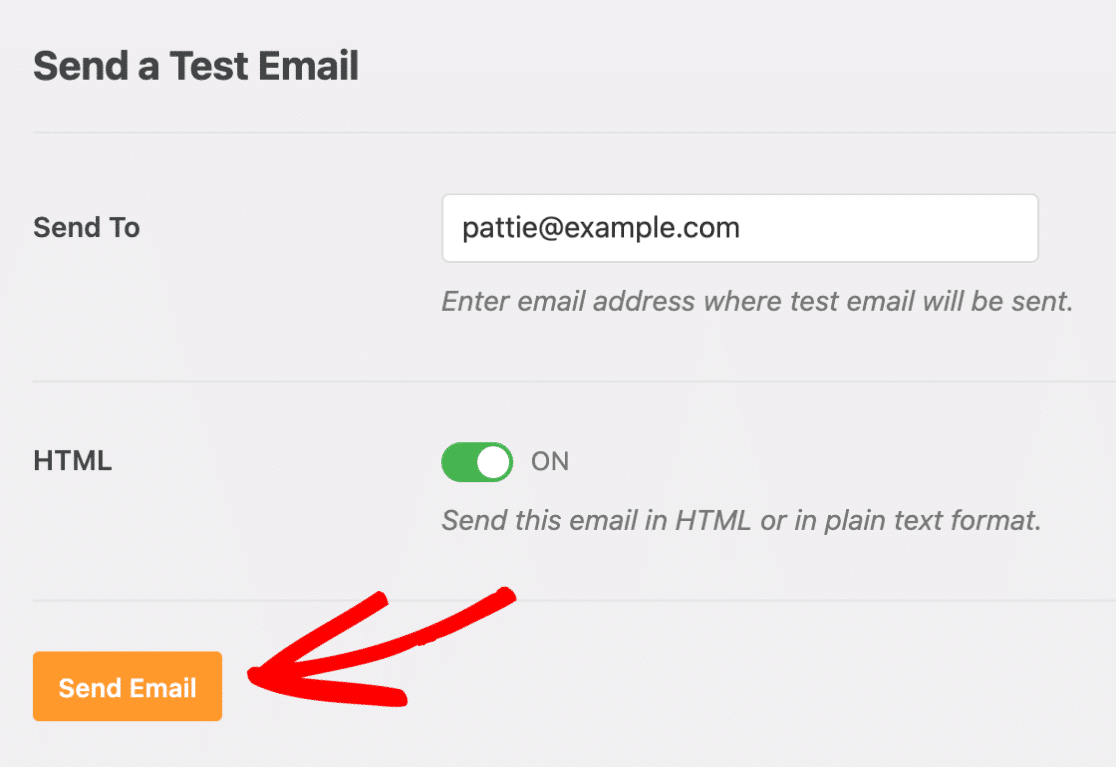
now that your microsoft api is configured and connected, it is important to send a test email to make sure everything is working properly. To do this from the wordpress admin panel, go to wp mail smtp » tools and click on the email test tab.

In the send to field, you’ll see the site administrator’s email address by default. however, feel free to change this email address to any email address you wish to send the test email to. then click the send email button.
after sending the email, you should see a success message.
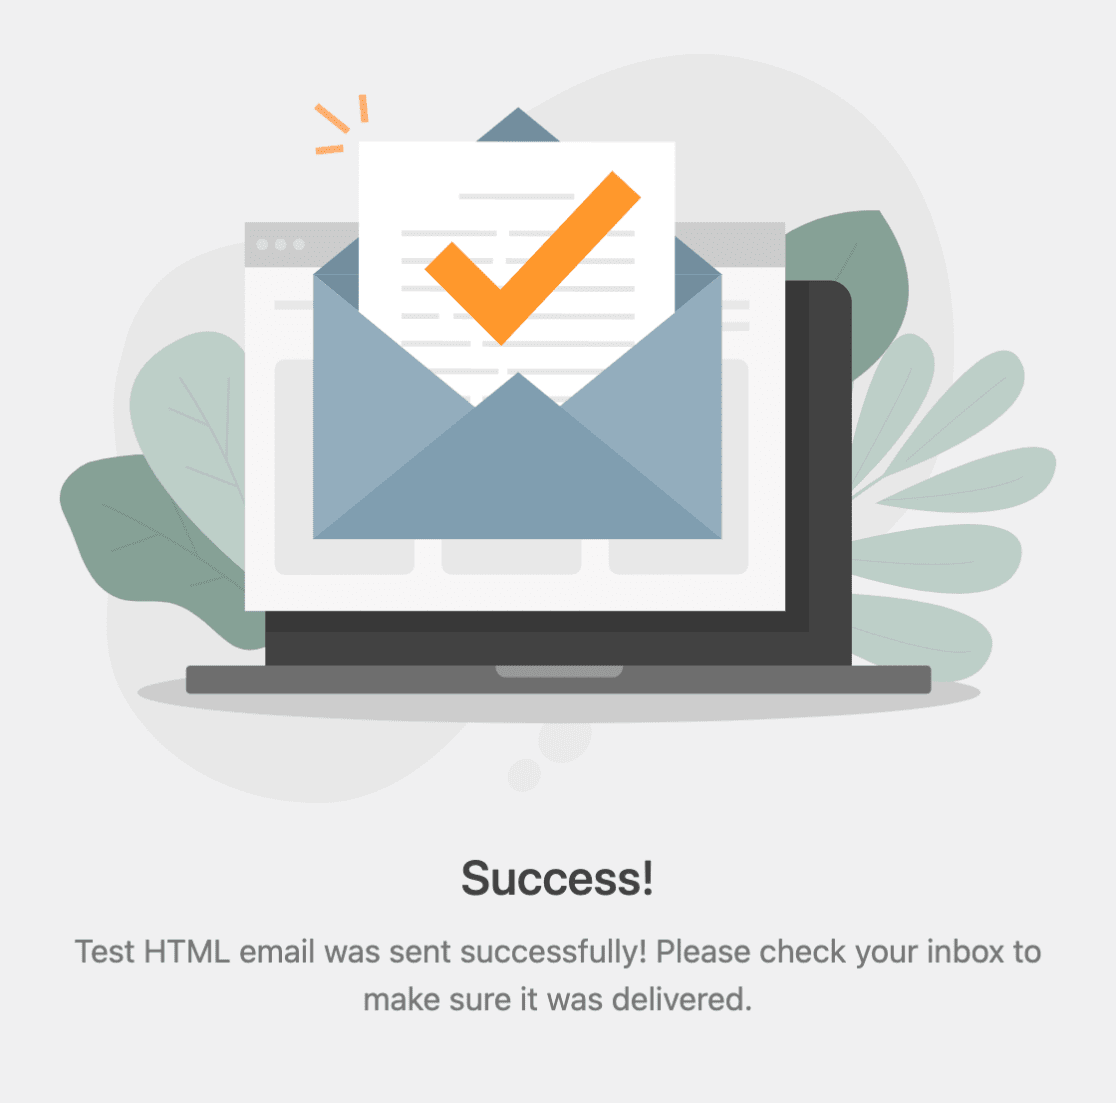
If you check the inbox for that email address, you should receive the email for this test.

frequently asked questions
I use two-factor authentication/multi-factor authentication (2fa/mfa) on my microsoft-based email account. will it work with the mail program microsoft 365/outlook.com?
if you already have 2fa/mfa configured before completing the setup steps in this tutorial, then you shouldn’t have any problems (just follow the steps normally).
However, if you complete this tutorial and then decide to enable 2fa/mfa, in most cases you will need to re-authorize the sender (see how to save settings and authorize wp mail smtp).
what is the maximum size of email that can be sent through the microsoft 365 / outlook.com mail program?
for wp mail smtp versions 3.3 and earlier, the maximum size limit is 4mb.
for any version of wp mail smtp greater than 3.3, the maximum size limit will depend on your outlook settings.
If you updated the wp mail smtp plugin to a version higher than 3.3 and plan to send emails larger than 4mb, you will need to re-authorize the sender (see how to save settings and authorize wp mail smtp).
why am i getting the following error when setting up an office 365 gcc or dod email address?
confidential client does not support cross-cloud request
for security measures, government community cloud (gcc) and u.s. department of defense (dod) accounts typically use the .us domain extension instead of .com. To set up these types of accounts, you’ll need to add the following code snippet to allow .us domain extensions:
If you need to account for a domain extension with a different country code, such as .de, simply replace ‘we’ with your country code, on the last line of the code provided above. for example,
Will I have to reconnect if my login credentials have changed?
yes, if you change your password, your connection will be invalidated. you will need to reset your connection with the new password in order to continue.
does microsoft 365 / outlook.com mailer support sending as a different user, a shared inbox, or a group?
Yes, the Microsoft 365/Outlook.com mail program supports sending emails from multiple users, shared inboxes, and groups. these options can be configured in the authorized microsoft account that you have connected to wp mail smtp.
Below you will find relevant documentation from microsoft on how to configure these different send options:
- send as or on behalf of another user
- send from a shared mailbox
- send as or on behalf of a group
once you set any of these options, you can change the sender email address to the email address of any user you have set up in your connected microsoft account.
what if I don’t have permission to authorize apps that require administrator approval?
You will need to ask your global admin to set up the admin consent workflow. Once this workflow is configured and you have been added as a reviewer, you will be able to request access to applications that require admin consent, such as wp mail smtp.
that’s it! You have successfully configured your site to send emails from wordpress with the mail program microsoft 365/outlook.com in wp mail smtp.
next, would you also like to control what emails wordpress core sends? be sure to check out our tutorial on email controls for all the details.