learning objectives
After completing this unit, you will be able to:
- enable reply mail management on your account.
- configure how your account handles incoming requests.
- decide how your forwards will appear.
we will contact you
If you sent fifty thousand emails, whether marketing or transactional, you could receive fifty thousand responses. that’s a lot of answers. I probably couldn’t read all of them, let alone cobble together a useful answer for each individual. and the truth is that you don’t need to read them all. most likely they are unsubscribe requests that don’t use the unsubscribe link or just some weird response. so while you don’t need to read them, you can’t ignore them either. That’s why Marketing Cloud provides Reply Mail Management (RMM), a tool that helps automatically process any messages that arrive at your Marketing Cloud addresses.
rmm addresses the autoresponders produced by almost all email programs in use today. In most situations, rmm can handle more than 90 percent of incoming messages by either sending an automated reply to the sender or forwarding the incoming message to the appropriate email address for further review. let’s take a look at the overall process.
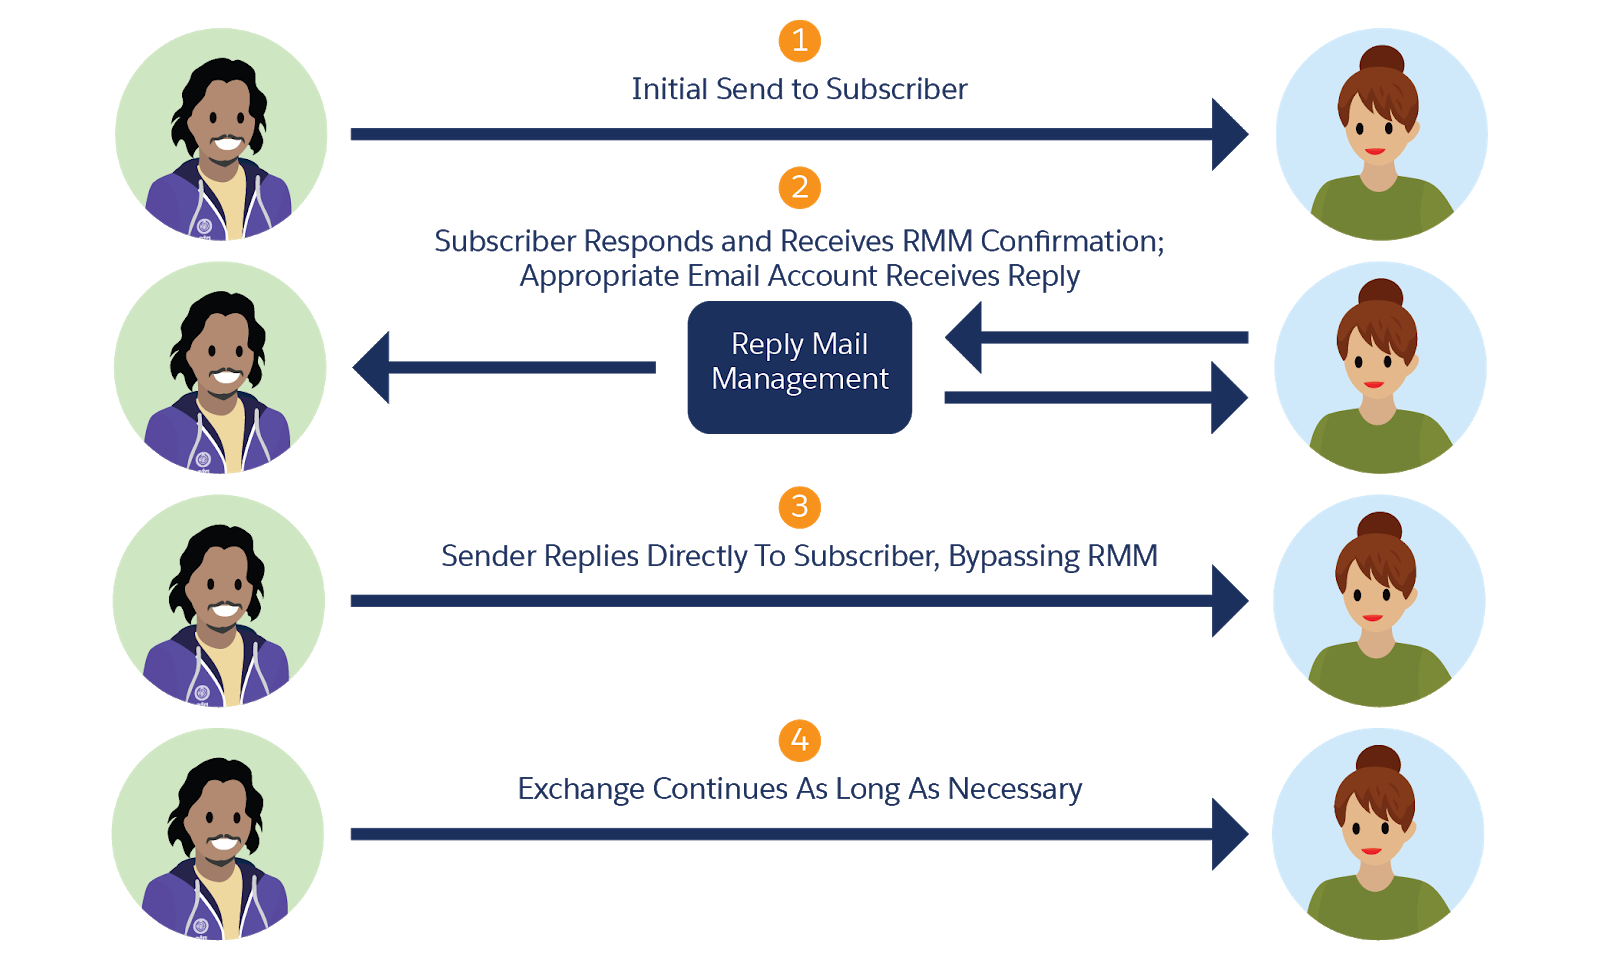
The process seems simple, but imagine all the autoresponders, out-of-office messages, or other responses this tool can handle for you. plus, you can sort through messages that need attention while ensuring that basic tasks (such as handling manual unsubscribe requests) are processed correctly. so let’s review what information is needed to enable rmm for your cloud marketing account.
configure rmm
rmm is part of Sender Authentication Package (sap) and you will need the help of your marketing cloud account manager to set it all up. As part of the process, you must provide the following information.
- email display name: This information is the name of the sender for replies you send. we recommend that you make this personal. use the real name of the person handling responses, or at least use the name of your friendliest customer service organization, such as customerservice@example.com.
- response subdomain—this is the subdomain that handles all the rmm rules, like answer.example.com. rmm uses this subdomain to ensure that it handles all replies and forwards them correctly.
- reply email address – This email address is attached to the display name of the email in the information of any responds rmm sends. and although it looks like an email address, when the time comes, it is transformed into a forwarding address to rmm for processing. Magic! you can use a string for this value or define it via a sender profile (which we’ll cover in the next unit).
- full dns record redirect – this checkbox indicates you already completed direct dns registration to the marketing cloud. Since you will be working with your cloud marketing account representative to perform this task, you must wait for their approval before enabling this feature. trust us, they will tell you exactly when it should happen.
After you’ve entered this information, you can tell rmm exactly what to do with incoming email messages. on kind terms, of course.
follow the rules
rmm follows a few logical rules when filtering all incoming messages from your cloud marketing sends. First, rmm handles all autoresponders and out-of-office messages. Because, let’s face it, you probably don’t need to know that Joel will be back in the office on Monday after his hiking trip. We recommend automatically deleting these messages. in case you want someone to review them, you can set that too.
Instead of using the unsubscribe link, some people may send a message requesting to unsubscribe from their emails. You still have to honor those requests, so rmm looks for some common unsubscribe terms in the subject line or the first 200 characters of the message. if a match is made, rmm unsubscribes from that email address.
If the response doesn’t match any of these conditions, you can set up an autoresponder that says something like “thank you for your response, we’ll get back to you as soon as possible.” rmm provides a default email option, but you can also configure a custom response with more specific information. or you can choose not to send any response.
next steps
These rmm settings and rules contain the basic information needed to handle incoming responses, but you can also use a sender profile to expand your response options. And because all cloud marketing accounts require a default sender profile to manage your sends, you’re probably already familiar with setting one up. In the next unit, we’ll see how Sender Profiles, Delivery Profiles, and Shipment Classifications make managing all of your shipments much easier.
resources
- salesforce help: handling reply mail