create and print labels in microsoft word using mail merge and an excel list (generate bulk addresses or mailing labels)
by avantix learning team | updated on January 9, 2021
applies to: microsoft® word® 2013, 2016, 2019 and 365 (windows)
you can create labels in microsoft word by running a mail merge and using data in excel. this is typically used to generate and print mass mailing labels for names and addresses of clients or other contacts. You’ll need to create a main document for the tags in word and then connect to a dataset or list in an excel spreadsheet (although you can use other data sources). when you run mail merge, you can create a new merge file with a label for each contact or merge directly to a printer.
Typically, labels are purchased in sheets that are placed in the printer’s tray or document feeder and a product code is printed on the label packaging. address labels are often called mailing labels or shipping labels.
recommended article: how to use word mail merge for form letters
Do you want to learn more about word? check out our word courses in the virtual classroom or in the live classroom >
Understanding the tag mail merge process in word
There are 8 steps in the word mail merge process for mail or address labels:
- in word, start the merge and specify the main document for the tags. you will be prompted to specify the type or size of the labels you want to generate.
- select the source excel workbook that contains the dataset with names and addresses. Microsoft refers to a data set or database as a list. would create the excel source file before starting the mail merge process.
- in word, insert fields in the first cell of the table (which would be the first label). this table is automatically created by word.
- update or propagate the other tags in the sheet.
- format the parent tag document (such as changing font and size).
- select specific recipients or filter the recipient list (optional).
- preview the merged labels (optional).
- run the mail merge .
During the mail merge process, fields are inserted into the main document and are enclosed in carets (such as <<name>>). by default, when you click a field, it is shaded gray. when you run the merge, the fields are replaced with data from the excel source file.
In this article, we’ll use the Mails tab on the Ribbon to set up and run a mail merge (not the Mail Merge Wizard).
step 1: start the merge and specify the main document as tags
The first step is to start the merge using Start Mail Merge in the Posts tab on the Ribbon:
to start the merge and specify the main document for the tags:
- create a new blank word document.
- click the mail tab on the ribbon and then click start mail merge in the start mail merge group .
- from the drop-down menu below, select tags. a dialog box appears.
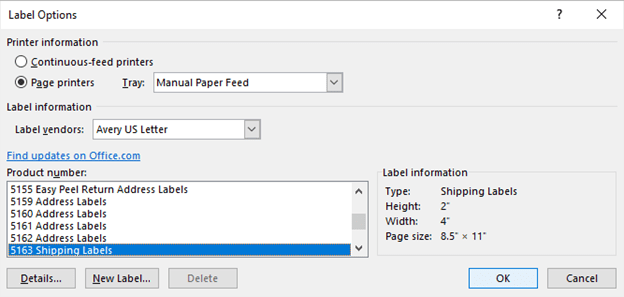
- select the product type and then the label code (which is printed on the label packaging). you can also select a new label and then enter a custom name and size.
- click ok. word creates a table in the main document. the next record appears in each cell of the tag to tell word to move to the next record in the data source.
- if the table gridlines are not displayed, click the table and click the table tools layout tab or the table layout tab (on the right side of the ribbon) and click view gridlines in the table group.
In the following example, avery us letter was selected as the label provider with an address or avery 5163 shipping labels:
step 2: select the source excel file containing the dataset
The next step is to connect to an excel source file containing a list of names and addresses using selected recipients. In the excel spreadsheet, the first row should contain field names like first name, last name, company, address, etc. there should be no blank rows in the dataset.
select recipients appears on the mails tab on the ribbon in the home mail merge group as follows:
In the following excel spreadsheet, note that the field names are in the first row of the sheet being used as the source:
to select a microsoft excel source file containing a worksheet with names and addresses for the tags:
- in the main word document, click the mailing tab on the ribbon, and then click select recipients in the start mail merge group. a dialog box appears.
- click use an existing list in the dropdown menu. a dialog box appears.
- navigate to the excel file that contains the names and addresses you want to use as a source.
- double-click the excel file. a dialog appears.
- make sure the first row of data contains column headers is checked.
- click on the excel spreadsheet that contains the data you want use.
- click ok.
The following dialog appears when you select an excel file as the source for a merge:

step 3: insert fields from the source file into the main word document
Once you’ve connected to a source file, you can insert fields into the main document (which contains a table for tags). you have the option of using a special word field called an address block or inserting individual fields.
The address block appears as follows on the ribbon:
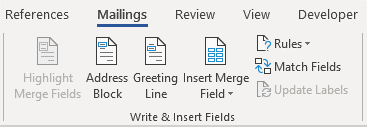
to insert the address block field:
- click the first cell of the table in the main document where you want to insert the name and address of the recipient.
- click the post tab on the ribbon and select the address block in writing & insert field group. A dialog box appears. word will display an address based on the source data.
- In the swatches on the left, select the address swatch you prefer.
- Check or uncheck other options if needed.
- click ok. word inserts an address block field in the main document.
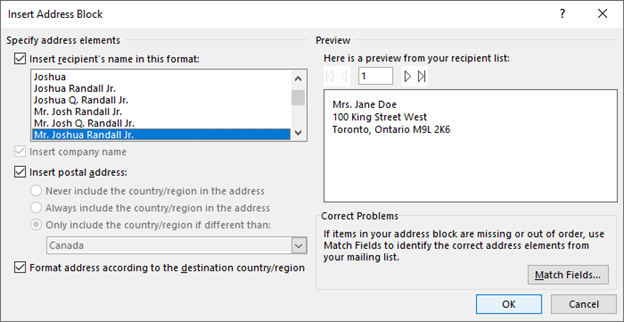
in the address block dialog, select a sample address in the area on the left:
to insert fields individually:
- click the first cell of the table in the main document where you want to insert the recipient’s name and address.
- click the post tab on the ribbon and select insert merge field in the write & insert field group.
- In the drop-down menu, select the field you want to insert.
- press the space bar, type text, or press enter if necessary.
- repeat for other fields you want to insert.
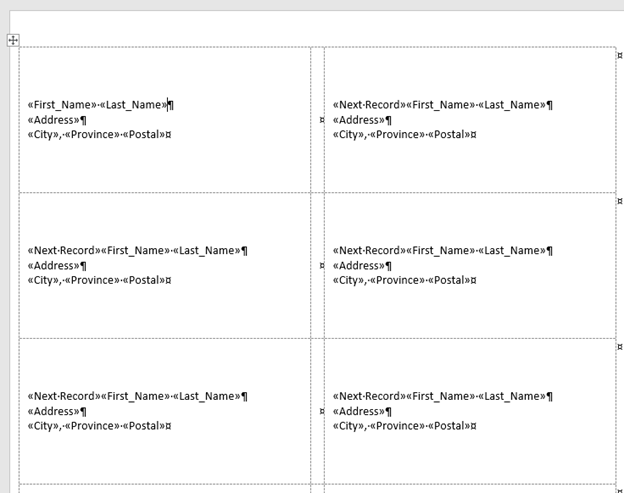
step 4: update tags
to complete all table tags:
& insert group. word will insert the fields into all cells of the label and include <<next record>> to go to the next record in the source data.
step 5: format the tags
You may need to apply formatting to the tags, such as changing the font and size, changing the alignment, and adjusting the space between paragraphs.
A sample main document for address labels (avery us letter 5163 shipping labels) follows:
Step 6 – Select specific recipients or filter the recipient list (optional)
You have the option to choose specific recipients or filter the list of recipients if you don’t want to create labels for all contacts in the data source.
to choose specific contacts:
- In the main word document, click the mailings tab on the ribbon, and then click edit recipient list in the start mail merge group. A dialog box appears.
- Clear the check boxes next to the recipients you don’t want included in the mail merge.
- Click OK.
to filter the list of sources:
- In the main word document, click the mailings tab on the ribbon, and then click edit recipient list in the start mail merge group. a dialog appears.
- click filter. a dialog appears.
- select/enter the desired filter options.
- click OK.
for example, here is a filter to display records from toronto:

To remove the filter, repeat the process, but click clear all in the filter and sort dialog.
step 7: preview the results (optional)
before running the mail merge, to preview the results:
- in the main word document, click the post tab on the ribbon, and then click preview results in the preview results group.
- click the arrows in the preview results group to go to the next or previous page.
- click the preview results to see the fields again.
Step 8: Run the mail merge to create a new file or print the labels
The final step is to run the merge. you can create a new merged document or merge it directly on a printer.
To run the mail merge and create a new merged label document:
- in the main word document, click the mails tab on the ribbon and then click finish & merge into the final group. a dropdown menu appears.
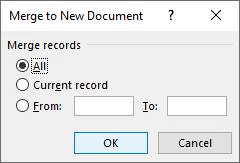
- click edit individual documents. a dialog appears.
- click the current record or enter a selected range if necessary.
- click ok. word creates a new combined document that you can edit, print, and save.
The following dialog appears when you select to edit individual documents:
To run the mail merge and print the merged file:
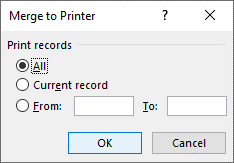
- in the main word document, click the mails tab on the ribbon and then click finish & merge into the final group. a drop-down menu appears.
- select print documents. a dialog appears.
- click the current record or enter a selected range if necessary.
- click ok. a dialog appears.
- select the desired printer and other printer options.
- click OK.
The following dialog appears when you select to print documents:
Usually you will want to save both the main document and the source file. if you save the merged file, you will have a record of the tags that were created.
subscribe to receive more articles like this
Did you find this article useful? if you want to receive new articles, join our email list.
more resources
how to create a table of contents in word
how to remove auto returns in word documents
how to add page numbers in word (step by step)
how to find and replace in word (and use wildcards)
how to superscript or subscript in word (with shortcuts)
related courses
microsoft word: intermediate/advanced
microsoft word: design dynamic word documents using fields
Microsoft Word: Long Documents Masterclass
microsoft word: accessible word documents
microsoft powerpoint: intermediate/advanced
see more courses>