Using multiple gmail accounts for separate projects but don’t want to miss any email as it arrives?
with gmail, you can easily connect multiple accounts and email addresses with its native features. no add-ons or paid plugins needed.
It’s the perfect solution if you have aliases (such as a published author) or want a helper to handle urgent emails while you focus on the work that matters.
Gmail alone accounts for 26% of all email sent over the internet, so it’s highly likely that everyone you’re working with already has an account. Plus, for businesses, there’s an even easier solution on Google Workspace.
In this article, we’ll show you exactly how to manage multiple gmail accounts from a single inbox.
Want to manage multiple gmail accounts and addresses from a single inbox? 💪 learn more about this time-saving tool right here ⚡️click to tweet
Would you rather watch the video?
how do i have multiple gmail accounts in one inbox?
If you’re wondering how to have multiple gmail accounts in one inbox, it’s easy and you can use gmail’s built-in features to set it up in just a few steps.
just follow me.
1. send a request to your second account in gmail settings
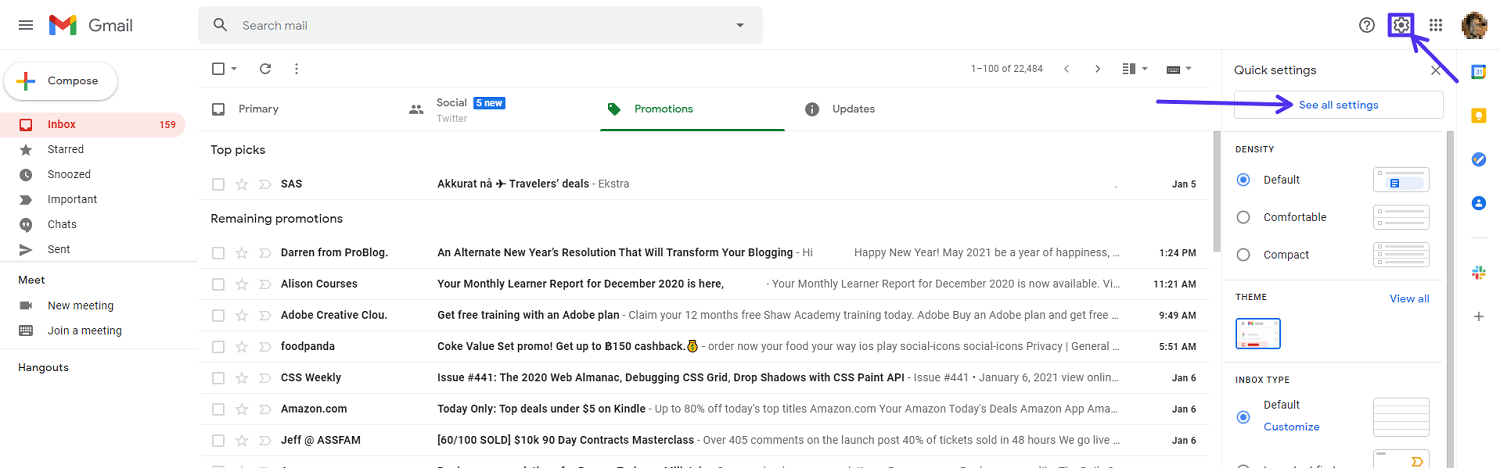
Start by navigating to the accounts menu in settings (you must go to the all settings section to do this).
note: make sure you start from your main gmail account before following any further instructions.
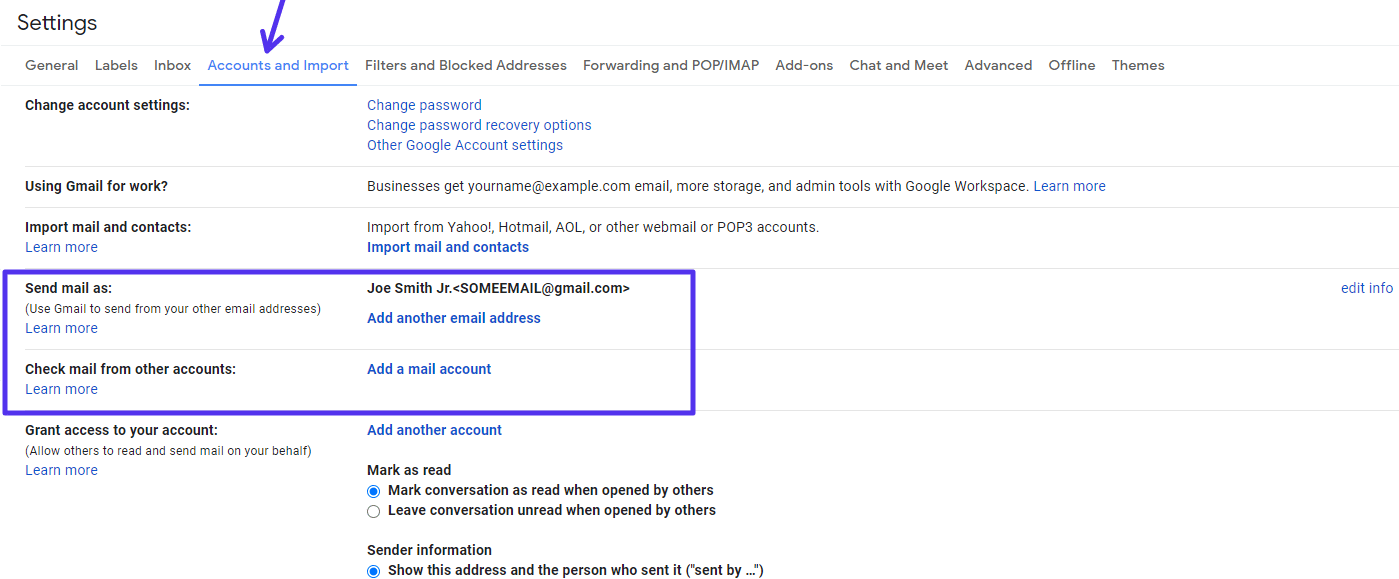
Then switch to the Accounts and Import tab.
Fill out the name and email address for your other account.
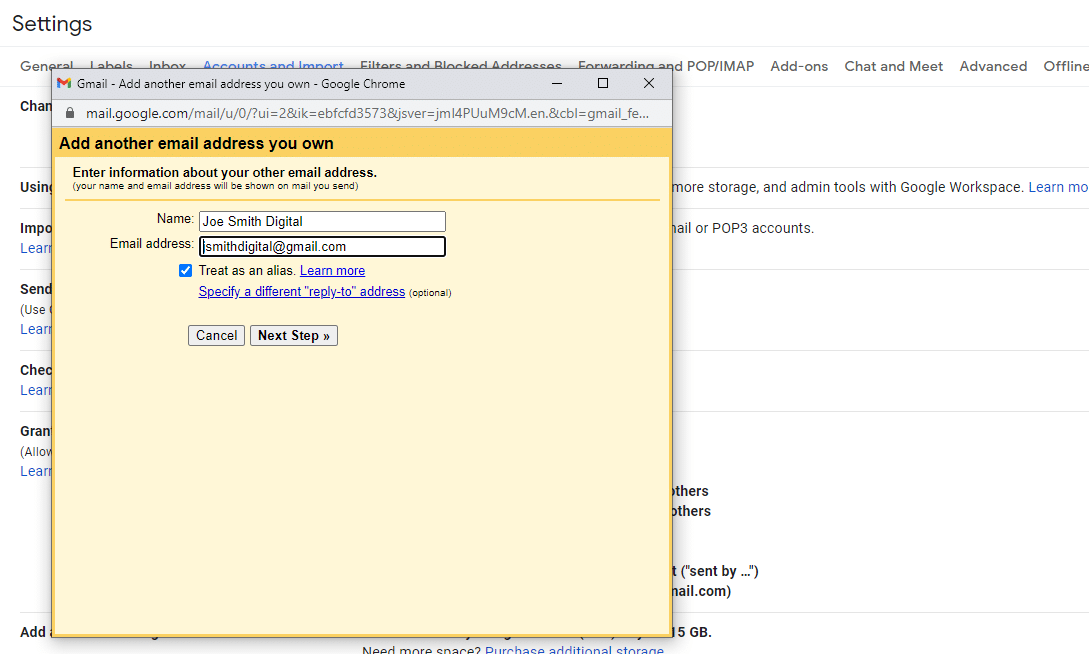
Confirm the information before you move on to the next step. Next, send the verification.
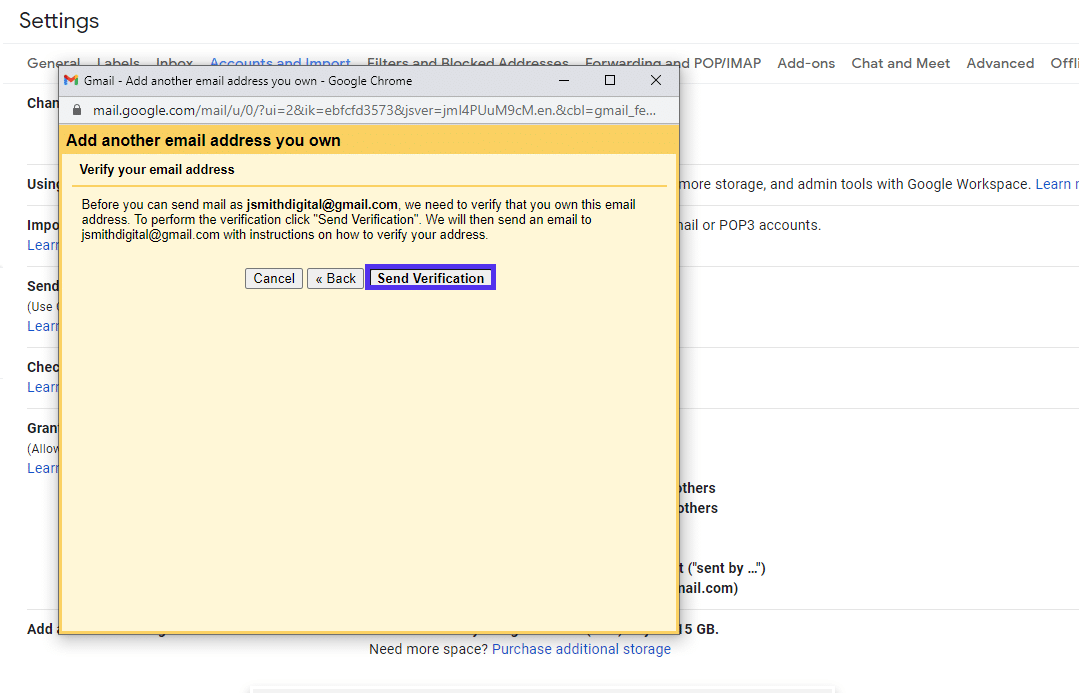
Now you need to navigate to your other Google account and confirm the request you sent from your main one.
2. accept the request from your other accounts
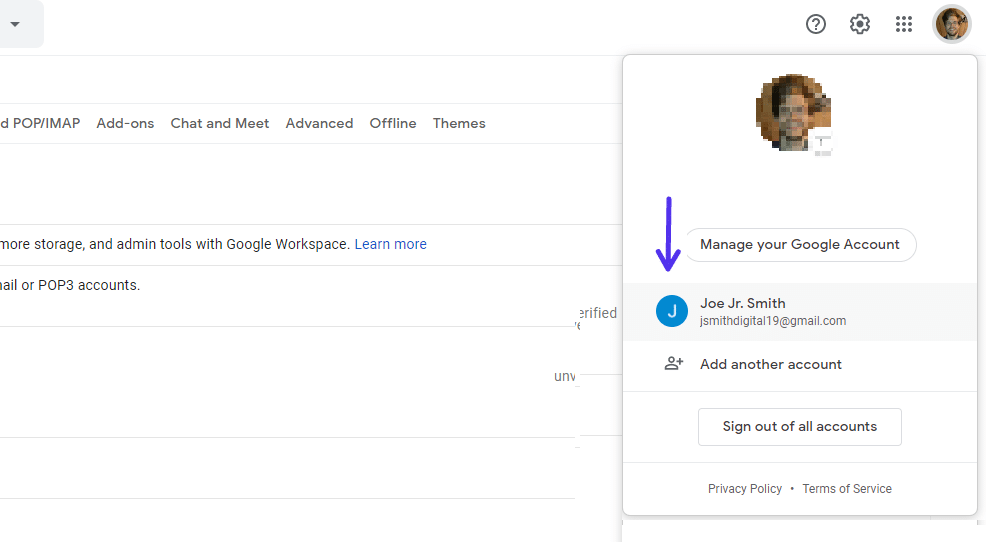
To accept the request, start by switching to your second gmail account. click your face (or the first letter of your name) in the upper right corner to open the menu.
Find the confirmation email in your inbox. It should be at the very top unless you’ve changed how you sort the emails.
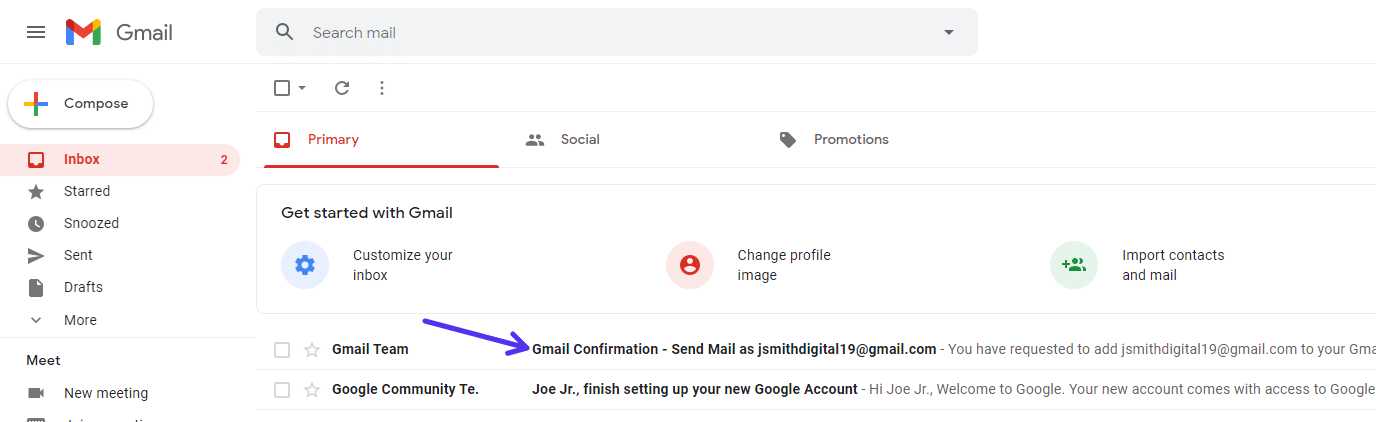
Open the email and click the confirmation link that starts with mail.google.com. As always, be wary of any phishing links.

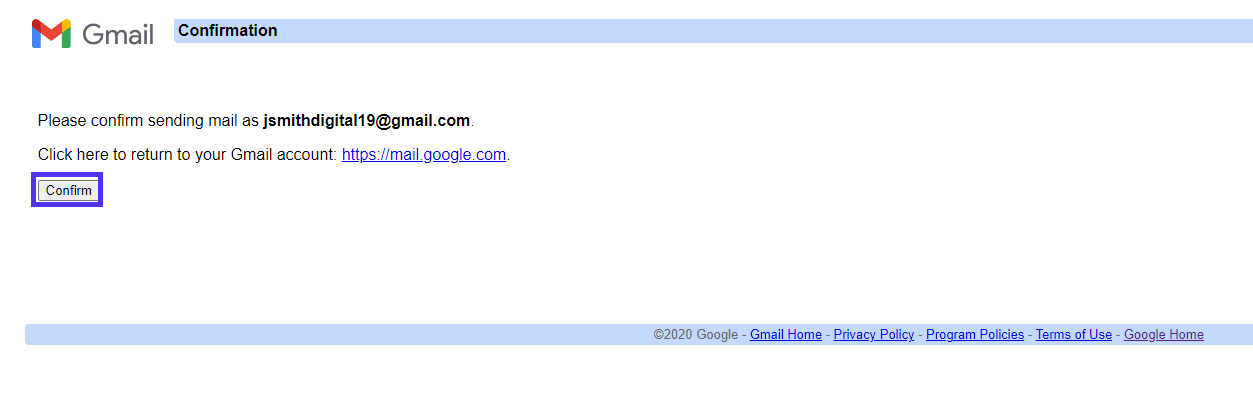
And finally, Confirm the request by clicking the button.
That’s it. You should now see a “Confirmation Success!” message.
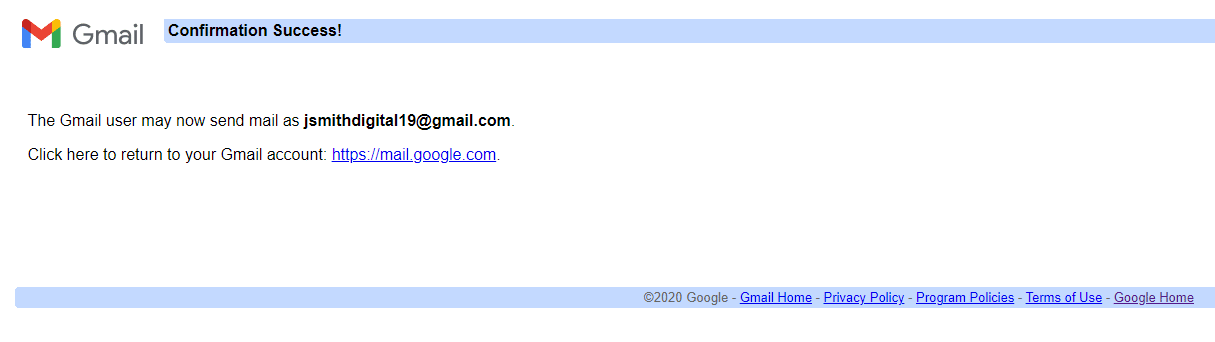
You’re all connected.
note: the change does not only affect the browser version. It works automatically on all devices you’re signed in to, including the gmail app on android or ios.
Now, all that remains is to test that it works.
3. test it works
First, click the compose button to create a new email message. click the “from” area to see if you can select another email besides the main one.
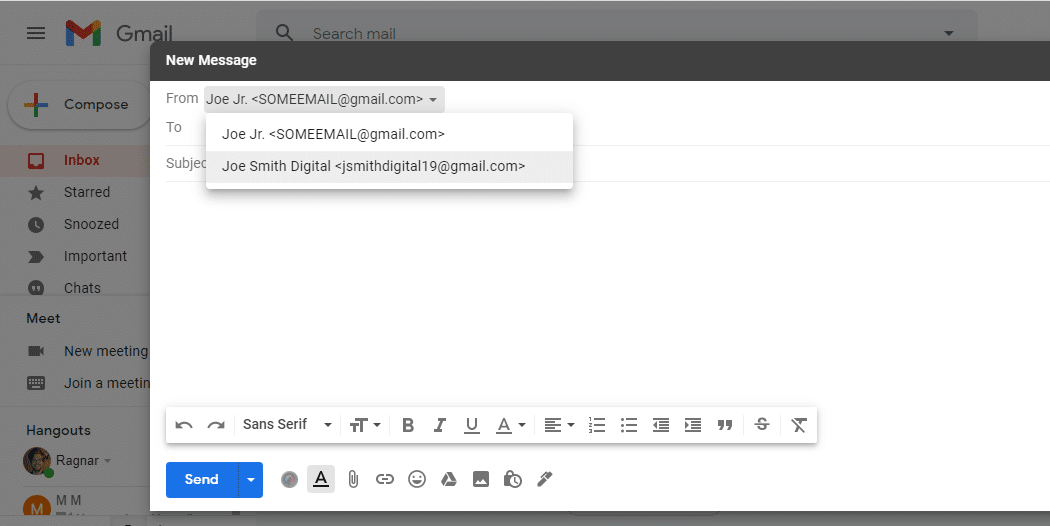
If you can see a drop-down menu of multiple email addresses, it worked. That’s the first part. Now you know you can send emails as your alias.
but what about receiving them? to test that, you need to send an email to the new address and check if it shows up.
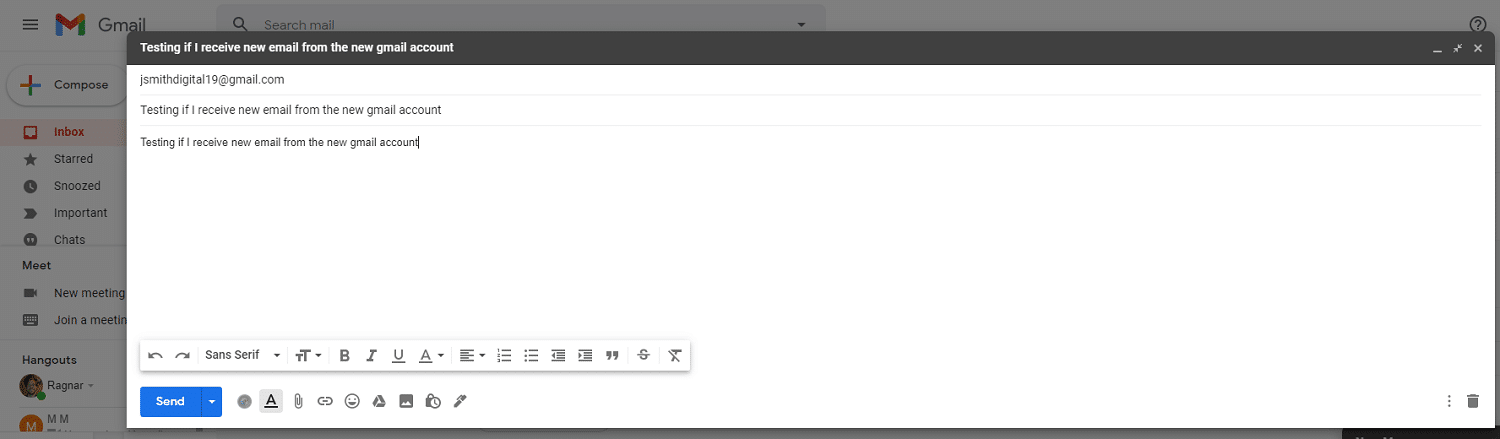
If you can see it, that proves the connection beyond any reasonable doubt.

Success! The email shows up, even though addressed to a different account.
You have officially confirmed that you have multiple gmail accounts in one inbox. And all without multiple logins or any extra effort.
4. rinse and repeat
rinse and repeat the above process for as many accounts as you like. you no longer need that long list of passwords.
one google account to rule them all!
options for non-gmail email addresses: pop3/smtp
Want even more power from a single gmail inbox? you can also connect it with your business email using pop3 and smtp.
go back to account settings in gmail (for main account). then click add email in the “check email from other accounts” section and type your email address to continue.
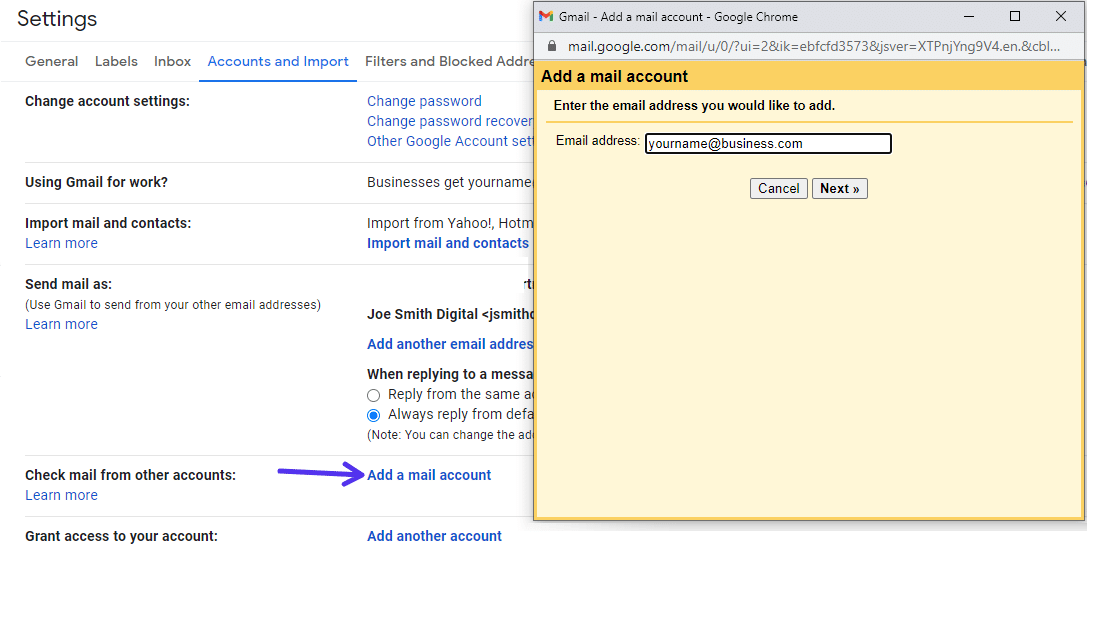
If it’s your business email address from your hosting provider, you need to connect it with POP3.
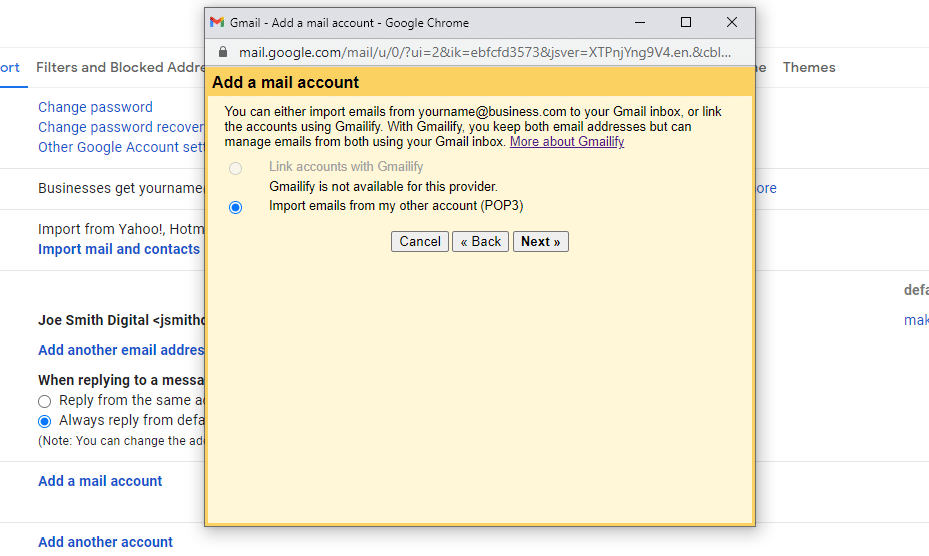
Click Next to continue to the stage where you need to fill out your POP3 information.

You can search for “my host POP3 server,” and you’ll find the page with the relevant information right away. You can also log in to your hosting dashboard and find the information there.
in cpanel, the information looks like this.

Make sure you tick the “always use a secure connection” box and choose the appropriate settings.
If you entered all the information correctly, you should see this confirmation message.
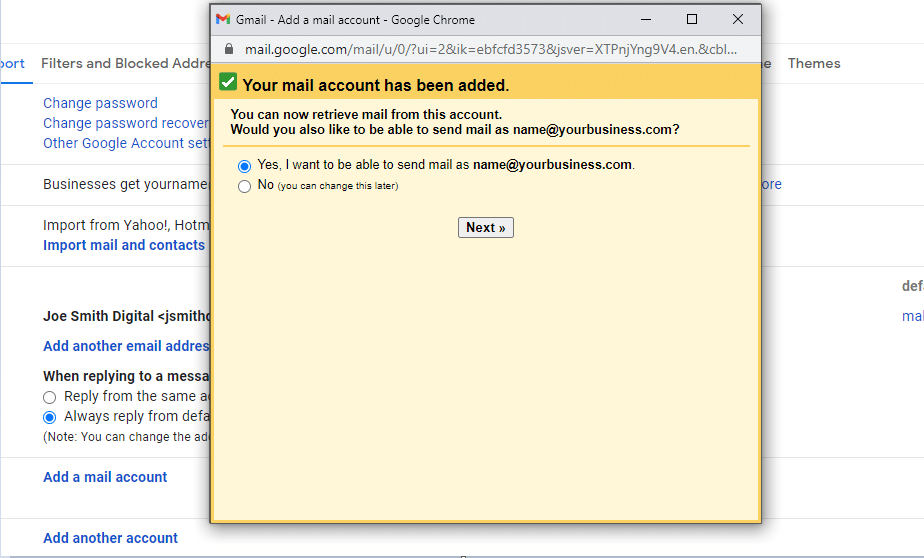
If you want to send the emails, not just receive, you need to repeat the steps, but this time for SMTP and outgoing email. If so, keep the yes checked, click the Next button.
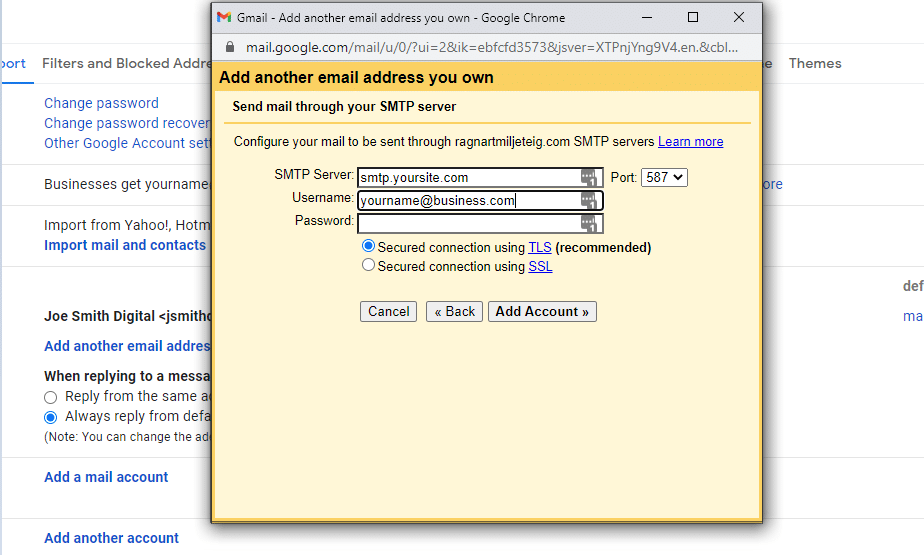
Fill out the relevant fields, choose the right port, and click Add Account.
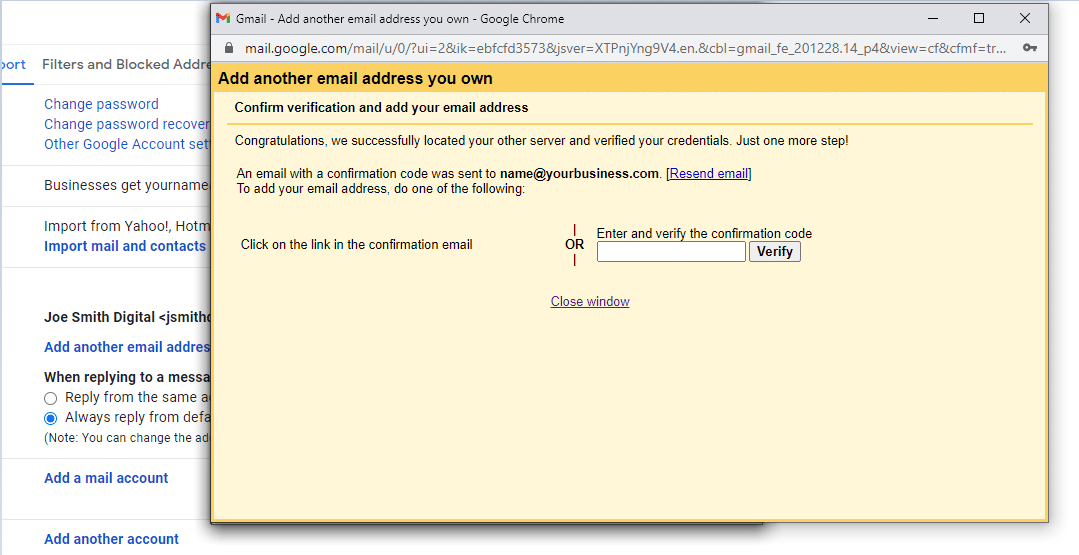
To finalize it, visit your business email inbox and click the link in the confirmation email.
how to organize emails from multiple gmail accounts
Now that you’re receiving email from multiple Google accounts, and maybe even your work email, your inbox probably has a lot to deal with.
so now we’ll show you how to organize them into different folders to make your email inbox easier to navigate.
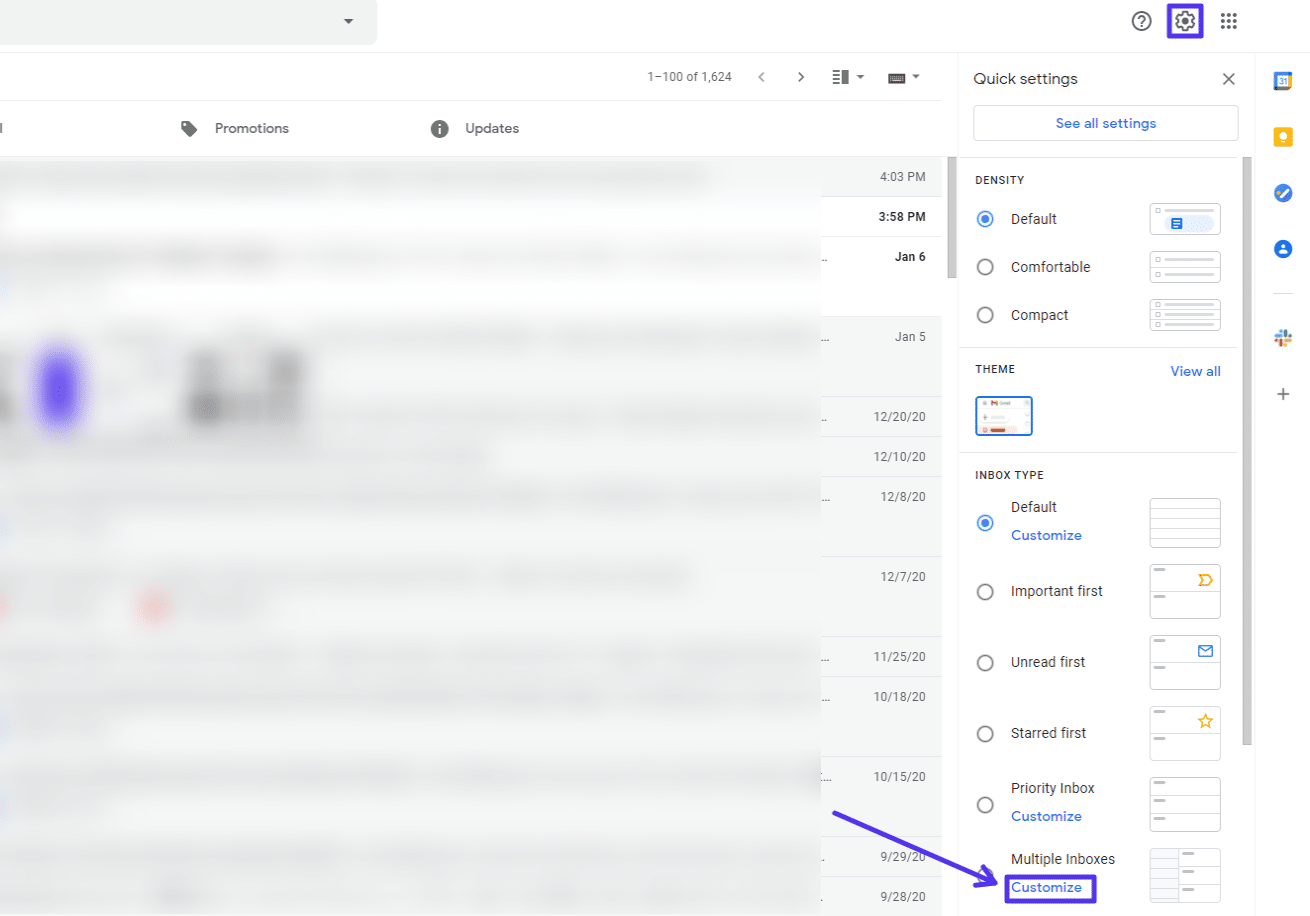
switch to multiple inbox view
Switch to the multiple inboxes view by opening your quick settings and clicking the personalize link below “multiple inboxes”.
Then, you’ll want to single out email addresses by using the “to:[email protected]” filter. That will sort emails by the recipient, and you can give each new section a name (optional).
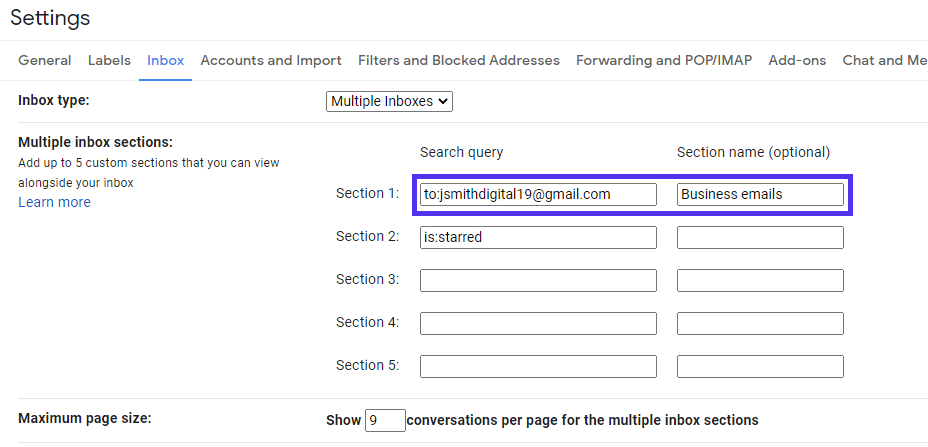
Scroll down to save the changes to the new settings.

You should immediately see the new layout.
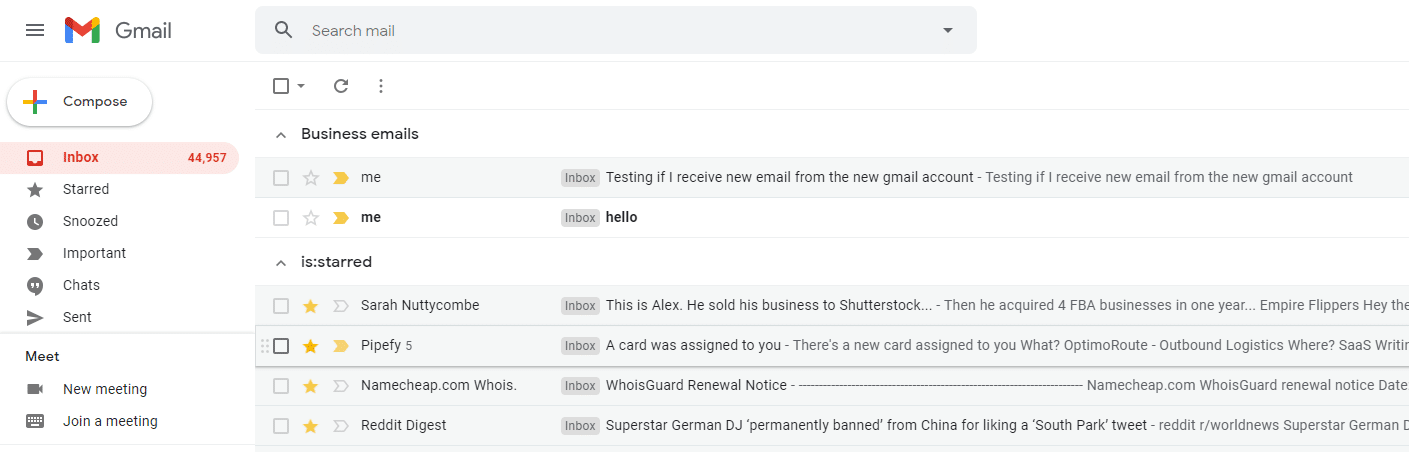
If successful, the section you created for the email address will show your test email. It’ll populate as soon as you receive more email messages.
If it wasn’t (due to a typo or other errors), you wouldn’t see any emails in the section.
You can also use some of these 22 gmail plugins and extensions to make it easier.
bonus: signature management for multiple emails in two easy steps
in gmail, adding email signatures is very easy. multiple gmail accounts in one inbox doesn’t change that. you can easily assign each signature to a unique email address.
this is how you do it:
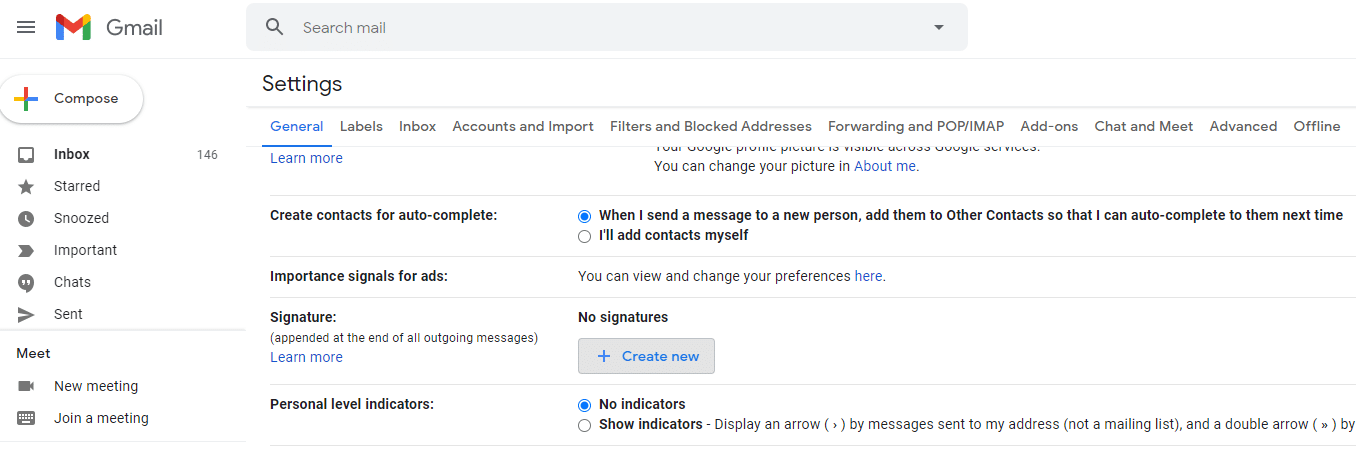
Go to the general settings page and scroll down to the signing section.
If you don’t have one, create a new one and choose an easily identifiable name. for example, if you only use an address for business purposes, set it to “business signature”.
Then you can assign a default email address to each signature.
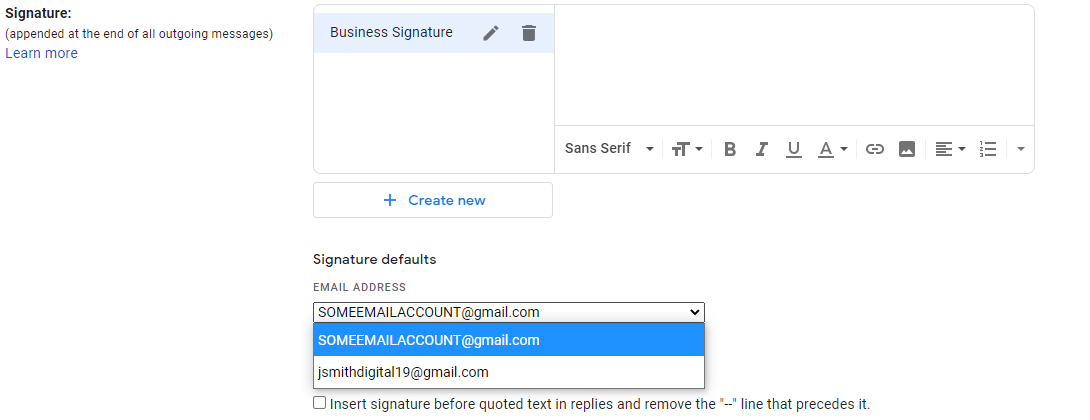
Repeat this process for all of your email addresses. It’s that simple.
Note: Be sure to set your primary signature for your default account. an incorrect email signature does not accurately convey professionalism.
why you need multiple email accounts
There are many different use cases for integrating multiple accounts and this solution is not suitable for all of them.
suppose you want to set up a personal assistant with your emails, no problem. this method allows them to scan and reply to emails without directly giving them your personal email account.
but if you want to use multiple emails for business purposes, there is a better way.
With Google Workspace (formerly G Suite), you can easily create aliases for each user or email address in your business account.
and none of your email addresses should be branded with “gmail.com”. you can use your domain name instead.
That will give potential customers a much better first impression.
plus, it’s not like you’re just paying for business email features. you also get access to cloud storage, file management, spreadsheets, and more. your company may already use google workspace.
for business: use google workspace aliases instead
with google workplace, the process is even faster. you can easily set this up for your employees instead of telling them how to do it themselves.
let’s get straight to it.
how to configure google workspace aliases (formerly g suite)
The fastest way to set up google workspace aliases is to assign them when you create new users.
sign up for a new google workspace account and follow the tutorial.
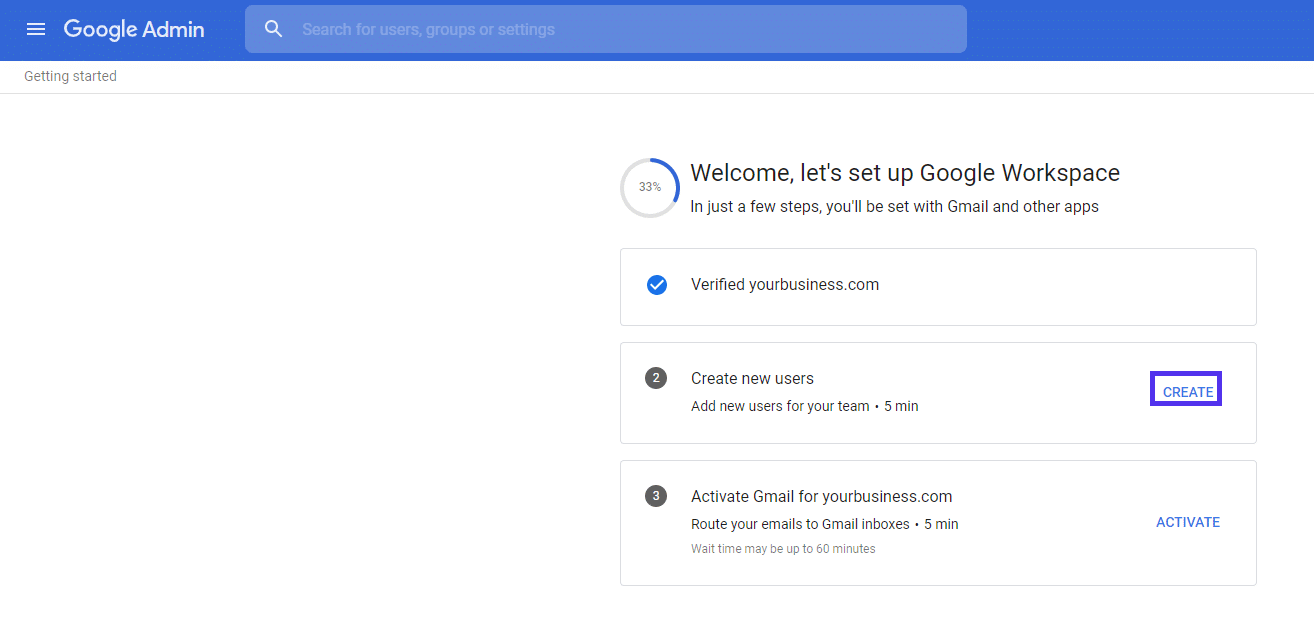
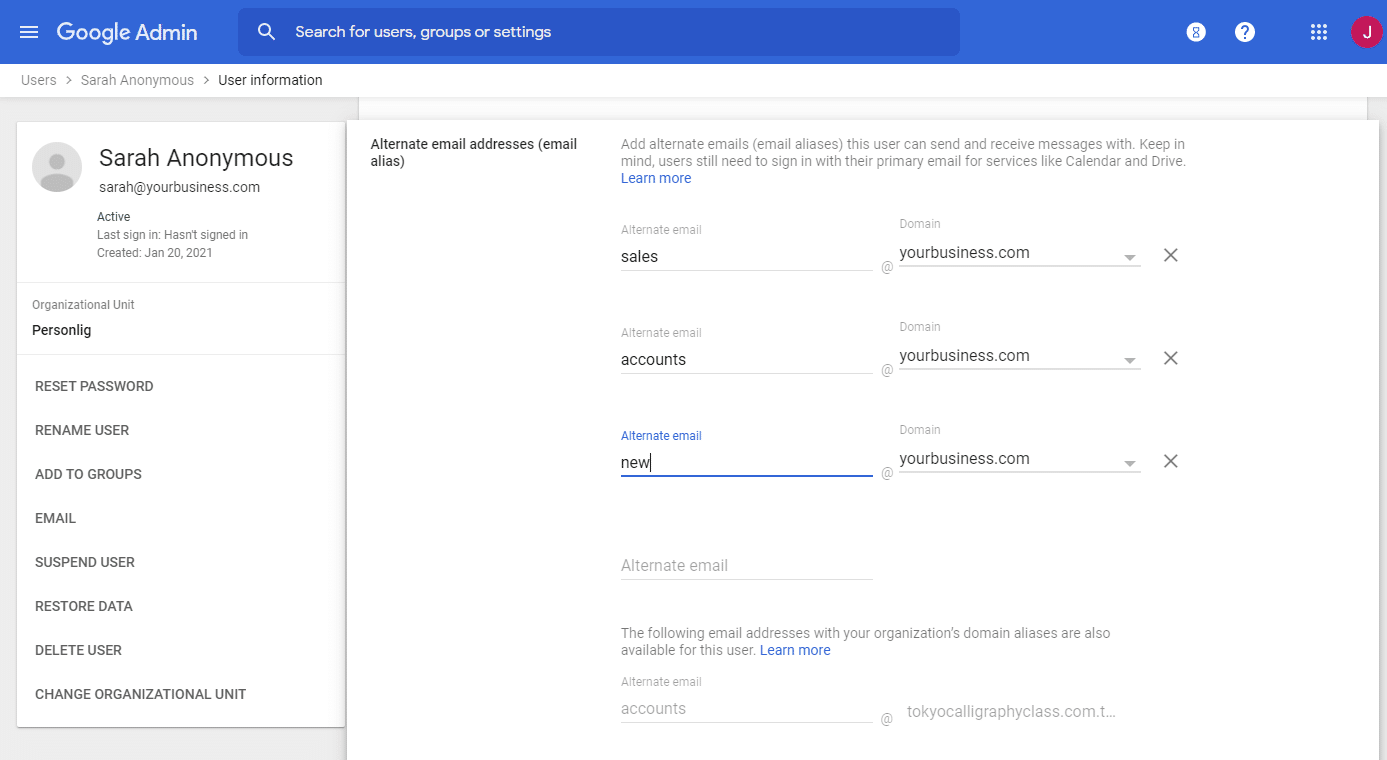
Google Workspace lets you add the email aliases by just typing them out.
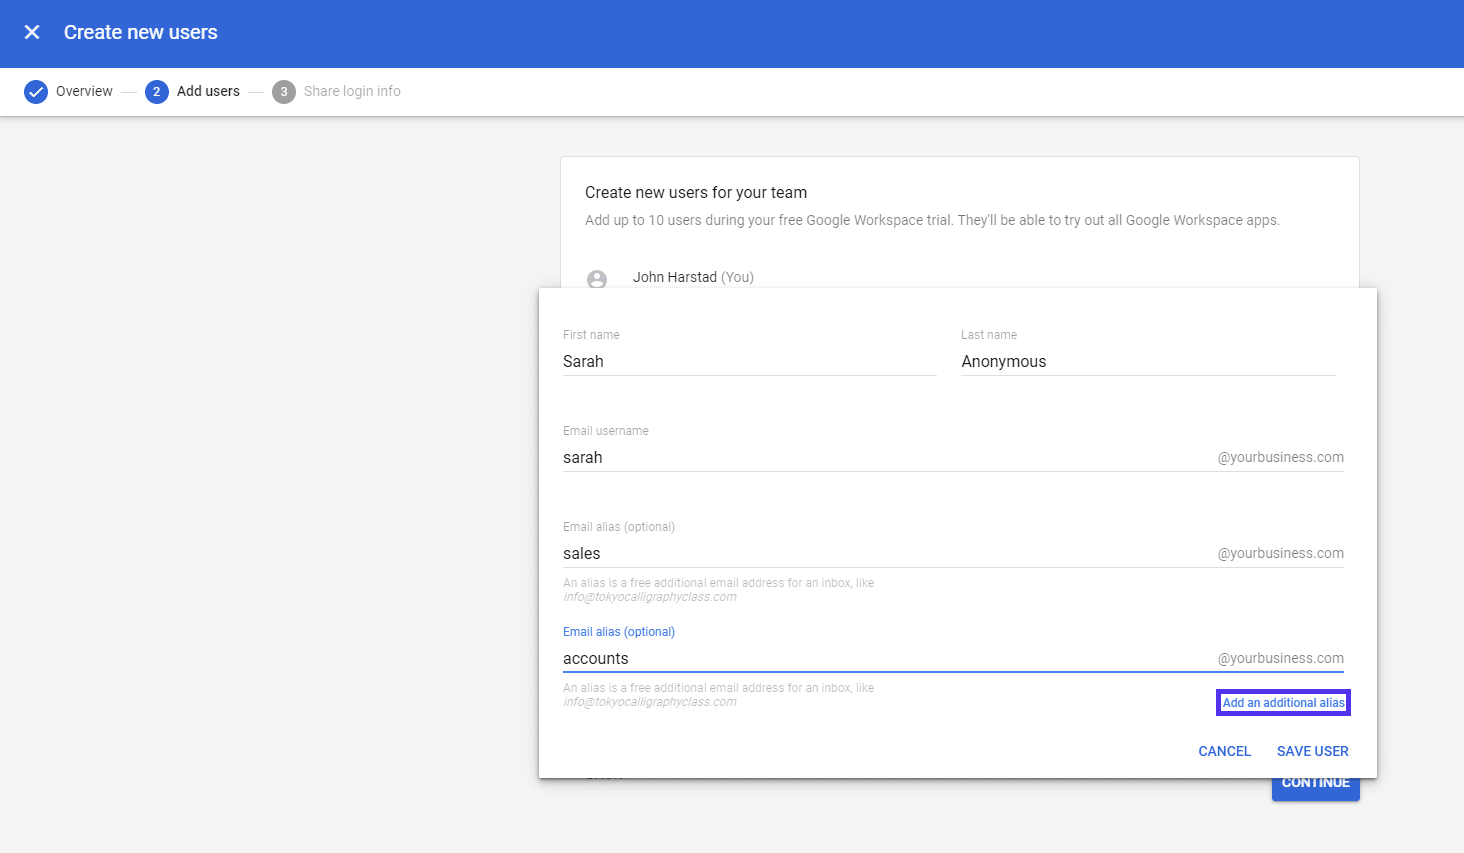
If you have existing corporate email addresses, this is the fastest way to transfer them. For more info on moving them to Google Workplace, see the section in our guide on setting up a professional email address.
if you already use google workspace, follow these steps:
go to the users section.
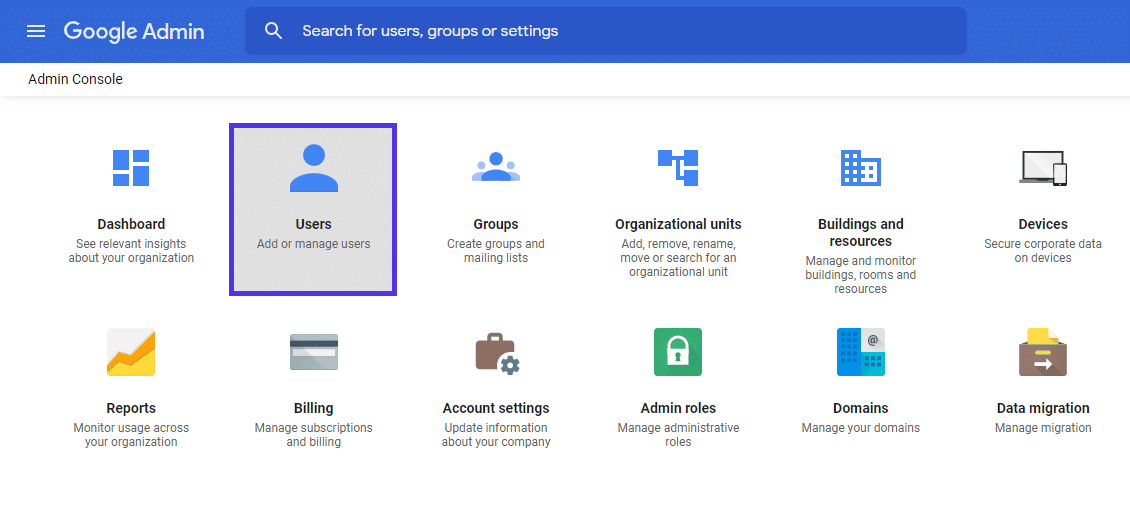
Then click the user for who you want to add alternate email addresses or aliases.
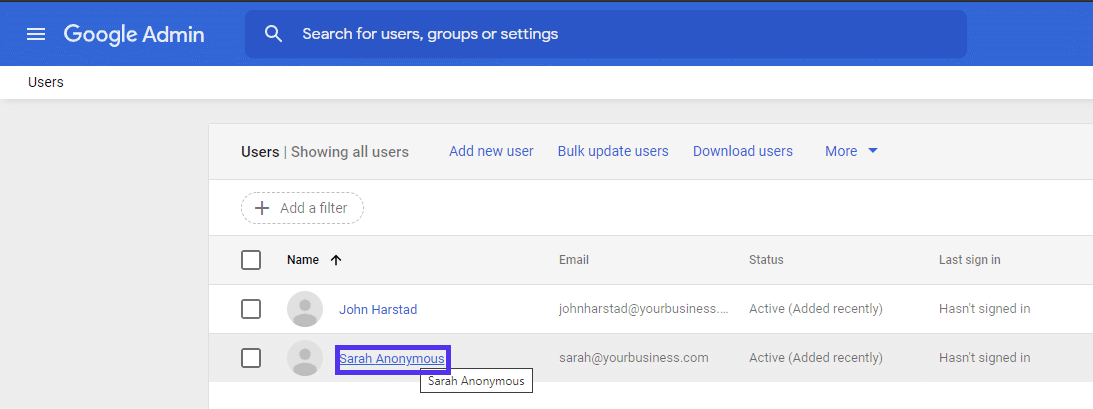
Click the User information box to expand it.
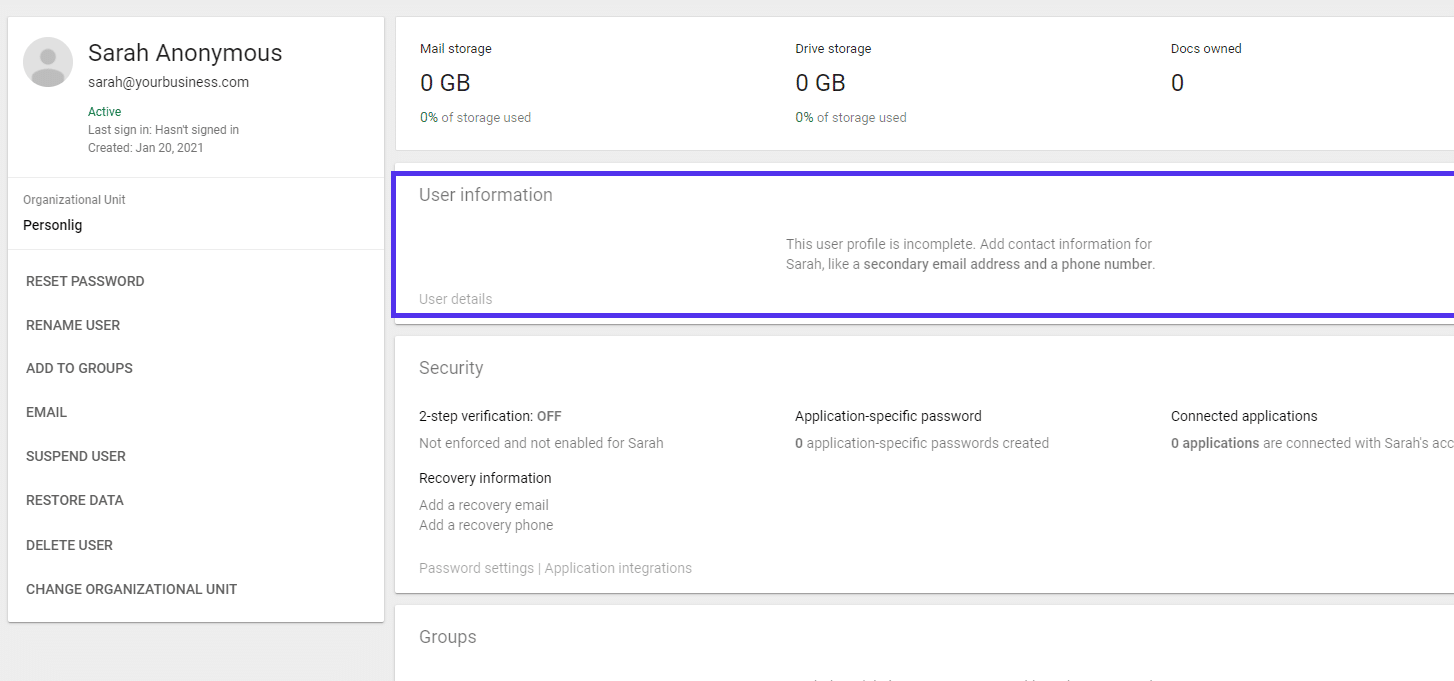
Next, expand the Alternate email addresses box.
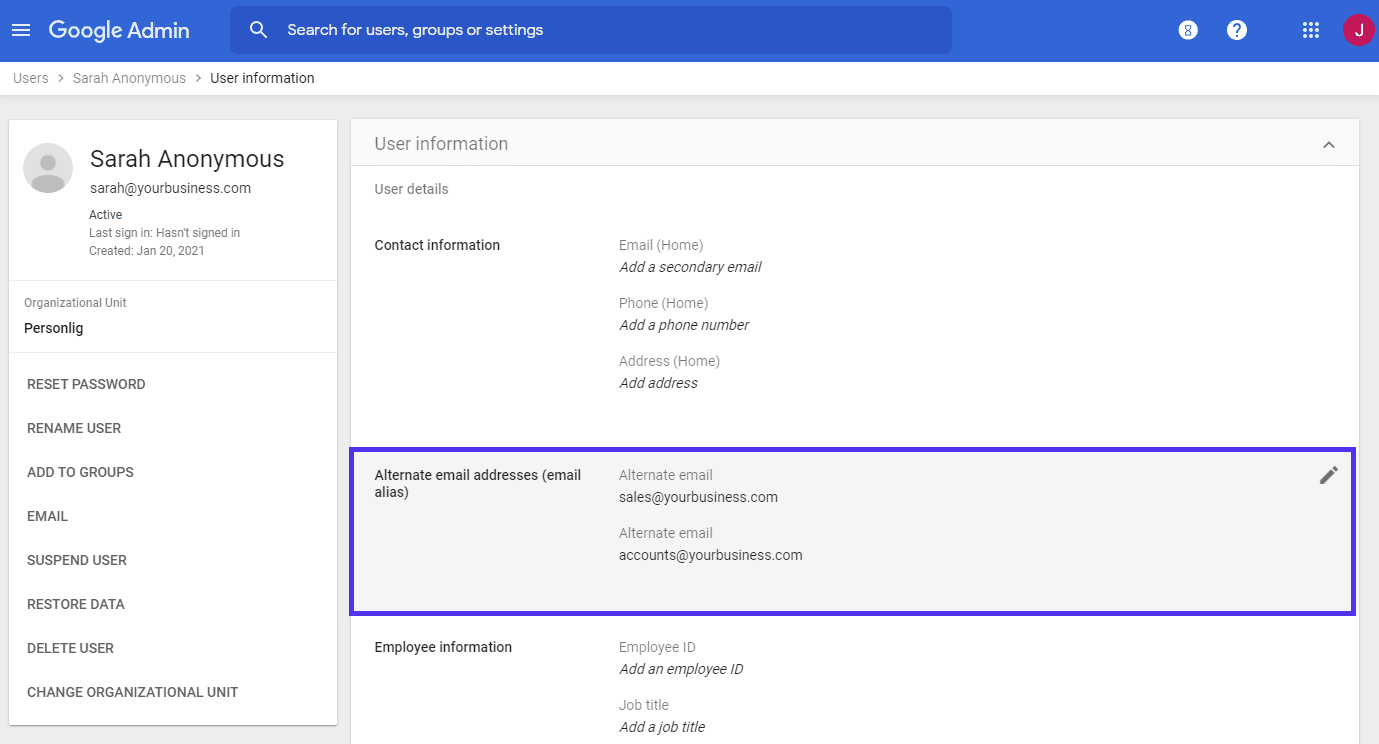
And finally, add as many email aliases as you want.
Once set up, you can precisely use these aliases from your Gmail inbox, as demonstrated in the previous section.
how many emails do i get with google workspace (g suite)?
each google workspace (formerly g suite) user can have up to 30 aliases. which provides the address of all email addresses for administrative work to a specific person.
Even if your startup only has one assistant, you can still convey the image of a great organization. just set up different emails to match different departments and requests.
for example, you can have custom emails like:
- [protected email]
- [protected email]
- [protected email]
- [protected email]
make the most of it.
Improve your email management skills today. 📩 manage multiple gmail addresses through one inbox 💥click to tweet
summary
Whether you want to do it for business purposes or have extra email addresses for personal projects, gmail makes it easy to manage multiple accounts.
all you need to do is send a confirmation email and accept it. you can have it done in a few minutes. With Google Workplace, it’s even easier than that.
The hard part is keeping track of all the email from all those sources. To help you manage your new multi-account inbox efficiently, be sure to upgrade to Gmail’s search operators…they could save you a lot of time!