Can’t be that hard to write your resume in Word, right? So why are you stuck? Overwhelmed with hundreds, no, thousands of pages and videos on how to make a resume in MS Word? Who has time to sift through that mountain of junk information to find the hidden gems?
Don’t worry. We leave no stone unturned and summarize everything you need to know about making a resume in Word.
In this guide you will learn:
- How to access and customize a ready-made Microsoft Word template design.
- How to create a resume in MS Write from scratch faster than you can say Microsoft Office, even if you’re totally new to it.
- How to format a resume so it looks better and more professional than most other resumes.
But instead of reading all this, you can move on to our resume builder that will do it for you. Not only is it easier to use than MS Word, but you can also download your finished resume as a .doc file that will make writing your resume a breeze.
Let’s get started!
Want to save time and have your resume ready in 5 minutes? Try our resume builder. It’s fast and easy to use. Plus, you’ll get ready-to-add content with just one click. See 20+ resume templates and create your resume here.
Create your resume now
Sample resume created with our builder: See more sample resumes here.
One of our users, Nikos, had this to say:
[I used] a nice template I found on Zety. My resume is now one page long, not three. With the same things.First, you may want to check if sending a resume in *.doc format is a good idea: Is a PDF resume the Better option? ?
Check out our resume templates to choose the best one for you:
- Free Resume Templates
- Best Resume Templates
- Apple Resume Templates
- Blank Resume Template
- Simple Resume Templates
- Functional Resume Templates
- Student Resume Templates
- Recent Graduates Resume Templates
- Entry Level Resume Template
- One Page Resume Template
- Google Docs Resume Templates
- Creative Resume Templates
- Great Resume Templates
- Modern Resume Templates
- Minimal Resume Templates
- Plain Text Resume Templates
Now make yourself comfortable, we are going to review, step by step, how to make a resume in Word from scratch.
Access MS Word templates
Access MS Word templates It may seem complicated, but it’s really just a few simple steps that we’ll walk you through below.
- Open a new document.
- Click ” more templates” option.

- Choose “Resumes and Cover Letters”.
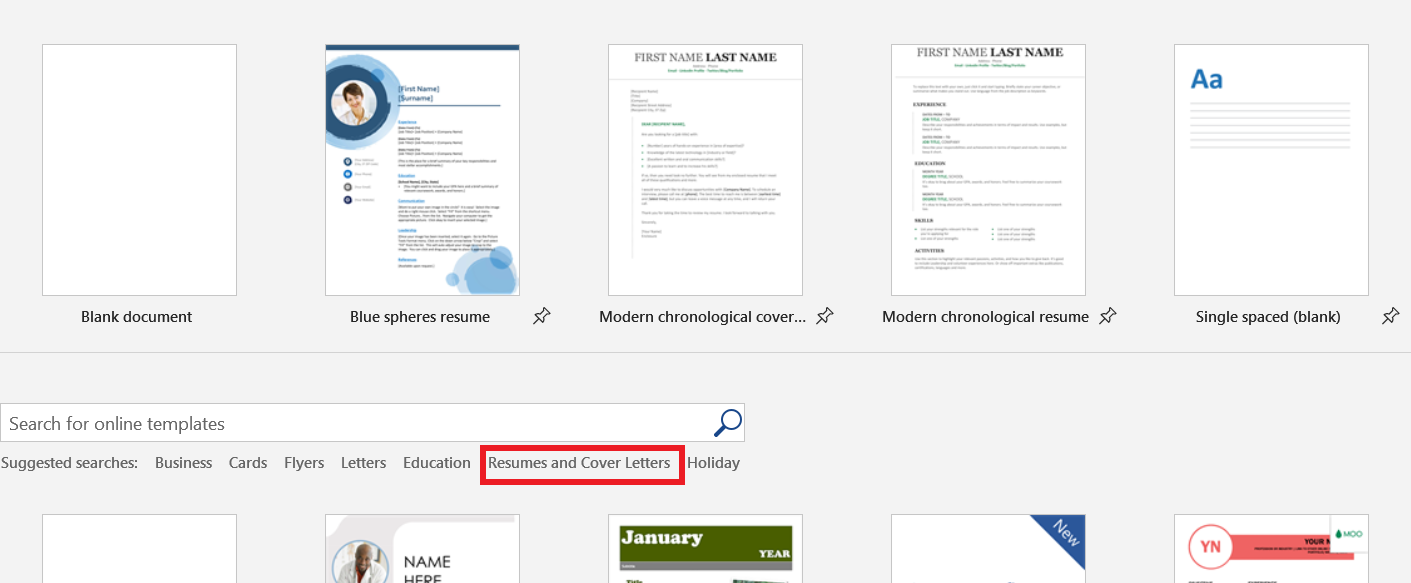
- Choose the resume template that best suits you and click on it.
- Click “Create”.
- The chosen resume template appears as a Word document and is ready to edit it with your personal information and experience !
Not sure which resume template has the most impact? our pick and tips here: 25 Resume Templates for Microsoft Word
Make a Resume Header in Word
Go to Top -below, we start with the resume header first (and the Captain Obvious award goes to…).
The head of your resume should include the following:
- your name
- current title
- phone number
- email address
- links to any online profiles or professional online sites you have.
It should look like this:

But hey, how did that cute phrase get there?
It’s simple, so let’s save it for later, once you’ve finished all your sections. If you’re really impatient, skip here to learn how to add a line in a Word resume.
How to Format a Resume Heading in Word
Since your name is important and the first thing the hiring manager sees, make sure it is larger than the rest of your text (14-16 pt).
Depending on the font you use, decide if bolding will make it look better and draw more attention.
Feel free to bold the headings of the information you’re listing (as in the example above) to make it a bit clearer to read.
Add a resume objective/summary
Double space from the last line of your header resume.
Type “Objective” or “Abstract” depending on which one you are using. Since it’s a section title, make it a little bigger than the rest of the text (14-16 pt). Also, depending on the font you’re using, make it bold.
Below the section title, write a couple of sentences about the summary or objective of your resume.
Not sure if a resume objective or resume is right for you? These two helpful guides will help solve that problem: Resume Summary Examples and Resume Objective Examples
The Objective/Summary section of your Your resume should look like this:

Write Your Experience Section in Word
Now we dive into the sections Larger resumes that take a little more time and effort to get right.
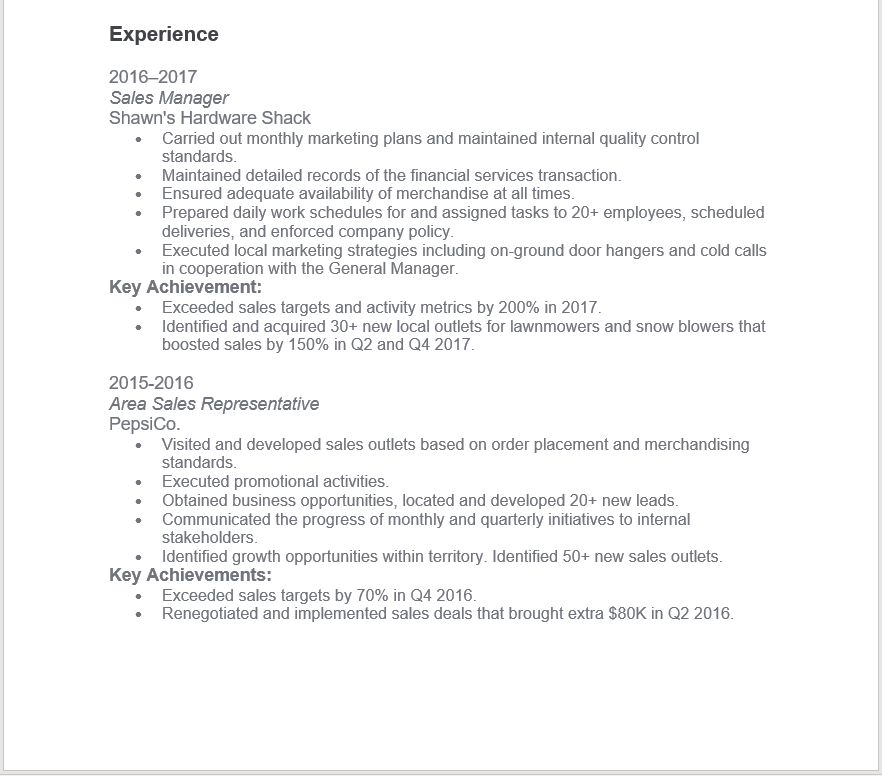
Again, double space from the last line and add the “Experience” section title in larger text like the previous section titles.
Next, add the date, your current job title, and then the company name.
Next, add a few lines describing your relevant job responsibilities in bullet points.
If you have key accomplishments you’d like to include, add “key accomplishments” after your job responsibilities and list them as well in bullets. Since “Key Accomplishments” is a subsection header, remember to make it bold, underlined, or slightly larger than the surrounding text to make it stand out more.
Need more tips on adding work experience to your summary? This guide will point you in the right direction: Resume work experience, history, and sample job descriptions
The completed work experience section should look like this:
Add your education section
The hardest part of your resume is over, phew! Now let’s move on to your education.
Follow the same rules as before, so double space and enlarge the font for the title of the “Education” resume section.
Next, add the date you graduated (or plan to graduate), the name and location of the school, and the degree you earned.
Simple!
If you’re feeling a bit lost about how to add your education to your resume, you’ll definitely find these guides very helpful: How to Put Education on a Resume and How to Include Education continue on a resume
Your education section should look like this:

Adding skills to a resume in Word
You’re now in your skills section!
This section is easy as you won’t have to do much more than list.
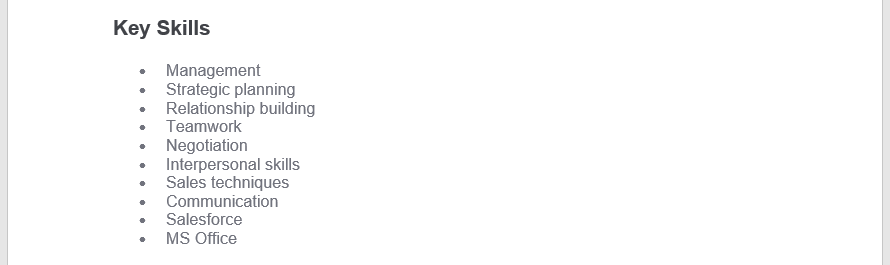
Again, double space from the last line and use th The same format for the “Abilities” section heading that you used for the rest.
Now just list your skills. You can do this as a simple list or just some kind of formatting like bullets. That’s it!
When you’re done, the skills section of your resume should look something like this:
It is important to remember that he can’t mention all the abilities he has, including competitive gum chewing. It has to be relevant.
This guide will tell you exactly which professional skills are key to landing your dream job: Key Skills to Put on a Resume
Add More Resume Sections
You’re nearing the end, yeah!
The extra section is It’s not required on your resume, but it’s a great place to showcase your accomplishments, certificates, interests, languages, and other things that don’t really fit anywhere else on your resume.
Add the relevant section headings, i.e. “Achievements”, “Certificates”, “Languages”, “Interests”, etc. and then form a simple list below.
Here’s an example:

That’s it!
Are you afraid your resume won’t pack enough punch? optimized for the job description with this handy guide: 6 tips on how to tailor your resume to a job description
When you’re done, if you put all the pieces together, your resume The entire resume should look something like this:
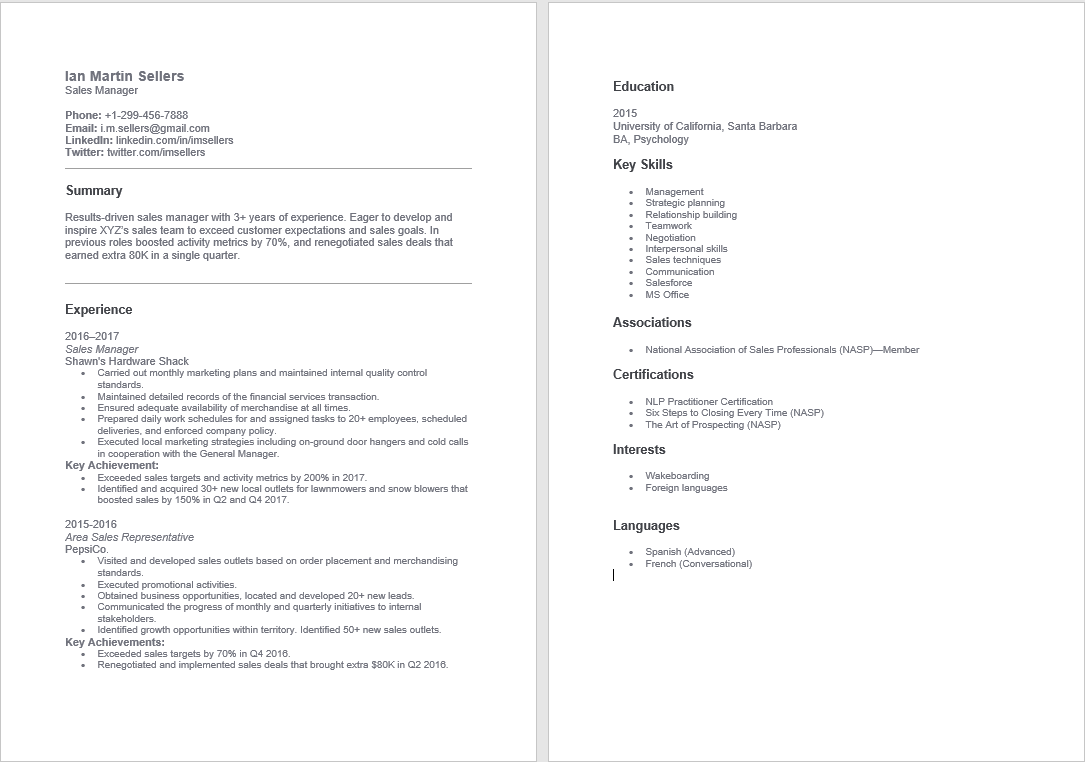
Not sure if your resume is complete?Check that you have all the crucial pieces: Parts of a resume: What are the important elements?
Now , that looks nice, but it’s not exactly something to stand out about.Want a Word resume that really stands out from the rest?
When making a resume in Word our builder, drag and drop bullets, skills and autocomplete stuff abu laughs. Spell check? Check it out. Start creating a professional resume template here for free.
When you’re done, Zety’s resume builder will grade your resume. resume and will tell you exactly how to do it better.
How to Format a Resume in Word
You’ve already learned a bit about formatting a resume in Word over the years. throughout this guide, but to recap and add some new tips for good measure.
Resume Fonts in Word
It may not seem like a really worth worrying about, but a bad font can ruin your resume faster than an unnoticed iceberg.
Use modern, professional fonts and stay away from fonts that are too creative, hard to read, or just plain comical (I’m looking at you, Comic Sans!).
For a deeper understanding of which fonts are “go” and which ones are “not”, check out this excellent guide: Best Fonts for a Resume
Resume Margins in Word
Word usually has clean margins set by default or you’re probably ready to go from scratch.
Just in case, remember that the standard margins for resumes are 1 inch on all sides.</p
Want to give more thought to measuring your margins? This guide will do just that: Proper Resume Margins
Resume Line Spacing in Word
Again, Word will usually cover this by default, but it’s good to know that 1.15 line spacing is better on a resume.
If you want to see what line spacing is set in a Word document, go to the toolbox on the Home tab and select the icon that looks like a paragraph with arrows On the left side. A drop-down menu will appear with different spacing options.
Resume Headings in Word
Like We’ve already covered, resume headings need to stand out in some way. They should definitely be a bit larger (14-16 pt) to differentiate them from the rest of the 12 pt text.
If readability of the font allows, feel free to underline or bold the resume section headings as well.
Don Don’t overdo it though. This does not look good on a resume: WORK EXPERIENCE
How to Make a Line in Word for Your Resume
Making a parting is one of those things that seems simple, but ends up giving you an aneurysm and a half when you try it.
There are actually three ways to create a line in Word: through dashes, borders, or horizontal lines.
- Use hyphens.
Type three hyphens ( – ) and then press “Enter”. Viola! You have a line!
- Use borders.
Go to the Borders option in the Home toolbox and click on the dropdown menu. Choose the first option “Bottom Border” and Word will automatically insert a line.
- Use horizontal line.
Go to borders in the Home toolbox and click the dropdown menu. Choose “Horizontal line”. Click and Word will insert a line.
Now you know more than one way to make a line in Microsoft Word!
Lines, like other formatting options, should be used from time to time to emphasize main points. You don’t want to turn your resume into a web of lines created by drunk spiders.
Plus, a great cover letter that matches your resume will give you an edge over other candidates. You can write it in our cover letter generator here. Here’s what it might look like:
See more cover letter templates and get started write .
If you’ve ever wondered how to create a resume template in Word, then you have! Now you can create several different custom resumes for your dream jobs!
Not too bad, was it?
Creating a resume in Microsoft Word may not be super easy, but it doesn’t need to be a complicated design or formatting nightmare. You can definitely create a resume in one relaxed session.
Just keep in mind:
- Keep the sections of your resume in order.
- Make your resume section headings slightly larger than the rest of the text.
- Double check if the font, margins, and line spacing are professional and legible .
- Use lines and formatting sparingly in your resumes to emphasize rather than clutter.
¿ Did you find this guide useful? Any options or templates we’ve left out that you think might be useful? Let us know!
.