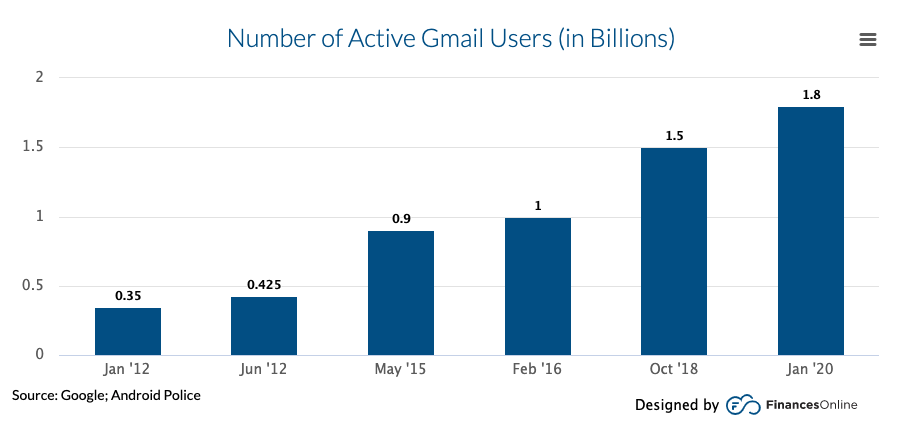
As of 2020, there were about 1.8 billion active Gmail users. With that in mind, it’s very likely that you and the people you email on a daily basis will have a gmail account by 2022.
but how do you know the emails you send are safe?
gmail uses tls (transport layer security) as a standard to keep your emails safe. While both the sender’s and recipient’s email providers require TLS to be enabled to work, there’s no need to worry: most email providers support TLS. if your email provider doesn’t, you might consider moving to one of the many that do.
While tls keeps your email secure as it’s delivered from one email inbox to another, it doesn’t have the added security of keeping that email safe once it’s arrived in the inbox.
>
however, you can do this quite easily on both free and paid gmail accounts.
here are the step by step guides for both:
for free gmail accounts use gmail confidential mode
google recently released confidential mode, so we’ll look at that first.
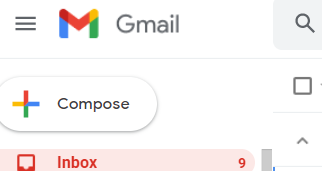
Step 1. As you may suspect, you will first need to log into gmail.
step 2. click the compose button as you normally would when sending a normal email.
Step 3. Write the email as you normally would.
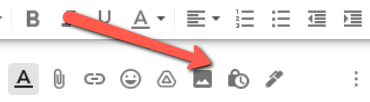
Step 4. When you are done, you should locate the confidential button. you can find this at the bottom right of the bottom ribbon.
Step 5. You should see a popup like this.
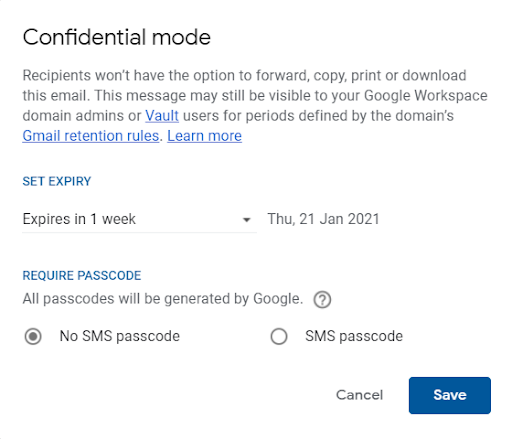
Step 6. From the set expiration dropdown menu, you need to choose how long you want the email to be active before it expires. you can choose a week, a month, three months and, a bit strangely, five years.
step 7. then choose if you want the recipient to use an sms password. this is done through the radio buttons. no sms password means the recipient will get the password via email if he doesn’t have gmail. selecting an sms passcode means that the recipient will receive the passcode via sms.
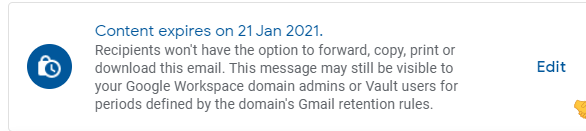
step 8. click save. you should see a box, like in the image below.
step 9. send your confidential email.
pros and cons of confidential mode
As with anything you get for free, there are some drawbacks. Here’s a quick look at the pros and cons of using confidential mode on free gmail accounts.
advantages
- this is an easy way for regulated industries to send secure email.
- removes the extra step you need to set up to send secure email if you use gmail.
cons
- It takes a few steps on the part of the email sender, and you have to do it every time.
- You will need to have the recipient’s mobile number handy so that they can receive the sms, which which may not always be the case.
- This process also requires additional steps on the part of the recipient, taking precious time out of their already hectic day.
for paid gmail accounts (google workspace), use s/mime
s/mime stands for Secure/Multipurpose Internet Mail Extension, which supports encryption in transit and encrypts your outgoing emails.
Its big drawback is that both the sender and the receiver need to have it enabled for it to work.
here’s how to enable s/mime in your google workspace.
Step 1. Go to yourgoogle admin console.
step 2. then select applications > google workspace > gmail > user settings.
Step 3. In the left navigation bar, choose the domain or organization for which you want to enable s/mime.
step 4. scroll down and select enable s/mimeencryption for sending and receiving emails.
Step 5. From here, you’ll need to go through the optional setup. as this is different for each configuration, you will need to follow the advice google provides here.
step 6. click save and you’re good to go.
how to verify that your email is encrypted
Step 1. Start composing your email as you normally would.
Step 2. Next, add the recipient in the to field.
step 3. To the right of the recipient’s name, you should now see a small lock icon. this indicates the level of encryption the recipient of the email has at their email provider.
step 4. by selecting the lock, you will be able to do two things. you can change the s/mime settings and you can also get more information about the encryption level of your recipients.
Further Reading: 10 Best Gmail Alternatives in 2021
how to verify that the encrypted email was received
step 1. open the received email.
Step 2. If you are opening on an android device, you will need to select view details followed by view security details. if you’re viewing from an iphone, you just need to tap view details.
Step 3. You should now see a colored icon that lets you know what level of encryption the sender used.
but what do the different colored icons mean?
this is s/mime enhanced encryption. this is the highest level, and only the recipient with the corresponding private key will be able to decrypt and ultimately view the message.
this is tls or standard encryption. tls or transport layer security is used as the standard when an email service does not support s/mime.
this icon means that the email is not encrypted.
There you have it! Whether you use a paid or free account, there is a way to encrypt your gmail messages relatively easily.