- 22 min read
- Mobile, JavaScript, Apps, iOS, React, Swift
- Share on Twitter, LinkedIn
The idea of creating mobile applications with JavaScript is not new. We’ve seen frameworks like Ionic and PhoneGap rise to the challenge and, to some extent, manage to garner a fair amount of support from developers and the community. On to part 2 of the tutorial.
However, these frameworks and the general idea of building mobile apps with JavaScript never really appealed to me. I always thought, why not just learn Swift/Objective-C or Java and build real apps? That definitely requires a significant amount of learning, but isn’t that what we developers do and should be good at? Quickly learn new languages and frameworks? What’s the point then? For me, the pros never outweighed the doubts.
Until I read this Chalk + Chisel article, the following line in particular:
What? Are you… serious?
Additional reading on SmashingMag:
- Why you should consider React Native for your mobile app
- Server-side rendering Using React, Node, and Express
- Scaling React Applications
- Internationalizing React Applications
Reading such a bold statement made me go ahead and give Native reacts a shot. Why not? I was already using React and I loved it. React Native is so similar to React (duh!) that you’ll feel right at home if you’re already a React developer. Even if you’re not, React is thankfully very easy to understand.
What We’ll Build
I’ve never had any luck finding the perfect wallpaper app for my iPhone in the store Of applications. On desktop, Unsplash is the one stop shop for all my wallpaper needs. On phone: Settings → Wallpaper 🙁
So unlike other tutorials where you build counters and hardly use them, in this tutorial, together we will create an app that will pull stunning random wallpapers from Unsplash, display them in an aesthetically pleasing way, and allow you to save wallpapers of your choice to the Camera Roll. Trust me, I’ve found myself using this app more than I initially thought. Even if by the end of this tutorial React Native fails to impress you , you’ll end up with a really cool wallpaper app. Isn’t that cool?
Before we get started, here are some things you should be familiar with:
- JavaScript
- Some ES2015 features, namely classes, arrow functions, destructuring, and template strings
- Mac OS X Terminal
- CSS (yes!)
- React (optional)
One more thing.As cl says Just the title, in this tutorial we will create an application for iOS Which requires, yes, even with React Native , that you are on a Mac. With React Native you can definitely create Android applications on Windows and Linux, but not on iOS. Therefore, from now on, this tutorial assumes that you are running Mac OS X.
Conclusions
By the end of this tutorial, you will be familiar enough with React Native to begin to write your own apps right away. We’ll go over setting up a project in Xcode, installing third-party components and modules, linking libraries, styling with flexbox, creating a custom gesture listener, and more.
If not If you’ve used React before, this tutorial will get you set up with React as well. React is the new JS library with a lot of potential, and I don’t see it going anywhere in the near future.
This tutorial has been divided into two parts for your convenience. Each part has five sections. In each section we meet a goal that brings us one step closer to finishing our app. I advise that once you start, you finish the whole section in one go, since they are short, and that way you will know the whole concept that I am trying to present without interrupting your flow.
For your reference , the final code of the application we are creating can be found in this GitHub repository.
1. Setting up a blank React-native project
Make sure you have Xcode 7.0 or higher installed. it’s free to download from the App Store.
Most likely (if you’re a web developer reading this in 2016) you already have Node installed. But if that’s not the case, go ahead and install Node as well. Another important tool that we will need is npm. Node comes with npm installed; However, you will need to update it as it is updated quite often. Follow this setup guide.
That’s all we’ll need. Now, from the terminal, run npm install -g react-native-cli. This will install React Native globally on your system.
If everything seems too new to you, or you just feel a bit lost in the whole installation process, the official getting started guide is always there to help you. help you.
Find a good location on your computer where you would like to set up the project. Once there, from the terminal, run react-native init SplashWalls.
This should find and install all the necessary modules and create a new folder called SplashWalls.

A great advantage of React Native is that you can write Android applications and iOS together with most of the JavaScript code shared between them. Inside the newly created folder you will find two .js files: index.android.js and index.ios.js – names are my own – explanatory. If you’re building an iOS app, you’ll work with index.ios.js; with index.android.js for an Android application; and so much for, you know, both platforms.
Since we’re building an iOS app, for the sake of this tutorial and to keep things clean, we’ll get rid of index.android. js and the entire android folder. index.ios.js is the file we will be working with. This is the file that is run for the first time when the application starts.
Next, go to the ios folder and run SplashWalls.xcodeproj.
An Xcode window like the one below should appear.

Note the warning in the image above that says “No matching provisioning profiles found”. Let’s fix this.
First, change the text in the Package Identifier field to something custom. You need to make sure that everything you enter follows the reverse DNS convention, where your organization’s domain name is reversed and suffixed with more identifiers. This convention helps distinguish your app from others on a device and in the App Store. I’ll use com.nashvail.me.tutorial.SplashWalls; just substitute your name in place of mine if you can’t seem to make something up.
Then choose your name from the team dropdown.

Click Fix Problem.
While we’re at it, watch the

Change the settings to match the following:

We’ll make the app portrait only and hide the status bar as well.
Go ahead and press the Button Run at the top left of Xcode. Doing so will open a terminal window like the one shown below. The initial transformation takes a bit of time.

Once this is done, you should see the following output in the simulator:

And with that we have completed our first section.
2. Getting wallpaper data from the API
In this section, we’ll make calls to the Unsplash.it API requesting wallpaper data. But before we start doing all the cool work, there’s some configuration to do.
Switch to ES2015 class syntax
When opening index.ios.js , you’ll notice that some initial code is already present. This is the code responsible for the output in the simulator (screenshot above).
Inside index.ios.js notice the line of code that says var SplashWalls = React.createClass ( {… }). Let’s modify this. We’ll be using the ES2015 class syntax for this tutorial.
Developers are curious souls. I know you must be wondering, why? Why switch to class syntax?
It all comes down to personal preference. I have programmed extensively in object oriented languages before and the class feels more familiar to me. Also, by using class, you also choose to keep your code a bit cleaner, since you don’t have to add commas after each method declaration.
On the other hand, when you choose a class, you don’t get features like autobinding or access to the isMounted method, which isn’t a bad thing, since you’re not really going to find yourself. at a loss for not using them.
Whichever way you choose, you are creating a class after all. My advice would be to use class. It’s a new feature and sooner or later you’ll find yourself using ES2015. And if you’re following this tutorial, you’ll have to use the class, you really don’t have a choice!
For more information, consider reading “React.Component vs React.createClass” by Naman Goel and Zach Silveira.
Once you’ve made the necessary changes, the code block should look like this:
class SplashWalls extends Component{ render() { return ( . Welcome to React Native! To get started, edit index.ios.js Press Cmd+R to reload,{‘
‘} Cmd+D or shake for developer menu . ); } };
For people new to React, the code inside the return parentheses might seem a bit strange, but it’s not rocket science, just good old XML-like syntax called JSX. Read more about it here.
Compared to the pre-class implementation, the var syntax is gone. Also render: function(){… now it’s just render(){…
Hey! But what is that Component you are extending? And you would be right to ask. If you ran the project in Xcode now, you’ll get an error that the component is undefined. You can do two things here: replace Component with React.Component; or add a new line within the block (shown below) at the top of the file.
In this and other code examples, I surround newly added lines with // to make it easier for you to compare the code you are writing with the one shown here. Just make sure that if you copy the code from the samples, you won’t end up copying // along with the actual code. Since JSX doesn’t support /***/ comments, you’ll end up crashing the app if you include them in your JSX code.
var { AppRegistry, StyleSheet, Tex .t, View, /***/ Component /*** / } = React;
All the above code block does is save you a couple of keystrokes. For example, if you didn’t include these lines of code at the top, you would have to write React.AppRegistry instead of just AppRegistry every time you wanted to. Pretty fucking cool! It is not like this? Okay, not so much.
Go back to Xcode and run the project one more time to make sure you didn’t break anything in the process.
Everything ok? Excellent! Let’s continue.
Inside the SplashWalls class, the first thing we need to do is add a constructor. Inside the constructor we will initialize our state variables. The only two state variables we’ll need at this point are an array, wallJSON, which will store all the JSON data fetched from the API, and isLoading, which is a boolean variable, meaning it will have a value of true or FALSE. Having this state variable will help us show and hide the loading screen depending on whether or not the data has loaded.
Inside the SplashWalls class, add the constructor as shown below.
p>class SplashWalls extends Component{ /***/ constructor(props) { super(props); this.state = {wallsJSON: [], isLoading: true }; } /***/ … }
Next, we’ll define a fetchWallsJSON method, which, well, does what it says on the tin. Leave a couple of lines below the closing brace of the constructor and add the following lines of code:
fetchWallsJSON() { console.log(‘Wallpapers will be fetched’); }
We would like this function to fire once our component has been successfully mounted. Add the componentDidMount method. Most of the described methods go inside the SplashWalls class; I won’t forget to mention when they don’t.
componentDidMount is a lifecycle method that fires immediately after the first render occurs.
Here’s a good explanation of all the React component lifecycle methods. Just remember that since we’re using the newer class syntax, we can omit the getInitialState method. It is replaced by a declaration of this.state variable in the constructor.
It’s a good idea to organize your methods inside your class in a clean way. I like to keep all custom methods separate from lifecycle methods. You should too.
Let’s declare componentDidMount:
componentDidMount() { this.fetchWallsJSON(); }
Notice that inside the fetchWallsJSON method we have logged a message to the console, but where is the console? Hold down.
Make sure you have the Simulator window selected and press Cmd + Control + Z.From the menu that appears, select Debug in Chrome. This opens a new tab. While on the same tab, head over to Developer Tools (Option + Cmd + J). In the console, you will find the message “Wallpapers will be recovered”.

Keep the debugger open for now. Visit unsplash.it/list in a new tab. You should see the entire viewport filled with a JSON array. Each element in the array is a JavaScript object that contains data for a single wallpaper. This is the data we’ll filter and grab random wallpapers.
First let’s make fetchWallsJSON do more than just log a message to the console.
fetchWallsJSON() { /*** / var url = ‘https://unsplash.it/list’; fetch(url) .then( response => response.json() ) .then( jsonData => { console.log(jsonData); }) .catch( error => console.log(‘Fetch error’ + error) ) ; /***/ }
Refresh the simulator (Cmd + R) or better, enable live reloading by pressing Cmd + Ctrl + Z and selecting Enable live reloading. By enabling live reloading, you don’t have to update the simulator every time you make a change to your code. Just save to the IDE and the simulator will update automatically. If you’ve ever developed an app in Xcode or Android Studio, you’ll find this feature particularly amazing, since you don’t have to hit the Run button and recompile the app every time you build it. change. These small parts make React Native much more attractive.
Upon refreshing, after waiting a few seconds, you should see the following output in the console:
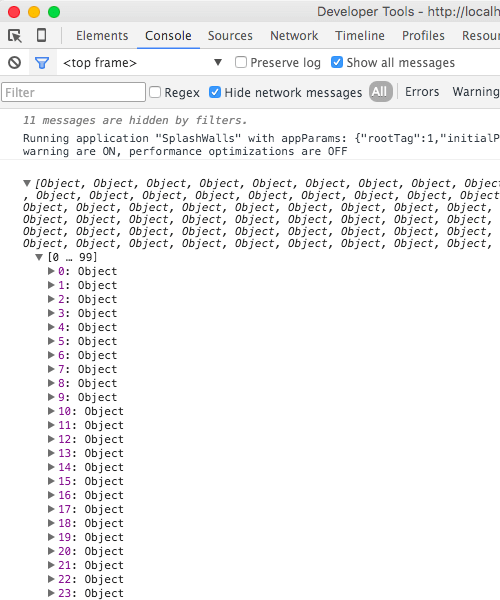
Okay, now we can get wallpaper JSON data from the API. As you may have noticed, there is a small delay before the data is logged to the console. This is because data is being downloaded from the servers in the background, which takes time.
This seems like a perfect time to add a loading screen.
3 . Adding a Loading Screen
At the end of this section, a loading screen will appear while the JSON data is being downloaded.
First, get rid of everything inside the class SplashWall render and add these lines of code:
render() { var {isLoading} = this.state; if(isLoading) returns this.renderLoadingMessage(); otherwise return this.renderResults(); }
We have two new methods. Let’s declare them too, while we’re at it
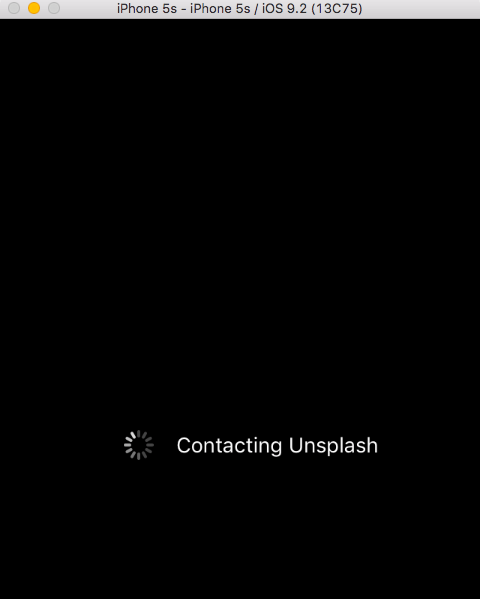
renderLoadingMessage() { return ( . Contacting Unsplash . ); } renderResults() { return ( . Loaded Data .); }
Depending on the value of the isLoading state variable, two different View components will be rendered. If isLoading is true, we display a spinning loading arrow followed by the text “Contacting Unsplash”; when isLoading is false (implying that data has been loaded), we display the results, which as of now is just a text component saying “Data Loaded”.
But we’re missing something here: we are not changing the value of isLoading once our data has been downloaded. Let’s do just that. Go to the fetchWallsJSON method and below the line that logs jsonData to the console, add an additional line to update isLoading.
fetchWallsJSON() { var url = ‘https://unsplash.it/list’; fetch(url) .then( response => response.json() ) .then( jsonData => { console.log(jsonData); /***/ this.setState({isLoading: false}); //update isLoading /***/ }) .catch( error => console.log(‘Get error’ + error) ); }
setState is one of the React Components API methods. It is the main method used to trigger UI updates.
Notice that in renderLoadingMessage we have a new component: ActivityIndicatorIOS (simply put, the spinner). We need to import this component before we can use it. Remember when we imported Component where we saved a couple of keystrokes? We’ll need to do just that.
var { AppRegistry, StyleSheet, Tex .t, View, Component, /***/ ActivityIndicatorIOS // Add new component /***/ } = React;
We need to do one more thing before we can see the results. Notice that the view that contains the ActivityIndicatorIOS has a style set to styles.loadingContainer. We’ll have to define that. Look for the line that says var styles = StyleSheet.create({…. Here you will see that there are already some styles defined. These styles are responsible for styling the initial “Welcome to React Native” message in the simulator.Get rid of all predefined styles and add just one for loadingContainer as shown.
var styles = StyleSheet.create({ /***/ loadingContainer: { flex: 1, flexDirection: ‘row’, justifyContent: ‘center ‘, alignItems: ‘center’, backgroundColor: ‘#000’ } /***/ });
All styles you apply to components in React Native are declared as shown above. StyleSheet.create takes a JavaScript object containing styles as an argument, and the styles can then be accessed using the dot[.] operator. Just like we apply the style to the containing view as follows.
You can also declare styles inline:
However, this makes our code a bit messy. When you have multiple styles applied to a component, it’s always a good idea to store them in a variable.
Styles are a lot like CSS, right? You know why? Because they are supposed to, they are no different. This makes React Native even easier for web developers to learn. When you build an app in a dedicated IDE (Xcode, for example), you’re provided with a StoryBoard to directly drag and drop UI elements like buttons and labels onto the screen. You can’t do that in React Native, which, trust me, isn’t a bad thing.
React Native makes heavy use of flexboxing to position elements on the screen. Once you comfortable with flexbox, placing items around it is a doddle. Any day now I’ll take the flexbox layout over StoryBoard, period. It’s just one of those things you have to try yourself to tell the difference.
Save your changes, head over to the simulator and press Cmd + R. You should see the loading screen.
After a few seconds, you should see the screen that says “Data Loaded”.

4. Filtering and selecting random wallpapers
In this section, we will filter the wallpaper data and select a specific number of random wallpapers.
This section will focus more on JavaScript than in React Native. We will go through the creation of a new module (file) that will handle the generation of random numbers. If modules in JavaScript sound new to you, consider reviewing the Node.js module docs.
Go to the line above the class declaration and declare a new constant that will tell the application how many random wallpapers that you have to choose; let’s make it five.
const NUM_WALLPAPERS = 5;
Now we are going to create a module that will help us with the generation of random numbers. This module will export two functions. Let’s take a look at each of them.
- Unique Random Numbers: This function takes three arguments. The first is the number of random numbers to return. The next two arguments define the range in which the random numbers will be returned, namely lowerLimit and upperLimit. Calling the function uniqueRandomNumbers(5, 10, 20) will return an array of five unique random numbers between 10 and 20.
- randomNumberInRange: This function takes two arguments that define the lower and upper bound respectively between the which returns a single random number. For example, calling randomNumberInRange(2, 10) returns a unique random number between 2 and 10.
We could have merged both functions into one, but since I’m a code preacher good quality, I follow the principle of single responsibility. SRP states, more or less, that each function must do one thing well and do nothing else. Following good programming principles saves you a lot of future headaches.
Create a new file in the same directory as index.ios.js. If we wanted to, we could put these functions in index.ios.js, but think about it: for the kind of purpose this new file serves, we can simply copy this file and paste it into any of our new projects that require random number generation and use them from there. Also, this keeps the code inside index.ios.js much cleaner.
We call the file RandManager.js. Its contents are shown below:
module.exports = { uniqueRandomNumbers(numRandomNumbers, lowerLimit, upperLimit) { var uniqueNumbers = []; while( uniqueNumber.length != numberRandomNumbers ) { var CurrentRandomNumber = this.RandomNumberInRange(lowBound,UpBound); if(uniquenumbers.indexOf(currentRandomNumber) === -1 ) uniqueNumbers.push(currentRandomNumber); } returns unique numbers; }, randomNumberInRange(lowerLimit, upperLimit) { return Math.floor( Math.random() * (1 + upperLimit – lowerLimit) ) + lowerLimit; } };
Don’t forget to request the RandManager module in index.ios.js. Just add: var RandManager = require(‘./RandManager.js’); below strict use; statement. Once we have the RandManager ready, we’ll make the following changes to our fetchWallsJSON function:
fetchWallsJSON() { var url = ‘https://unsplash.it/list’; fetch(url) .then( response => response.json() ) .then( jsonData => { /***/ var randomIds = RandManager.uniqueRandomNumbers(NUM_WALLPAPERS, 0, jsonData.length);var walls = []; randomIds.forEach(randomId => {walls.push(jsonData[randomId]); }); this.setState({ isLoading: false, wallsJSON: [].concat(walls) }); /***/ }) . catch( error => console.log(‘JSON Fetch error: ‘ + error) ); }
Once we have jsonData, we retrieve unique random numbers from the RandManager and store them in the randomIds array. We then loop through this array, picking up wallpaper data objects present at a particular random ID and storing them in the walls array.
We then update our state variables: isLoading to false since the data has been loaded. Discharged; and wallsJSON to the walls.
To see the results, modify the renderResults function to look like the following:
renderResults() { /***/ var {wallsJSON, isLoading} = this.state; if( !isLoading ) { return ( . {wallsJSON.map((wallpaper, index) => { return( {wallpaper.id} ); })} . ); } /***/ }
In the first line inside renderResults we are using a new ES2015 feature called destructuring. With destructuring we have managed to replace:
var wallsJSON = this.state.wallsJSON, isLoading = this.state.isLoading;
with:
var {wallsJSON, isLoading} = this.state;
ES2015 is pretty cool, I assure you.
Then, inside the view, we loop through the retrieved data wallsJSON data using map. Anytime you want to loop through a collection in JSX, use the map construct.
Also, when looping through an array or collection and rendering a component, React Native requires you to provide a key, a unique ID for each one. of the secondary components it represents. That’s why you see a key property at
Once the simulator is updated…

We see five different random wallpaper IDs being displayed. Change {wallpaper.id} to {wallpaper.author} in renderResults and you should see something like the following.

Great! Now we are talking. Now we can get and filter the specified number (five, in this case) of random wallpapers from the API. Looks like we’re done with this section. High five!
5. Adding the Swiper Component
In this section we will include a Swiper component in our application. This component will allow us to display wallpapers in a swipeable container.
You will learn how to include a third-party React Native component in our app. React Native has amazing community support, and on GitHub there’s a rich collection of all sorts of different third-party components.
For our purposes, we’ll be using react-native-swiper.
Go to the project directory in the terminal and run the following command:
npm install react-native-swiper -save
Now requires the Swiper component: add var Swiper = require(‘react-native-swiper’) ; then use strict.
Let’s test our newly included Swiper component.
Go to the renderResults method and replace View with Swiper. After doing this, your renderResults should look like this:
renderResults() { var {wallsJSON, isLoading} = this.state; if( !isLoading ) { return ( /***/ /***/ {wallsJSON.map((wallpaper, index) => { return( {wallpaper screen.author} ); })} /***/ /***/ ); } }
Doing so results in the following:

Instead of displaying the author names as a list, we’ve put them in a slider that gives you each wallpaper its own screen, which we can slide.We need to do a couple more things here: add the following attributes to the Swiper component as shown.
<Swiper /***/ dot.{} activeDot.{} loop={false} {wallsJSON.map((wallpaper, index) => { return( {wallpaper.author} ); })}
Doing this:
- Style the pagination dots (makes them the blue dots you see at the bottom of the image above is white and larger).
- Disable continuous scrolling (loop={false}). That is, once you get to the final page and swipe more, it won’t go back to the first wallpaper.
- It will fire on the MomentumScrollEnd (which we’ll dig into in the next part of the tutorial) every time we finish swiping .
With this, we have reached the end of the first part. What a trip!
To summarize the React Native tutorial
- In the first section you learned how to set up a blank React Native project in Xcode.
- In the second section, we talked about ES2015 classes and why you should prefer the newer syntax along with creating state variables and getting raw data from the API.
- In the Section three, we discuss the dynamic representation of the application based on the value that a state variable has. Also, we did some flexbox positioning.
- In the fourth section, we created a completely new module to handle the random number generation and also revised it to include it in the main file.
- In the last section we added the first third-party component to our app, which was a piece of cake, thanks to Node.
So far, to be honest, our app doesn’t look very special. I know. In the next part, we’ll add actual images instead of just author names. Not only that, we’ll do some advanced stuff like creating a custom double tap listener using the PanHandler API. You’ll learn how to link a library in Xcode and give your app access to the Camera Roll. We will also create our own component and much more. Sounds interesting? See you in the next part.
.