Email is one of the most effective and affordable forms of marketing on the Internet. It is often an inexpensive way to attract a large audience in a very short time. However, building an email list of WordPress users is not easy to do.
Over the years, many have felt that email marketing has lost its touch, but this simply it isn’t true. It is still worth every website’s time to build a mailing list because there are over four billion daily email users. That’s half the world’s population.
It’s a great platform for businesses big and small to reach customers and help increase sales. In fact, this is exactly why 64% of small businesses use email marketing to reach customers.
In terms of return on investment (ROI), email marketing by email is unmatched.
Today, we’ll show you several ways to build a WordPress email list and how to get the most out of the experience.
Why They Matter email lists
Email is one of the most common forms of communication on the Internet. Thanks to the integration of applications in smartphones, these messages can be sent to practically anyone, regardless of where they are.
This means that it has a greater potential to keep users informed about any aspect of the website or business.</p
Sending emails to people does more than just give you a way to let others know. You can also play a role in marketing products and increasing revenue.
For example, it wouldn’t take much to offer 20% off select items to those who opt-in to a mailing list e-commerce.
A single message can be sent en masse to thousands of recipients. Of course, this depends on how many people are actually on the list, but the point is that you can engage them all with just one email.
More importantly, since those people voluntarily opt-in to receive emails . , they want to be exposed to your marketing.
Is email better than social media?
For those with limited time and resources, you may be wondering if email marketing email is a better option. than social media.
While there are many exceptions to this, on average, most businesses are more successful with email marketing.
The truth is, while you can reach a lot of people on social media, most people will quickly scroll through any ad you buy.
Or ignore your latest posts on the platform, especially if they only highlight new products or sales .
And this is because most people use social media for fun. They don’t go to the platform to make a purchase or find a new product, they want to chat with friends and family.
While your mailing list subscribers actually opt in to receive these notifications.
p>
If you can only pick one, email will give you more for your money.
How to Build a WordPress User Email List
Today , we will go over several methods to build an email list. Each has its own advantages and disadvantages, so choose the one that best suits your needs.
Method 1: Use WordPress User Registrations
Step 1: Install Profile Builder
Perhaps one of the easiest methods for building a WordPress email list is to make it part of the signup process. When using plugins like Profile Builder, users need to activate their profiles via email confirmation.
This helps verify that the address is correct and active.
This it’s just a part of the plugin. You can do a lot more like adding a “Forgot your password?” under login or even restrict what users can access in terms of products they can view (perfect for membership stores).
But first, we need to install it:
Click on Plugins and select the Add New option.

Browse, install, and activate Profile Builder.

Step 2: Add Email to the Signup Process
Thankfully, Adding email as part of the registration process is really simple and only requires a few mouse clicks.
Click on Profile Builder and select the Settings option.

You’ll see several tabs in this section, but for the purpose of this tutorial, there’s only one option we need to worry about is General Settings.
Locate the Email Confirmation On option. This is a drop down box that will allow you to select “Yes” or “No” and select the “Yes” option.

You might want to take a few minutes to see what else the plugin offers.
For example, you can also customize the requirements for creating a password.Website security has never been more important, so making sure visitors use a strong password is a great idea.
Click the “Save Changes” button at the bottom of the page. screen when you are satisfied with the changes you have made. have done.
Now you can start building a mailing list based on the people who sign up to your website. It’s a good idea to let people know before signing up that the email address can be used to send messages.
This will help reduce the risk of being seen as spam.
Profile Builder also comes with a WordPress widget that sits in the sidebar for user logins.
Method 2: Using Jetpack for follower signups
Step 1 : Install Jetpack
Jetpack is an amazing plugin, especially for beginners. It comes with more than 20 common tools to help any website developer. These tools include a module called “Subscriptions”.
This allows visitors to subscribe to the website or to the comment section of any post.
It will also help to develop a mailing list email accessible through the WordPress.com interface. Of course, this is just one of Jetpack’s many features. It is often described as the Swiss Army knife of WordPress.
You can do almost anything, all you need to do is activate the correct module.
To enable subscriptions in Jetpack:
Install and activate the plugin, “Jetpack” if it is not already in your WordPress tools.

Step 2: Enable email subscription
The first thing we need to do is enable the email subscription option.
Note: You will need to configure Jetpack to use before proceeding. The setup process is extremely short, and you simply need to create an account and choose a plan, and yes, the free plan is fine.
To do that, click on Jetpack and select the Settings option.
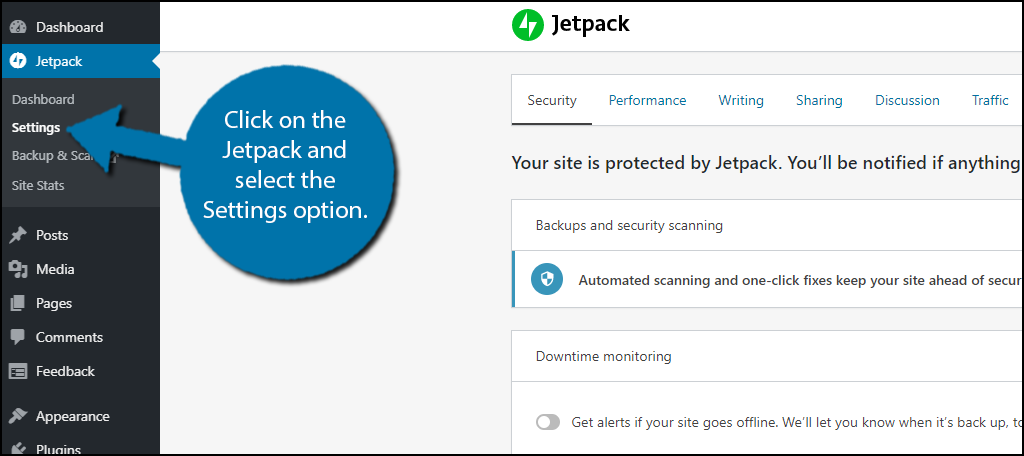
On the settings screen, you will see an area with five sections: Security, Performance, Writing, Sharing, Discussion, and Traffic
Click the Discussion tab.
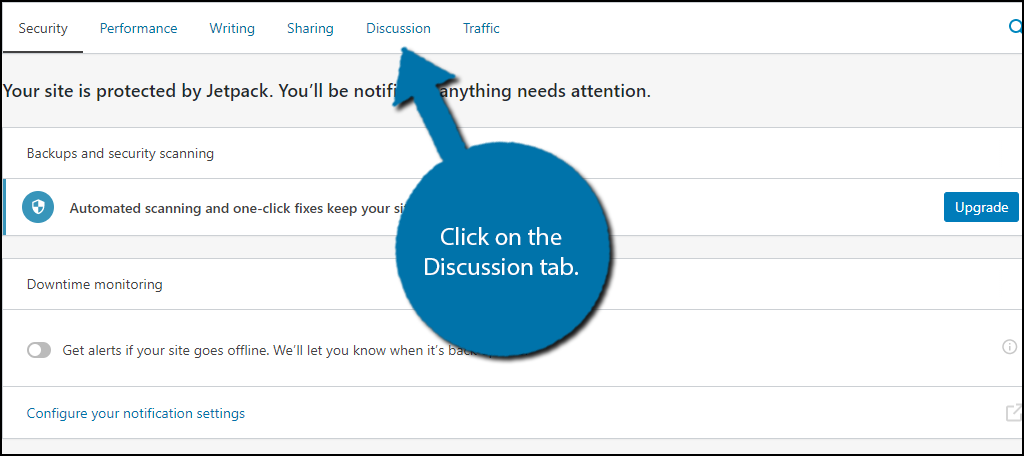
At the bottom , you should see a Subscriptions section. It has a series of slider switches that you can interact with. By default, this feature is disabled. So first, you need to activate it by sliding the first switch.
Once activated, you can adjust the other two sliders. These allow visitors to subscribe to your website and specific comments for email notifications. By default, both should be on, and you should leave them that way.
So the end result should be all three switches are on.

These settings are saved automatically, so that you can exit this section.
Step 3: Add the Subscription Widget
Now you should take the time to add the subscriptions widget to your sidebar. This will make it easier for visitors to sign up, which will speed up your growth.
Click Appearance and select the Widgets option.

Locate the “Blog Subscriptions (Jetpack)” widget and drag it to your sidebar or the corresponding widget area.
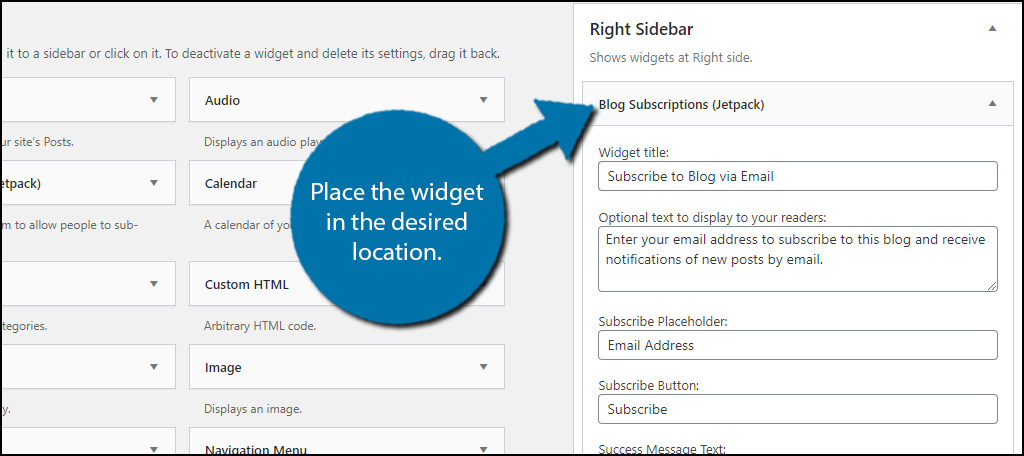
You can customize this widget to your liking, which you should, after all, the default name is “Blog”. Once you do, click the “Save” button at the bottom.
Step 4: Personalize the email
And finally, since you’re sending emails, it’s a smart move to check your emails.
Click Settings and select the Reading option.

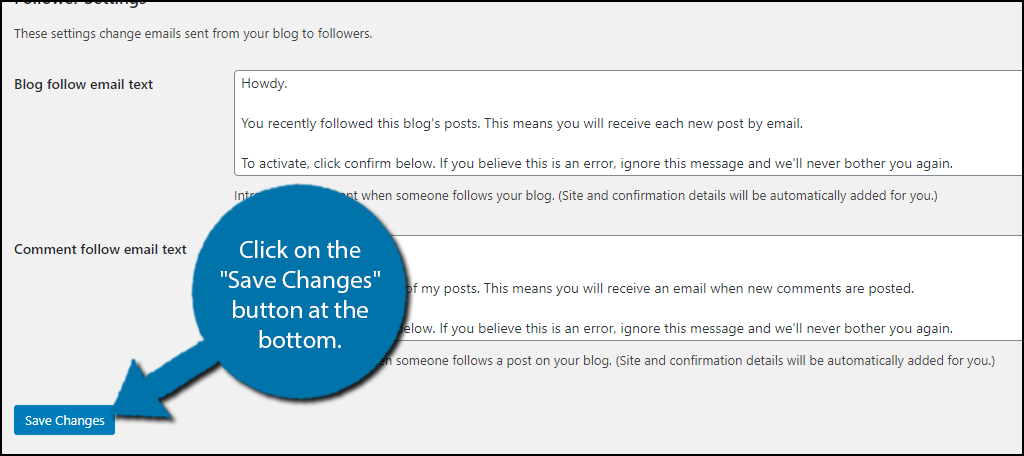
Scroll down until you see the Followers Settings section and you will see the emails default email. I highly recommend customizing these messages to match the tone and personality of your blog.
And there’s a very good reason to.
People will start ignoring your emails if they sound generic or look very basic. The world of email marketing has grown significantly and basic emails can no longer survive in today’s climate.
Instead, everything must meet certain quality standards.
When you’re done editing the post, click the “Save Changes” button at the bottom.
Your website will now collect subscribers, whether you choose to do so from the sidebar or while leaving a comment, these users will be automatically informed by Jetpack when new comments are added or whenever a new post is created.
The Jetpack email list by going to the module settings and clicking the link, this will take you to WordPress.com and show you the list of registered accounts.
Method 3: Using MailChimp
Step 1: Install MailChimp
Last but not least, let’s take a look at MailChimp, it’s a dedicated email marketing tool that has all the bells and whistles, and still is. one of the most popular options in WordPress today.</p
While MailChimp offers several pl In addition to premium, it’s worth noting their free plan to give it a try.
While MailChimp is its own service, you do need to create an account to use, you’ll still need to install the plugin. In this case, you need to install and activate the MC4WP: Mailchimp plugin for WordPress.

Now, you may have seen the plugin and immediately wondered why I chose this one. This plugin allows you to create a subscription form for multiple subscriber lists. All of the actual email creation is done directly in MailChimp.
This plugin is an invaluable tool, and is backed by 2 million active subscribers.
Note: Actually, there are several plugins that can add MailChimp in WordPress. It all comes down to which one you prefer.
Step 2 – Connect Your MailChimp Account
The first thing you need to do is connect your MailChimp account with the plugin. You will do this by entering the API key that you can find in your account.
Note: While you are in your MailChimp account, you should take a few moments and add your contacts to the subscriber list. . This information must be entered into your MailChimp account instead of WordPress.
Click on MC4WP and select the MailChimp option.

Here, you can enter the API key of your account. It’s free to sign up, so you shouldn’t have any trouble getting one.

Don’t forget to save your changes.
Step 3: Create a form
The main feature of the plugin is to create forms. They are quite simple in nature. Simply choose the list of subscribers they apply to (this information is entered on the MailChimp website) and choose the form elements.
Click the Form option.
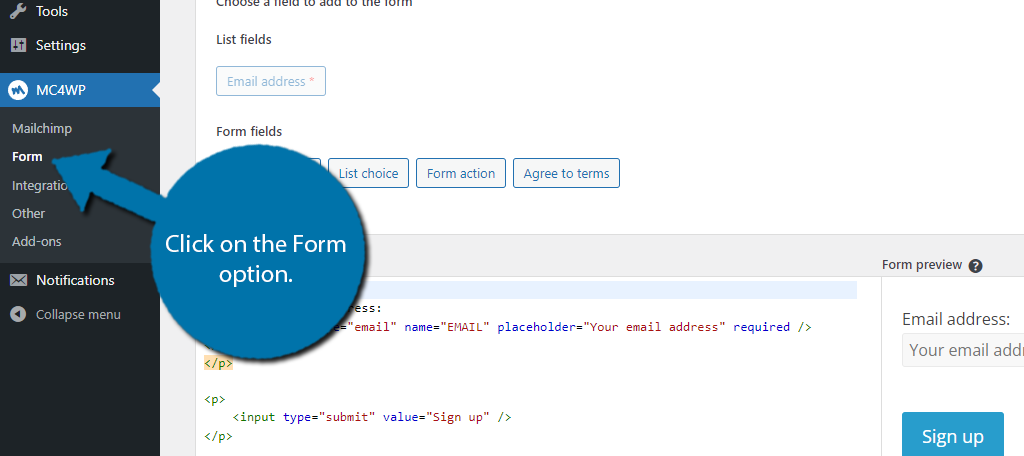
Available fields will depend of the type of MailChimp account you have. Just select the subscriber list and click on the form element you want to add. You can also code how the form looks if you want.
You can see what it looks like in the preview area of the form.

All that remains is to create a email in MailChimp. This is by far the easiest way to grow your subscriber list in WordPress, so make sure you create a form that will grab the visitor’s attention.
Do I need an email marketing service? ?
At first, you can definitely manage your WordPress email list manually. But as the list grows, this will no longer be a viable option.
Most websites will use an email marketing service instead. These services allow you to easily add new subscribers to receive regular emails. They provide multiple email templates that you can use to create the message you want to send.
There are several email marketing campaign services available that offer incredible incentives beyond the power of your website. These are methods that can bolster any commercial marketing campaign.
Most of these will include easy-to-use message generators and detailed reports based on user actions. They offer information on various things, such as how often messages are opened and whether a recipient has clicked on any in-text links.
One of the most attractive features of these systems is that everyone process is capable of being automated. This means that all you need is a list of addresses and the system will do the rest.
Some can also include personalization templates so that each recipient will read their name in the message.
Give people a reason to open your emails
Adding new subscribers to your email list in WordPress isn’t easy, but it’s even harder to keep them viewing your emails .
Let’s be honest, if you get multiple emails from the same sender and none of them contain any worthwhile information, you’ll probably label the message as spam or look for the unsubscribe option.
That’s why every email should be worth the time it takes to read it.
For example, one approach is to offer exclusive offers to email subscribers. This not only keeps subscribers happy, but also encourages others to sign up for those offers. Even a small discount will suffice.
Another approach is to include a general discount code. This doesn’t have to be in every email, but if subscribers know there’s a possibility, they’re more likely to open the email to verify it.
Of course, discounts and deals aren’t the only way to keep subscribers.
The rest of the content you include is important. Sending emails with broken links or that are simply poorly designed will not help keep subscribers on your mailing list. Instead, you should customize them to look fancy, just like WordPress.
Avoid Spamming Subscribers to a WordPress Email List
Now you might get the impression that As long as you provide valuable subscribers in one email, you can send as many as you want. And more emails means more exposure for your brand, so it only makes sense to send a lot.
DO NOT do this.
Email users Today they can pick up spam. If they feel your emails are too frequent, they will unsubscribe or mark your email as spam. The latter is much worse than unsubscribing because it makes you think your emails are reaching more people than they are.
And if the behavior continues, it’s not just subscribers who will tag your email. like spam. Email services like Gmail or Yahoo will eventually determine that the emails you send are spam.
Once you’re tagged as spam, your days of email marketing are over.
Start Emailing Visitors Today
Sending email has been an activity millions of people used before the Internet became the platform we know and love today. It’s a cost-effective platform that will help you engage customers on a massive scale.
Start building your email lists today.
With so many options available that are free to use, you you have nothing to lose except a little time.
What kind of additions do you use on your site to engage your visitors after they leave? How many visitors have subscribed to your website?
.