You are viewing: How to create an email list in outlook 365 At HTTLEN: Share Good Articles
You can create a group to store a list of people you want to send email to. Use this group to send messages to multiple contacts without having to enter each contact separately in the message.
Groups you create in your Contacts folder are not available to other users at the University.
How to create a contact group in Office 365
- Click the menu icon in Office 365, and then from the pop-up menu, select People </li
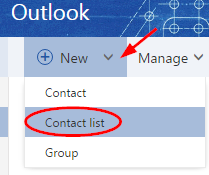
- Expand New and select Contact List

- Enter a name for the list Think about privacy… When naming your contact group, think about making sure it has a name that is obviously different from any other contact lists or resource accounts you use. This is essential to avoid inadvertently sending information to the wrong person/group. Most importantly, the first few letters are not the same as any other email address or group you use. For example, instead of having the groups “Childhood Year 1” and “Childhood Year 2”, perhaps call them “Childhood Year 1” and “Childhood Year 2” so that the first letters are different. The auto-complete feature in Outlook can be very useful, but only if it auto-completes with the correct address.
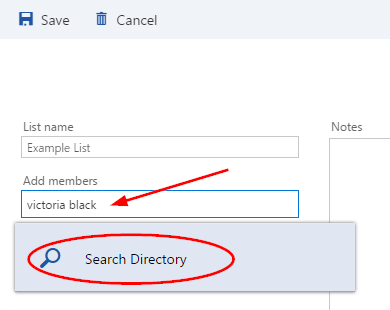
- In the Add Members box, start typing the name of someone you you want to add the list. If the person is not already one of your contacts, you can choose to search the University directory
- Once you have clicked on the person’s name, they will be added to the list
- Add all the people you want to be on in the list in the same way.
- When you’re done, click Save
Note: To edit your list later, Click the Office 365 pop-up menu icon, click People. Find the name of your list, check the box next to the name, and then click Edit on the menu bar.
Using your contact group in an email
- In Office 365 Email, click the To: button in the To field of a new email

- Select the double arrows to expand the side panel
- Select Your Contacts
- Depending on how many contacts you have, you may be able to see the name of the group. If not, you can search for it
- Once found, click the plus symbol to the right of the group name and you will see it appear in the “To” field

- Select Save and you will return to the email.
Please note: If you email this group regularly, you can start typing the name of the group in the To field and select it. of suggested  Please note the privacy caution above when naming the group.
Learn more about contact lists for Office 365 from Microsoft.
.