The website
Angular 2 finally made it to beta, which was the mental milestone for me to start writing Angular 2 content. Hooray! To get started, I wanted to port a project that I covered in my Building a Website with AngularJS Pt 2 – Now Stateful! publish to Angular 2. Let’s get acquainted with the brave new world of Angular 2 by creating a simple website so we can see how the Angular 2 pieces come together.
Get the code from the repository Next and let’s go!
Code
Compile and Serve
There are two main ways to compile and serve an Angular 2 application and that is through webpack or systemjs. I personally fell in love with the webpack, and that’s what we’ll be using to build this app. I’m not going to go too deep into the details of the build system, as there are plenty of quality Angular 2 Webpack seed projects that will power your Angular 2 application. See the Resources section for more details.
<p You can write your Angular 2 app in ES5, EcmaScript 2015, or TypeScript, but the framework lends itself better to TypeScript. Writing TypeScript requires a bit more setup, but the ROI is ten times higher in terms of productivity and clarity in our code.
When you download the repository, the first thing you need to do is run npm i to install the package dependencies.
tsconfig.json
One of the package dependencies we are going to install is typescript >, which we’ll use to compile our TypeScript into the negative Type O version of JavaScript: the universal donor, ES5. We need to tell our compiler how we want to compile our TypeScript files, so we need to create a tsconfig.json file. The file below reads pretty well, but I’ll mention the two most important properties and those are “target”: “ES5” and “module”: “commonjs”. We are setting our version of ECMAScript to ES5 and indicating that we want to generate our modules in the commonjs format.
{ “compilerOptions”: { “target”: “es5 “, “module”: “commonjs”, “emitDecoratorMetadata”: true, “experimentalDecorators”: true, “sourceMap”: true, “suppressImplicitAnyIndexErrors”: true }, “compileOnSave”: false, “buildOnSave”: false, “exclude” : [ “node_modules” ], “filesGlob”: [ “app/**/*.ts”, “typings/browser.d.ts” ], “atom”: { “rewriteTsconfig”: false } }
packages .json
We’ve defined how we want our TypeScript to be compiled, now we need to create a hook to do the job. In our packages.json file, we’ve defined a task that uses webpack-dev-server together with webpack to bundle our TypeScript modules and other assets into a single javascript file and then deliver the app.
“scripts”: { “start”: “webpack-dev-server -inline -colors -watch -display-error-details -display-cached -port 3001 -hot” }
Then we call npm start when we’re ready to compile and serve our app.
Bootstrapping
The first Angular 2 mystery for me was “How the hell do I run the app!? .” The second mystery was “Okay, how do I start the application?”
The first thing we need to do to start our application is include the necessary resources in our index.html Because webpack bundles everything into a single file, we only need to include one bundle.js file.
Inside the file boot.ts, we are importing three components; bootstrap , ROUTER_PROVIDERS and AppComponent . We are also importing core-js which is an ES6 polyfill, as well as zone.js which Angular uses for change detection. We then instantiate our application and specify our root level component, AppComponent, and inject ROUTER_PROVIDERS as a submodule.
import ‘core-js’; import ‘zone.js/dist/zone’; import {bootstrap} from ‘@angular/platform-browser-dynamic’; import {ROUTER_PROVIDERS} from ‘@angular/router’; import {AppComponent} from ‘./app.component’; bootstrap(AppComponent, [ROUTER_PROVIDERS]);
Going back to our index.html file, our markup entry point occurs at this line: Loading…. Angular instantiated AppComponent and loaded its template into the app element.
Loading…
We’ve just covered how to compile, serve, and bootstrap an Angular 2 application. Let’s break down what a component consists of so we can make the connection between how AppComponent becomes application > on our page.
The App Component
Angular components are really just JavaScript classes lovingly wrapped in Angular 2 metadata.
Yes you haven’t read my CIDER : My checklist for creating an Angular 2 component post, check it out. You will see the CIDER process in effect here.
The first thing I do when creating a component is to create the class. Usually I’ll just remove it because it improves it later.
export class AppComponent {}
The next thing we’ll do is import our dependencies. In this case, we only need to import Component from @angular/core.
import {Component} from ‘@angular/core’;
And from here, we’re going to decorate our class by adding @Component metadata to tell our app what we want the AppComponent to look like. . behave. We’re defining the HTML element we want this class to target in the selector property, as well as setting our template and styles via templateUrl and styleUrls strong>, respectively. We are also injecting ROUTER_DIRECTIVES into our component in the directives property.
@Component({ selector: ‘app’, templateUrl: require(‘app/app. component .html’), styleUrls: [require(‘app/app.component.css’)], directives: [ROUTER_DIRECTIVES] }) export class AppComponent {}
This is where things get a bit fluid in the process CIDER . I often spend n iterations improving my components and this could go on indefinitely. In our case, we want to add routing to our application, so we are going to import the appropriate modules and decorate our component with @Routes. To enable routing, let’s import Routes and ROUTER_DIRECTIVES as well as AboutComponent, ExperimentsComponent and HomeComponent.
import {Routes, ROUTER_DIRECTIVES} from ‘@angular/router’; import {AboutComponent} from ‘./about/about.component’; import {ExperimentsComponent} from ‘./experiments/experiments.component’; import {HomeComponent} from ‘./home/home.component’;
We need the routing modules to enable routing and additional components for our routing table. We are passing a series of route definitions to @Routes, which tell us the route of the route and what component is to map to that route. We want our home route to be our default route; To accomplish this, we do two things. First, we add a ‘/’ route to handle navigations to the top-level domain and redirect them to the home component. Then we’ll add a ‘/*’ route to capture all other routes and redirect them to the startup component. We’ll go back and talk about how templates handle routes in a bit, but the basic gist of the new component router in Angular 2 is that each route is assigned to a component. Not quite sure why they called it ComponentRouter though… JK!
@Routes([ {route: ‘/’, component: HomeComponent }, {route: ‘/home ‘, component: HomeComponent }, {path: ‘/about’, component: AboutComponent }, {path: ‘/experiments’, component: ExperimentsComponent }, {path: ‘/*’, component: HomeComponent } ])
We’re also going to import StateService and ExperimentsService into our component and then decorate our component in the providers property that we’ll cover later. And now I present the AppComponent of #drumRoll in its entirety!
import {Component} from ‘@angular/core’; import {Routes, ROUTER_DIRECTIVES} from ‘@angular/router’; import {AboutComponent} from ‘./about/about.component’; import {ExperimentsComponent} from ‘./experiments/experiments.component’; import {HomeComponent} from ‘./home/home.component’; import {StateService} from ‘./common/state.service’; import {ExperimentsService} from ‘./common/experiments.service’; @Component({ selector: ‘app’, templateUrl: require(‘app/app.component.html’), styleUrls: [require(‘app/app.component.css’)], directives: [ROUTER_DIRECTIVES], providers: [StateService, ExperimentsService], }) @Routes([ {route: ‘/’, component: HomeComponent }, {route: ‘/home’, component: HomeComponent}, {route: ‘/about’, component: AboutComponent }, {path: ‘/experiments’, component: ExperimentsComponent }, {path: ‘/*’, component: HomeComponent } ]) export class AppComponent {}
I really get how everything up to this point has been self-documenting in its intentions and purpose. There isn’t a single piece in this component that you can’t immediately figure out what its purpose is.
To complete the CIDER process, we are going to repeat the process on a subcomponent.The three components defined in our router are pretty much the same, so we’re going to focus on the HomeComponent. There are some additional functions in ExperimentComponent that we will cover in a later post.
The Home Component
Let’s start with our HomeComponent > defining the HomeComponent class. We are also defining and initializing two properties in our class for the component’s title and body. This is a website, after all!
export class HomeComponent { title: string = ‘Home Page’; body: string = ‘This is the body of the house’; }
We’ll import the appropriate dependencies.
import {Component} from ‘@angular/core’;
Then we’ll decorate our class and set the selector and templateUrl properties.
@Component({ selector: ‘home’, templateUrl: require(‘ app/ home/home.component.html’) })
We are going to use the StateService to store the state between our routes and add it to our component. Dependency injection within Angular 2 happens in the constructor, so we’ll add one to our class and inject the StateService. Components also have lifecycle hooks that we can use to sequence units of work. In our case, we want to retrieve and configure our StateService message when our component initializes. We’ll use the ngOnInit hook to make that call for us. We don’t have to import OnInit and extend the class, but it’s a good idea semantically.
import {Component, OnInit} from ‘@angular/core’; import {StateService} from ‘../common/state.service’; export class HomeComponent implements OnInit { title: string = ‘Home Page’; body: string = ‘This is the body of the house’; message: string; constructor(private stateService: StateService) { } ngOnInit() { this.message = this.stateService.getMessage(); } updateMessage(m: string): void { this.stateService.setMessage(m); } }
Again, incredibly self-documenting and easy to read.
The StateService
Let’s create the StateService class and then expose it as a provider of our app. I’m not going to offer too many comments on the code below because it is very rudimentary in nature. It is essentially a service that has a getter and a setter for a message property.
export class StateService { private message = ‘Hello Message’; getMessage(): string { returns this.message; }; setMessage(newMessage: string): void { this.message = newMessage; }; }
Things get interesting when we want to make StateService available to inject into other components. The first step is to import Injectable into our class.
import {Injectable} from ‘@angular/core’;
And then we decorate it with @Injectable() .
@Injectable() export class StateService { private message = ‘Greeting Message’; getMessage(): string { returns this.message; }; setMessage(newMessage: string): void { this.message = newMessage; }; }
We’ve spent most of our time working on building our components, so let us complete the cycle by locking our templates.
Views
Using home .component.html As our point of reference, let’s take a quick tour of the updated template syntax in Angular 2.
One-way data binding is defined exactly as in Angular 1. x via string interpolation.
{{title}}
{{body}}
User input events are no longer caught by adding custom Angular directives to our markup, but by capturing the native DOM events and wrapping them in parentheses. We can see this in the following code when we catch the click event with (click)=”updateMessage(message)” and call updateMessage.
The two-way data binding in Angular 2 is basically a one-way data binding applied twice. We talked about binding using string interpolation, but we can also bind properties using the bracket syntax. We combine property binding (component to view) and event binding (view to component) to achieve two-way data binding. The solution is surprisingly simple as we wrap our ngModel in square brackets and parentheses to make [(ngModel)]=”message”.
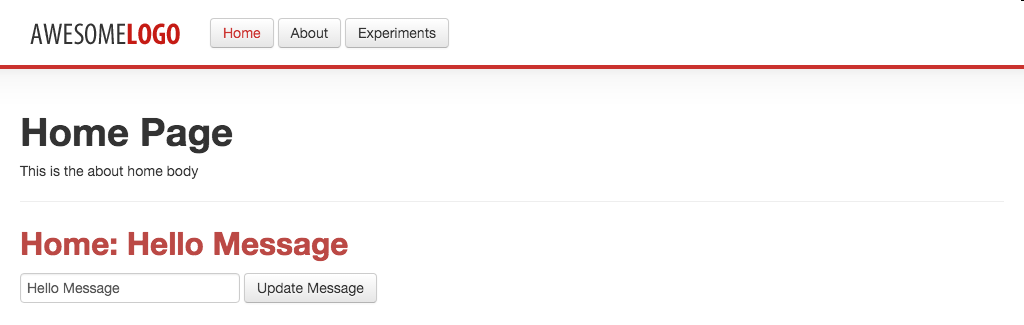
For context, here is the complete starter template.
{{title}}
{{body}}
Start: {{message}}
Routing Markup
We return to where we started as we wrap up this lesson with a discussion of template syntax for routing in app.component.html. When we define a route, where is the component template actually inserted? We configure that insertion point with router-outlet. It’s the new ngView.
Great! So how do we navigate from one route to another? We do that with routerLink in the form of [routerLink]=”[‘/home’]” as we can see in the code below.
And all app.component.html.
Review
Before to increase your billable rates by 15% and get started selling this sweet Angular 2 website, let’s do a quick review of what we cover d.
- We define how we want to compile TypeScript in our tsconfig.json file.
- We used webpack-dev-server to compile and serve our application.
- We saw how to use CIDER to build our AppComponent and HomeComponent
- We learned how to create an injectable service using @Injectable() metadata.
- We took an abbreviated tour of the syntax of Angular 2 link.
- We learned how to add routes to our view with router-outlet and the syntax for navigating to a route using routerLink li>
Let me know what else you’d like to learn in the comments below, and in the meantime… #highFive!
Resources
Template Syntax Angular 2
Documentation for tsconfig.json
TypeScript Documentation
Webpack
Webpack Dev Server
Code.