Do you want to learn how to create a website with HTML and CSS?
You are in the right place. In this guide, we show you all the steps to go from a blank screen to a website that is functional, optimized and quite attractive at the same time.
But first, what is HTML and CSS?
Well, you could look up both terms on Wikipedia, but those definitions aren’t very easy to read. Let’s simplify things a bit:
- HTML (HyperText Markup Language) defines the structure and content of a web page: where things go, how they are presented and what’s on the page
- CSS (Cascading Style Sheets) defines the style/presentation of a web page and the elements it contains
You really can’t have one without the other: the two work together to create the final web page, its design, and the content it contains.
Note; When we say “a web page”, what we mean is a single HTML document, a single page that is part of your website. While “a website” is the whole thing: your entire site with all its individual web pages.
If you think this is too complicated, we recommend creating a website using WordPress or choosing one of the websites. builders.
Gather your resources before you begin:
So, the first thing you need, even before creating a website with HTML and CSS, is a web server (hosting) . Don’t worry though; you don’t have to buy your own machine. Many web hosting companies will sell you a simple hosting service on their machines. Just Google “hosting” and choose something that isn’t too expensive or check out our web hosting reviews.
With your server in order, the next thing you need is a domain name. The domain name is what the website identifies itself on the web. For example, the domain name of this site is websitesetup.org.
When you have a domain name and a server, you can connect the two together.
To resolve this with No If there is a problem on your end, we recommend that you sign up with a company like Bluehost.
They will take care of all the setup for you. Which means they will: (a) set up a hosting account for you, (b) register a domain name on your behalf, (c)set everything up to work together, and (d) gives you access to an easy-to-use control panel.
Go ahead and sign up for any of the services web hosting, well wait. When you return and have your web server configured and ready to go, move on to the next step.
P.S. If you just want to experiment with an HTML website on your computer and don’t intend to make it public, use local web server software. The one we recommend and like to use is called XAMPP. It has versions for both Mac and PC, and is easy to use. Here is a guide on how to install it on your computer.
1. Learn the basics of HTML
The main element of an HTML structure is an HTML tag.
A tag, for example, looks like this:
SOMETHING
Here, we’re dealing with a tag. This will bold a piece of text between the opening tag () and the closing tag (). In this case, that piece of text is SOMETHING.
But there are other tags, just to name a few:
- … will put in italicizes the text between the opening and closing tags
- … will underline it
-
…
is a paragraph of text
-
…
is the main header of the page
In addition to those simple tags, there are also more complex tags. For example, if you want to create a list like this:
- Item 1
- Item 2
- Item 3
… you can do it with the following HTML code:
- Item 1
- Item 2
- Point 3
Or, if you want to add a link to another page, like this:
This is a link to our home page
… you can do that with this snippet:
This is a link to my home page
Read this for the full list of tags HTML. It will be useful when you create a website with HTML and CSS.
2. Understanding HTML Document Structure
Think of your HTML page as if it were built out of Legos. You put different bricks on top of each other to end up with a bigger structure.
But instead of Lego bricks, you get HTML tags…
This is the largest HTML document structure. simple:
Hello world!
My first web page.
You can take the code above, copy and paste it into a new file, save the document as index.html, and it will be a perfectly valid HTML page.
Let’s explain the individual parts of this code:
- – the initial declaration of the document
- – another statement; says that what follows is an HTML document written in English
- – marks the start of the header section; the header section is where all the basic parameters of the page go; most of them will not be displayed on the screen; they simply define what happens under the hood
- – defines which charset is used to write the document; it is not necessary to spend too much time on this; just use this statement as is
-
Hello world! – the title of the page; this is what people will see in the title bar of their browsers, for example:
- : marks the start of the body section; this is where all the content of the page goes; it is the main part of an HTML document; let us emphasize this, this section is where you will include all the content that should appear on the page
-
Hello world!
– the main header of the page. page
-
My first web page.
– a single paragraph of text
- – the closing tag of the entire HTML document</li
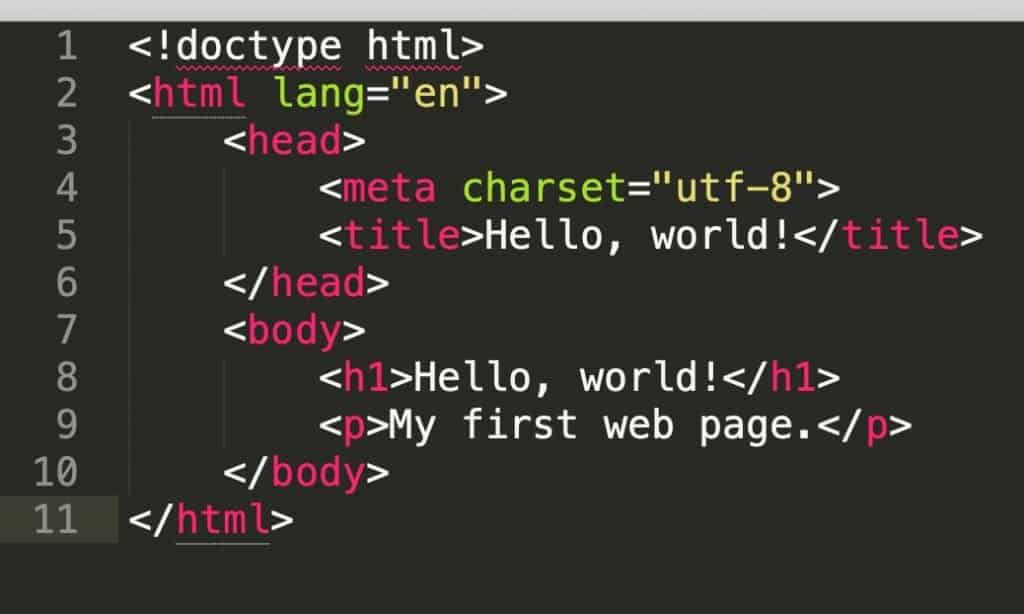
An important note here. Working on an HTML file in a basic text application or a complex word processor like MS Word is not a good experience. To make things easier for you, install an HTML editor called Sublime Text. It has versions for both Mac and PC, and it’s free.
Why is it better? Among other things, it will colorize the syntax of an HTML file. That is, it will visually distinguish your HTML tags from text content, tag parameters, and other values. Basically, everything will become readable. This is what our simple HTML structure looks like in Sublime Text:

Okay, back on topic. You can take that new index.html file of yours, copy it to where your web server’s main directory is, and then view that page by browsing through a web browser. Don’t get too excited though; this page will be pretty ugly (see below).
Okay, so the page is ugly, how can I make it not?
3. Get to Know CSS Selectors
Just like HTML has its tags, CSS has selectors.
Selectors describe how a given element should behave in terms of your appearance. This is an example of a CSS selector:
p { font-size: 18px; }
This selector indicates that all HTML
tags within the document will have a font size of 18 pixels.
However, a more practical way to use CSS selectors is to not constrain all tags of a given type to a certain style, but instead create different “classes” and assign them to the tags one by one.
For example, a class selector in CSS looks like this:
.normal text { font-size: 18px; }
Notice the period (.) before the class name (regular text). With the “normal text” class defined, we can now assign that class to those specific HTML tags that we want to be 18px in size.
For example:
This text will be 18 pixels.
Let’s take another minute to explain all the elements of that CSS snippet above:
- .normal- text – definition of class; everything after the class name and between the opening and closing brackets {} defines what elements assigned to this class will look like
- font size: a CSS property example
- 18px – a value assigned to the property
There are a bunch of other CSS properties besides the font size above. Here’s the full list if you’re curious.
4. Prepare a CSS Style Sheet
An HTML document is very structural: each element has its place, and the order of the elements is crucial to the final construction and appearance of the web page in question. A CSS document is much less so.
CSS documents are often called style sheets. Basically, a CSS style sheet is a list of all the class definitions that are used in the corresponding HTML document. The order of class definitions is not that crucial most of the time (at least for simple layouts).
The way to put together a CSS style sheet is to define each class one by one, and then testing if the result in the layout of your page is what you wanted.
This sounds like a tedious job, and it is.
But we will make things easier for you and we will not force you to do so. Learn HTML and CSS design by hand. Instead of teaching you everything from scratch, we’ll take a living organism and dissect its elements.
This is where something called Bootstrap comes into play.
5.Download/Install Bootstrap
Bootstrap is an open source toolset for building a website with HTML and CSS.
In plain language, Bootstrap takes care of the basic structure of a website. HTML document and CSS style sheet for you. It offers a framework that ensures that the main scaffolding of your web page is ready and optimized for further development.
In essence, Bootstrap allows you not to start from scratch, but to jump straight to the fun part. With it, you don’t have to work through the often boring early stages of building a website with HTML and CSS.
There are two paths you can take:
- Option (a) : Learn Bootstrap – Go to the Bootstrap home page, download the Bootstrap core package, and start building on top of it.
- Option (b ): Take a shortcut: Get a beautifully designed Bootstrap starter pack with a ready-made demo web page.
The (a) It might have a bit of a learning curve at first, but it’s by no means the worst way to approach building a website with HTML and CSS. Once you get the hang of Bootstrap’s basic structure, it might be easier for you to create new pages and make them look exactly the way you want them to. The Bootstrap documentation is a great place to start on this path.
We’re going to go with option (b) for this guide. We’re doing this for a couple of reasons, the main one being:
Starting with a ready-made structure saves a lot of pain trying to figure out the basic needs of an HTML document. This allows you to focus on the cool stuff, like styling the content and making it look good.
In short, learning things this way will get you a better result faster, which we assume is what you want .
6. Choose a layout
When you’re building a website with HTML and CSS, you can use any Bootstrap template you like. They should all work pretty similarly.
However, for this guide, we are going to use one of the Start Bootstrap templates. They have a good selection of free templates that are optimized, work smoothly, and are also very well designed.
The theme we are going to use is called Creative. The final effect we are after will look like this:

To get started with the creative template, click the Free Download button on the on the right (on this page) and save the zip package to your desktop.
Unzip the package and move its contents to the home directory of your local web server or web hosting account.
Now open that location through your web browser. You will see the standard version of the template:

It already looks great, but now it’s time to learn how to use HTML and CSS to make it exactly what you want it to be.
7. Customize your website with HTML and CSS
Let’s work on the home page design first. This will show us how to replace graphics, text, and adjust everything in general.
We’ve talked briefly about the header section of an HTML document before. Let’s take a deeper look at it here.
When you open your Bootstrap site’s index.html file in Sublime Text, you’ll see a header section like this (we removed all the non-crucial stuff from this code to for clarity *):
* Apart from the above, there was also code for loading Google Fonts, Font Awesome icons, and a lightbox module for images displayed on the page.
Most of the statements here I know that, but there are a couple of new ones:
- First of all, everything between the brackets is an HTML comment. It does not appear on the final page.
- – is one of the Bootstrap’s own declaration tags. Defines the size of the website’s viewport.
- : This line loads the CSS stylesheet of the creative template and it also contains Bootstrap’s default stylesheet.
Let’s modify that last declaration, the line that loads the CSS, to make it easier to work with later.
Change that line to :
This is just one small difference: it will load the non-abbreviated version of the same CSS sheet . This version is simply easier to modify.
Now scroll down to the bottom of the index.html file. You will see the following lines just before the closing body tag:
They are responsible for loading JavaScript files that handle some of the more visual interactions of the layout. For example, when you click the About link in the top menu, you will be seamlessly taken to the About block on the same page; this, among other things, is done through JavaScript. We don’t need to worry about understanding this code at this point. Let’s save this for another time.
Instead, let’s work on adding our own content to the page:
8. Add content and images
The first thing you’ll want to do is change the title of the page.
1. Change the title
Find the title tag in the header section and replace the text between the tags with something of your own:
2. Customize the hero section
The hero section is what we call this block:

It would be great to have our own content inside. To modify this block, go back to your index.html file and find this section:
…
This whole block of code controls what’s in the main section.
Here are some new tags:
-
– this is a tag that defines that this entire section is the header of the page; this tag has a pair of brothers and sisters in the form of the tag and the -
tag – this is a general CSS tag indicating that what follows is a separate section (also known as splitting) in the HTML document; using it makes it easier to visually distinguish individual sections on the page
You’ll also notice that some of the other tags (which we already know) appear to be a bit more complex, with multiple CSS classes assigned to them. them. For example:
…
The classes assigned to the
tag here are uppercase text – white font-weight-bold.
These classes are created by Bootstrap and the theme developer Creative. The good news is that you too are free to use them when building a website with HTML and CSS.
Frankly, you can customize any tag you add to your page structure by assigning any number of classes to it.
If you want to see the full list of available classes, you can open the main creative.css file found in the Creative theme’s css subdirectory.
Get an idea of all of these classes may seem intimidating at first, but it’s actually much easier than it sounds.
For example, one of the classes assigned to some of the paragraphs in our index.html file is font-weight- Light . When you go into the creative.css file and press ctrl+f to find the class name, you’ll see that it simply sets the font-weight parameter like this:
.font-weight-light { font-weight: 300; }
Modifying the default texts in the index.html file is very simple. Just find the tag you want to edit and change what’s between the opening and closing tags.
For example, to change the main title, just change this:
Your Favorite…
To something like the following:
Admire my HTML website!
You can do the same with all the paragraphs and other tags on the page.
The important thing is that you can also add new paragraphs freely. For example, we can take the paragraph that’s already on the page, make a copy of it, and paste it just below the original paragraph; like this:
Starting Bootstrap can…
Paragraph 2
Now, with the texts fixed, let’s replace the image in the background.
This is a bit trickier to do as it requires us to go into the CSS stylesheet file and make the modification there. As you can see in the HTML code for the Masthead section, no tag would indicate including an image on the page in any way. This is all done through CSS.
When you look again at the entire block of code that handles the Masthead section, you’ll see that it’s assigned to a class called masthead. This line of code handles the class assignment:
The masthead class is the one that puts an image in the background of the whole block.
Let’s go open the creative.css file again and find the “masthead” class:
header.masthead { padding-top: 10rem; bottom padding: calc(10rem – 72px); background: linear gradient(down, rgba(92, 77, 66, 0.8) 0%, rgba(92, 77, 66, 0.8) 100%), url(“../img/bg-masthead .jpg” ); background position: center; background repeat: no repeat; background attachment: scroll; background size: cover; }
This code does all kinds of fancy things to our image (like adding an overlay, shading, etc.), but the important part is this: url(“../img/bg-masthead.jpg”). This is the line that indicates where to find the background image. It will be in the img subdirectory.
To change this background image, take any image of your own, copy it into the img subdirectory, and then copy and paste its name in place of the original bg header. .jpg file. In short, change this: url(“../img/bg-masthead.jpg”) to this: url(“../img/YOURFILE.jpg”).
3. Customize the other blocks on the page
As you review the index.html file, you’ll notice that there are already many different sections on the page. We have a section for navigation, and above a block, some services, a portfolio, a call to action, a contact block, and a footer.
Although there is different content in all these sections , the sections themselves are similar in structure. They all have roughly the same set of HTML tags, just different CSS classes assigned to them.
The best way to modify the page to suit your needs is to go through the blocks one by one and experiment with changing things around.
In addition to changing the texts, you can also move entire sections (the parts between the
tags). Granted, you do have to do it by hand (cutting and then pasting elements into place), but it’s still easy to do. That said, there are two fairly basic modifications we haven’t made. t talked yet. We’ll cover these next:
9. Fine tuning colors and fonts
Changing colors or fonts is very easy to do in HTML and CSS. The simplest thing you can do is assign an inline style to an HTML tag. For example:
Red text
In HTML, colors are represented by their hexadecimal values; “#FF0000” is red. Here’s a table of all the other standard colors.
A better way to assign colors is through the CSS style sheet. For example, to get the same effect as the code above, we could put this in our CSS style sheet:
p.red { color: #FF0000; }
And then use the following piece of HTML code in the main document:
Red text
That second method is basically how you do things in Bootstrap .
To change the color of any text on the page, first find the tag responsible for styling that text, and then go to the style sheet and modify the corresponding class, or create a new class. </p
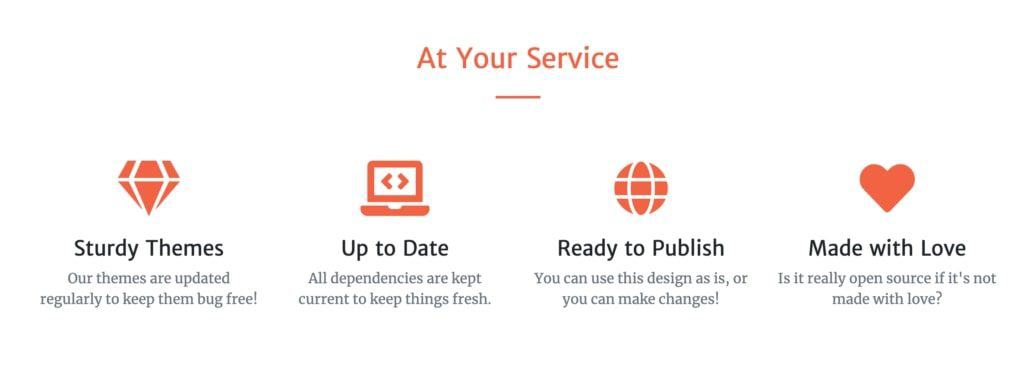
Here’s an example; say you want to change the color of the header that says “At Your Service”. Currently, it is black, and this is the code that handles it:
At your service
To change its color, the best way is to create a new class called, say, .text-orange and set the color value there, like so:
.text-orange { color: #f4623a !important; }
* The !important will make sure that this color setting overrides any previous color settings.
Now, we can go back to our header and change its code to:
At your service
With these changes, the header will now be orange:

To change the font and its size, you can do something very similar. But first, an example of what a font definition block looks like in CSS:
.SOMECLASS { font-family: “Merriweather”, Roboto, sans-serif; font size: 18px; }
- load fonts Merriweather, Roboto, and a system default sans-serif font (read this for information on web-safe fonts)
- set the font size to 18px
This type of definition can be placed in any CSS class, just like the color definition.Actually, the font and color definitions are often found in the class declarations themselves.
Going back to our previous example, to change the font size for that heading that says “At Your Service”, First we could create a class like this:
.text-xxl { font-size: 50px; }
And then assign this class to the header:
At your service
When changing colors or fonts in your template made with Bootstrap, first look in the CSS stylesheet for classes that might already provide you with alternate sizes or colors. Use them where available.
10. Creating Additional Pages
Now that you have your custom home page, it’s time to start working on some additional pages and then link them to the home page.
When creating a website With HTML and CSS, you can create any number of subpages and then link them all together.
Here are some of the common pages that most websites need:
- about the page
- contact
- portfolio
- products/services
- team
- policies (privacy policy , terms, etc.)
1. Start with the design
When creating a new web page, the first decision you need to make is what you want the design to be.
When creating a website with HTML and CSS, nothing prevents you from creating the design you want. The only difficulty is actually putting it together.
HTML and CSS can be unwieldy when starting from a blank screen, so we’ll use Bootstrap here as well. First, we’ll show you some principles for creating a layout, and then we’ll demonstrate how to do it with Bootstrap.
The way you can think of your web page layout is to think of it as a sequence of blocks, one on top of another. Something like this (note the four different blocks):

The best thing about Bootstrap is that it handles basic design principles and appearance details so you can focus on getting those blocks in the right places .
In this section of the guide, we’re going to create a new “about” page.
To get started, we’ll just create a very basic project of the layout something like the one above .
- There is a navigation menu at the top,
- a full width title block below the menu,
- the main menu section of content in the middle, box in the center of the screen (not full width),
- and a footer.
Now let’s build this layout in HTML .
2. Creating a New Page
The easiest way to start working on a new page is to duplicate an existing page and use it as a template. That’s what we’re going to do.
Create a copy of the index.html file and rename it about.html.
Just to make the pages easier to distinguish on this moment. stage, edit the new about.html file and change what is in the
tag. For example, <title>About Me .Now let’s go through the file line by line and decide what to leave and what to remove:
- The
- The main hero section (below ). We will not need this according to our design project. You can go ahead and delete the entire section.
- The about section (below the ). Let’s reuse this section as our main headline block.
- The services section, the portfolio section, call to action strong> and the contact section (everything between and ). We don’t need these sections at all. You can go ahead and delete them.
- The Footer section and everything below it (below ). We’ll have to keep this.
This makes our current code pretty simple. It’s basically just this:
What we’re missing here is the content section major. To build it, we’re going to reuse the about section.
Go ahead and make a copy of the about section. This:
…
…
Now change the first two lines to this:
Since we don’t need the
header or the
element, let’s just remove them. The only thing that will remain inside this whole block will be a paragraph of text. Like this:
A paragraph of text.
When you save the file and navigate to it through your browser, you’ll see that it basically has two very similar blocks one below the other, with the same background color:
It would be better to have a background white in the main content section. To change it, all we need to do is remove the bg-primary class from the main
tag. In other words, turn the tag into this: That’s better:

Let’s add some dummy paragraphs to the page to fill it out a bit more, plus a subheading:
Lorem ipsum dolor sit amet, consectetur adipiscing elit…
Proin fermentum, felis tempor pharetra lobortis, magna quam hendrerit dolor…
Subhead
Lorem ipsum dolor sit amet, consectetur adipiscing elit…
This is what this looks like on the page:

If you don’t like that the text is centered, just remove the t-center class text from one of the
tags.
If you want to put a little more style into these text blocks, you can create new CSS classes (like before) and assign them to the paragraphs in the block. Or, you can take a look at the current style sheet and see what classes already exist for this purpose. These are the ones we assign to the
and
tags:
Lorem ipsum dolor sit amet…
Proin fermentum, felis tempor pharetra lobortis, magna quam hendrerit dolor…
Subtitle
And here’s the effect:

One more thing we’re going to do here is add an image somewhere on the page.
Here’s what an example image tag looks like in HTML:
Simple enough, right? The only parameter there is the path to the image file. To keep things nicely organized, you can put your image back in the img directory (just like you did with that background a while back). In such a case, the image tag will be:

That being said, the image tag in this particular configuration is quite limited. To make it a bit more refined, let’s assign some Bootstrap classes to it. In particular:
These two classes will give your image rounded corners and also make sure the image size doesn’t exceed the size of the block it’s in.
You can now add a tag like this somewhere in the main content section of your info page. For example, here:
Lorem ipsum dolor sit amet…
Proin fermentum, felis tempor pharetra lobortis, magna quam hendrerit pain…
Subtitle
And here is the final effect on the page:
Here’s our about page in all its glory:

3. Link to New Page
With the new page complete, let’s link to it from the home page (the index.html file).Naturally, the best place to add this link is in the navigation menu (under ).
In particular, look for this line:
Let’s change it to this:
This is something we haven’t talked about yet, but the tag is a link tag in HTML. Using it, you can link to any web page by providing the address of that page in the href parameter. The link text, the clickable part of the link, will be the text between the opening and closing tags.
When you refresh the home page now, you will see your new link pointing to the information page.
Further reading
At this stage, you have basically created a simple website consisting of two pages: a home page and an information page.
What you do now is rinse and iterate by creating new pages, fine-tuning them, adding content to them, and then linking everything from the navigation menu.
Other things worth The worth doing as you are following these steps is to learn more about the principles of HTML and CSS, review the checklist, and also learn Bootstrap and its structures and classes. Some resources for that:
- HTML5 Cheat Sheet
- CSS Cheat Sheet
- JavaScript Cheat Sheet
- Bootstrap Tutorial</li
- Bootstrap Cheat Sheet
Mastering Bootstrap, probably the best path currently available to create beautiful and optimized websites with HTML and CSS.
If you have any questions about creating a website with HTML and CSS, feel free to ask them in the comments.
.
