Joomla is an open source content management system (CMS) for publishing web content. Like many other CMS, Joomla allows you to create a website without using HTML or CSS. That and its zero price make it a favorite among many businesses and nonprofits.
In this step-by-step Joomla tutorial, we’ll learn how to use the platform to create any website you want. need. We’ll cover how to install Joomla on your server and give you an overview of its functionality.
In the end, we want you to feel comfortable starting to explore Joomla on your own and further developing your knowledge.
Ready? Let’s get started.
1. Get a web hosting plan and choose a domain name
Tip: If you already have a domain name and web hosting, skip to step 2.
Before you can start To build your Joomla site, you will need a domain name and web hosting. If you don’t even know where to start with this topic, read our post on how to choose a domain name and our comparison of web hosting services.
We recommend choosing something cheap to start your project. However, whichever web host you choose, make sure it meets Joomla’s system requirements.
2. Installing and configuring Joomla
The first step of the tutorial: how to install and configure Joomla. There are two ways:
2a. Using Bluehost and Quick Setup
Once you’ve signed up and gotten a domain with Bluehost, log in to your account and click Advanced in the left column.

Scroll down, find the Joomla icon and click on it.

On the next screen, press Install Now.

This will take you to the installation screen.

Here is how to complete it:
- Software Setup — You will notice that your Bluehost domain has been included by default. Unless you have a good reason to change it, just leave everything as is.
- Site Settings – This is the name and description of the site that will appear in search engines . Therefore, it is a good idea to change the default value. However, you can also do it later within Joomla, so don’t worry too much about that.
- Database Settings – This is an option to include data from shows on your site. . Since we want to learn Joomla from scratch in this tutorial, we’ll leave it at None.
- Administrator Account – Be sure to choose a secure username and password for your administration . and enter your real name and email address.
- Choose Language: If you want your Joomla installation to be in any language other than English, you can change it here.
- Advanced Options – In this place, you can modify your database name, table prefix, disable email notifications for available updates, and control whether Joomla it should update automatically or not. All of these settings are optional and you can usually leave them as they are.
Once you’re done, click Install at the bottom. When you do so, you may encounter the following warning.

Don’t worry about that though. It’s just the default index.php page. Just check the box and click Install again. After that, the installation will run, until you run into this success screen:

Congratulations! You have just installed Joomla on your Bluehost domain.
2b. Manual Installation (Any Web Host)
If you are with a hosting provider that does not have the above option, you will need to install Joomla manually. Don’t worry, it’s very easy.
1. Create a database and upload files
The first step is to create a MySQL database. This is where Joomla stores all of your content and is a vital part of any website built with the CMS. You should find options to create one in your host’s control panel.

To install Joomla, you need the following information:
- The name of a database (empty)
- Name of a user associated with that database
- The password of that user
- The address of your database server
Once you have that, it’s time to upload Joomla to your server, to do that, go to the download section of the Joomla home page and press the big green download button (as of this writing). article, Joomla 3 is the last major version, with Joomla 4 in beta state).

Make sure to save the zip file to your hard drive, and when done, extract all the files. After that, connect to your server via FTP (eg via FileZilla) and car Place the extracted files where your domain is. is pointing to (usually the root directory). Once you’re done, it’s time to move on to the next step.
2. Run the manual installation
When all the files are on your server, open a browser window and enter the URL of your site. If you’ve done everything right, this should start the Joomla installation process.

<
At the top, make sure you choose the correct language for your site. Below that, enter your site name and optionally a description. As mentioned, these are the things that will show up in search engines, but you can also change them later if you’re not happy with your first choices.
On the right, you’ll be asked to enter the information to your superuser account. That’s the main admin, so be sure to enter a valid email address, a username that’s not easy to guess, and a strong password (twice).
Finally, at the bottom , you can select to set your site’s interface to offline mode after installation. That way, only registered users will see it. This may make sense for development projects and is up to you. When you’re done, click Next.
3. Connect Joomla to your MySQL database
The next screen is this:

Here, you will need the above database information. Fill in everything as follows:
- Database Type – In most cases, you can just leave this as is.
- Hostname : This is the hosting location for your database. Change it if it is not localhost.
- Username – The username associated with your database.
- Password : This field goes the password for your MySQL database.
- Database Name — Here, include the name of the database you want to connect to your Joomla website.
- Table prefix: Unless you have a good reason to change this, use the randomly generated prefix provided by the installation.
- Old database process – If any data already exists in your database, you can choose whether Joomla should delete it or save it.
Again, once you are ready, press the Next button.
4. Finish the installation
The final Joomla installation screen is mainly a summary of everything you have done so far by following the tutorial.

At the top, you can choose whether to install any Sample Data. For the purpose of this Joomla tutorial, leave it at None. Under Overview, determine if the installation should send the configuration to your superuser’s email address.
Other than that, you just need to check if everything is as you want and if your server environment meets the Joomla requirements. . When all that is the case, you can click Install. Joomla will then configure the CMS on your server. Once finished, you will see this screen:

(Ideally) tells you that Joomla has been installed successfully. You also have the option to add more languages. If you don’t want to do that, don’t forget to delete the installation folder by clicking the yellow button. This will remove sensitive files from your server.
That’s it! Cool beans, you just installed Joomla completely by hand.
3. Familiarize yourself with the basics of Joomla
At this point, when you go to the address where your new Joomla website is located, the interface looks like this:

Not very impressive, right? To make changes, we first need to log in to the Joomla back-end. For that, go to yourdomain.com /administrator.
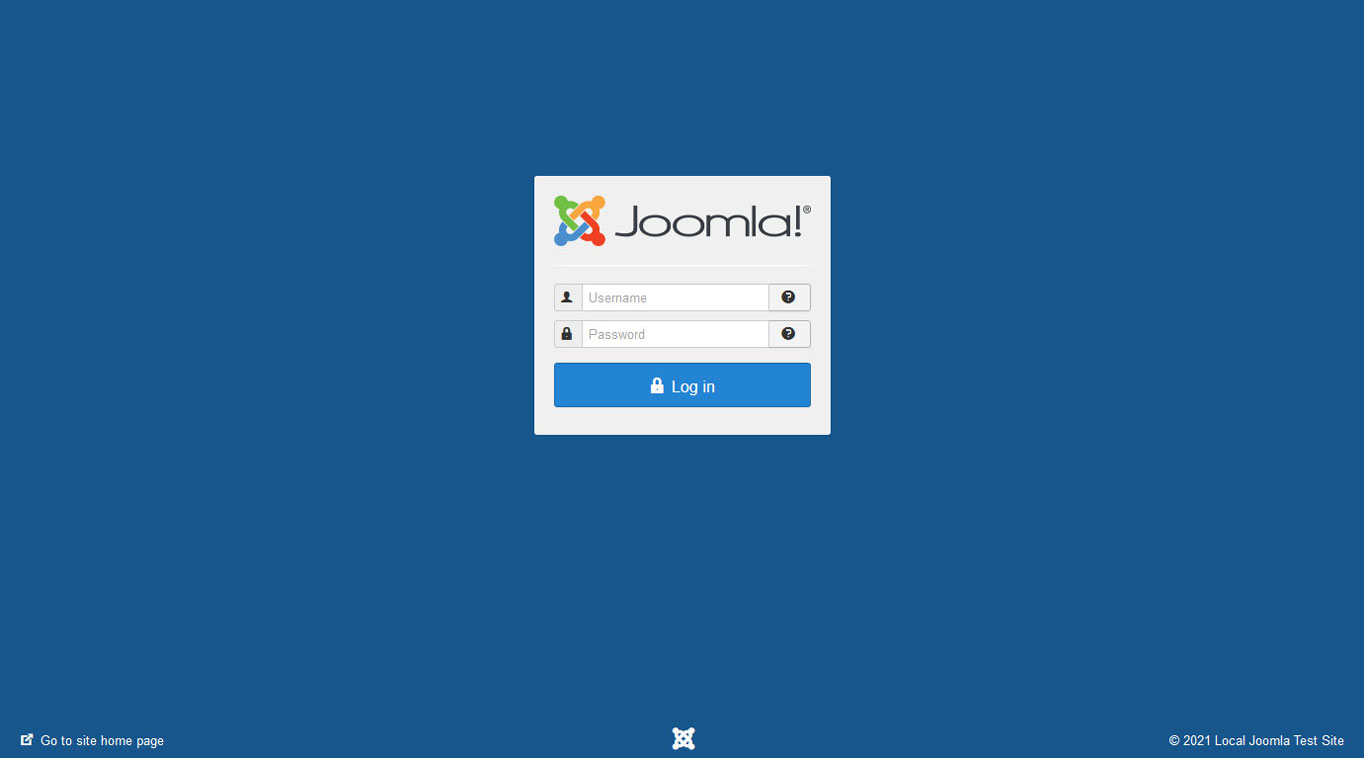
On the next screen, enter your chosen username and password to access the Joomla control panel.

We’ll be using a lot of the menus you see here throughout this Joomla tutorial, however let’s start with a quick overview.
Obviously, you can get rid of the two blue boxes by opting in or not in data collection Joomla statistics, and then read (and hide) your post. installation messages.
On the left, you’ll find shortcuts for frequently using parts of the admin area, such as creating new items, changing the menu structure, or installing extensions. On the right is important information about the status of your site.
The Heart of Joomla: The Taskbar
However, the most important part is the taskbar on the top.
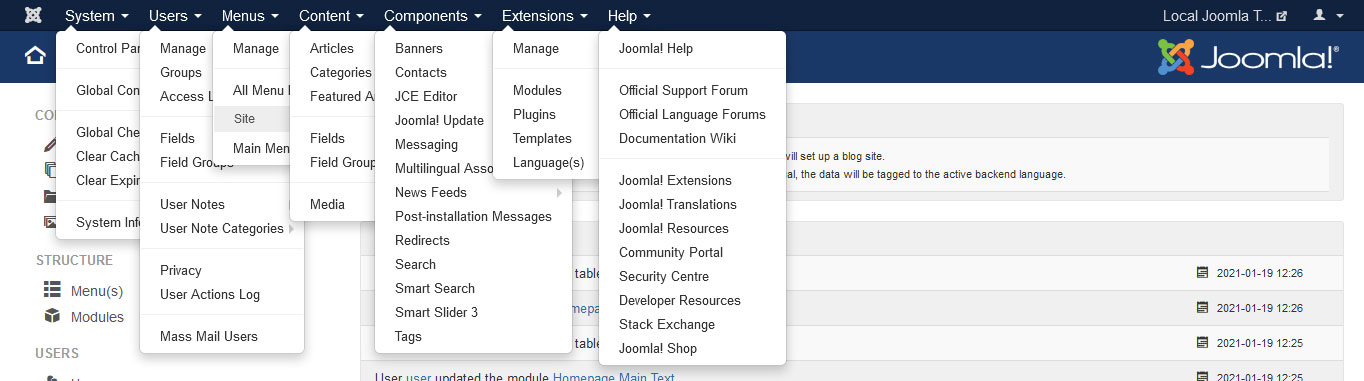
Here, you find the same options as in the control panel and more. This is what the different menus contain:
- System: access to the control panel, site settings, pending or blocked content items, the option to clear cache and view system information (site, server, and environment).
- Users: Manage users, user groups, and access levels, add notes about users, deal with related requests with privacy, view user logs and send mass emails to everyone on your site.
- Menus – As the name suggests, it contains all the options on creating and managing menus .
- Content: Add articles and taxonomies, assign featured content, and manage your site’s media files.
- Components: Create and manage site banners, contacts, site updates, private messages, multilingual associations, and news feeds. It also provides access to post-install messages (we covered those already), allows you to set up redirects (although you need a plugin for that), view site search terms, use smart search (again, this needs a plugin), and manage tags.
- Extensions: Allows you to install, update, manage, configure, find, and troubleshoot extensions. In this menu, you can also view the status of your database and update your site.
- Help: Direct access to important help topics in the official documentation.
All clear so far? Then let’s move on.
4. Select a template for your site
Like other CMS, Joomla offers a way to change the design of your site without coding, which is what we’ll cover in this step of the tutorial. In Joomla, the look, style and functionality of your entire website is completely dependent on so-called templates.
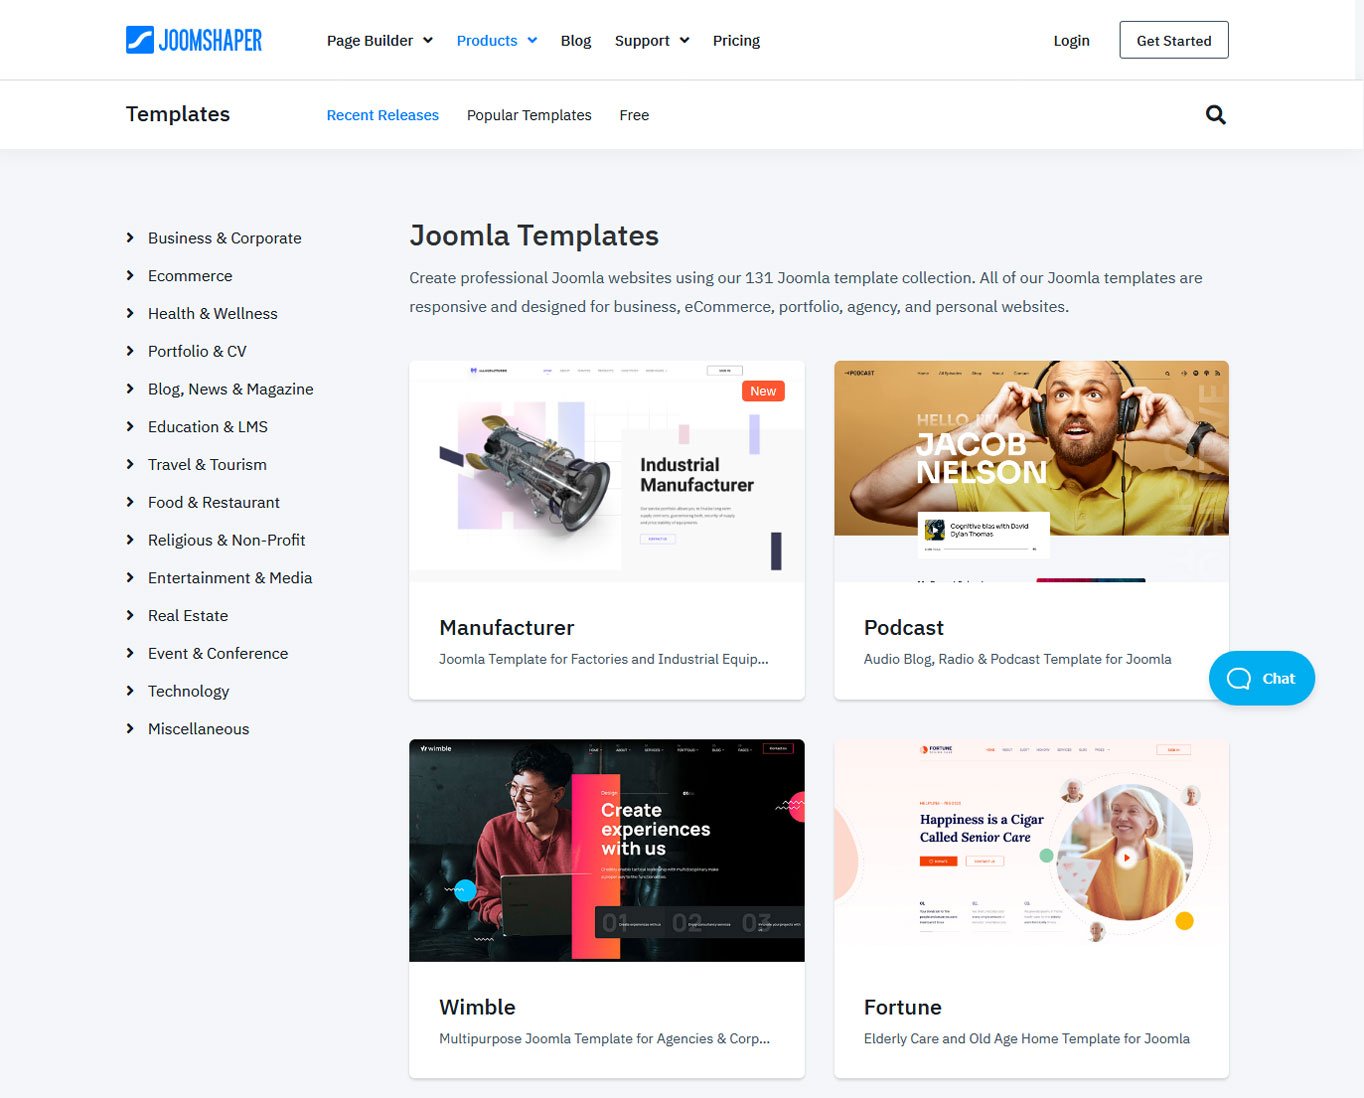
There are free and premium (paid) Joomla templates available. However, finding one can be tricky. Unfortunately, the CMS does not have a central directory for this. Therefore, you have to search the stores to find them. Many of the ones that sell premium themes also offer free versions that you can try. Here are some places to start:
- TemplateMonster
- Joomlart
- Joomdev
- JoomShaper
When selecting a template, in addition to your own taste, pay attention to some important features:
- Support – it’s great to have technical support included, so you have someone to help you with problems.
- Updates — Joomla is constantly updating its system. Make sure your template provider does the same for their products so they work with the latest version.
- Documentation: From time to time, you’ll need to check out some features to learn how. do they work. Make sure there’s a place where you can do it.
- Customization: Check out which template features you can customize yourself. For example, look for templates that have a lot of module positions (more on that soon).
5. Install Your Joomla Template
Installing a template in Joomla is quite easy in principle. Once you’ve made a choice, you usually get it in the form of a zip file. You can simply upload it in Extensions > Manage > Install.

Drag and drop the file into the field or click the Or browse file button to find it on your hard drive. Select it and Joomla should do the rest You can also install the template via its URL if you know where the package is located.
After that, you still need to activate the template in Extensions > Template > Styles, here click the star icon to the right right of the template name to make it the default for the entire site.

When you return to the front of your site, you will see that your entire design has changed. Such is the power of templates .
Note that when inactive Loading your template you may get additional files such as quickstart, configuration and extension.
The first is a full version of Joomla which includes the template. When you install that, your new design is ready to go when your site is set up, often including demo content. It’s a shortcut when you want the exact layout that the template advertises. All that’s left to do is swap the content.
The other two files refer to things you might have seen on the template’s demo site, like sliders, etc.
6. Customize the design
Most templates come with at least some customization options. You can access them by clicking the template name in the list.

In the settings, you can make adjustments to things like colors, fonts, logos, sizes, and much more. In this case, the template even comes with its own settings page that we access when we hit Template Options.

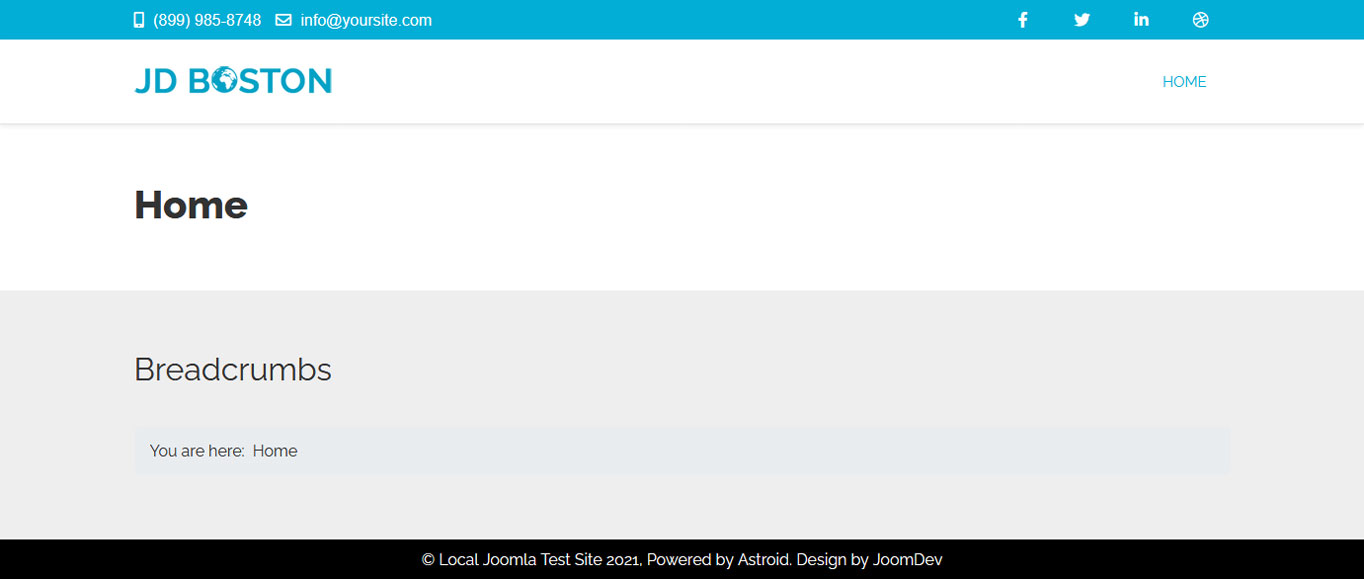
Some Joomla templates also have a preview option where you can see the changes in real time. In either case, don’t forget to review what your template has to offer and save any changes you’ve made to translate them to your site. For example, below we’ve changed the social profiles and contact info in the top bar, disabled branding at the bottom, and moved the top bar to the bottom of the page via the Layout options.
7. Create content using Joomla modules
Right now, even if it looks better, your site is still pretty empty. It’s time to change that. At this point in our tutorial, we’ll go over how to use Joomla to create content.
Unfortunately, we have to start with one of the more complicated topics, which is modules. These are small content units that can appear in many places on a page like building blocks. Using them takes some getting used to, so let’s try the home page.
To understand your options, it’s best to start by enabling preview mode for module positions. For that, go to System > Global Settings > Templates. Here, set Preview Module Positions to Enabled, save and close.

Next, go back to your list of templates and click the Preview button (the eye icon). This will display all available positions on your page where you can add modules and the names of the positions.

Quick note: don’t forget to turn off the preview when you’re done assigning modules.
8. Assigning Modules to Seats
Okay, now that you know where your modules can go, how do you assign them to those seats? That all happens in Plugins > Modules.
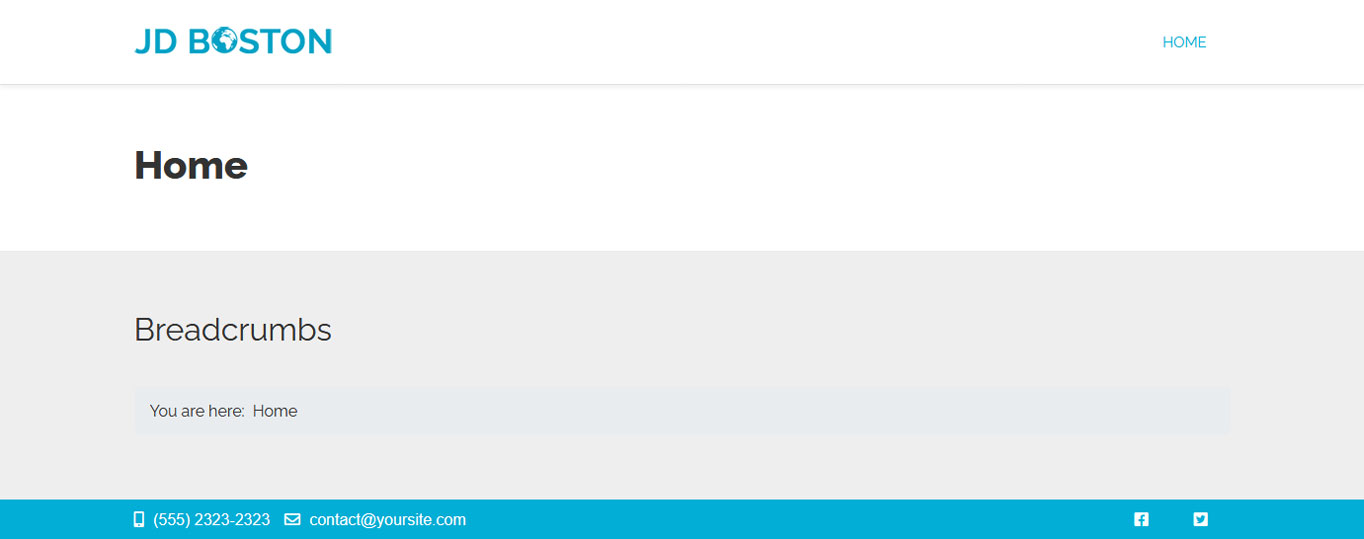
Here, you can see all the modules currently active on your site, plus the positions, pages, users, and languages they’re assigned to. To get rid of anything already on your site, like the login form and breadcrumbs, simply click the down arrow button under Status and select Trash.

If you want to add more modules to your site, under New in the top left corner, you find many options.

Let’s say you want to include text about you and your site on the home page. The first thing to check is where on the page it should go. In this case, this is the bottom content.
Then go to the Modules menu, create a new module via the green button on the top left corner and choose Custom as the type, this allows you to create your own content. using a WYSIWYG editor (what you see is what you get).

This is simply a tool for creating and formatting content that lets you see what it’s doing. Unfortunately, if we go through all the options on this screen , the Joomla tutorial would be too long, however, if you’ve ever used a word processor, it should all look very familiar.
Also, you can hover over any of the icons for a description of what it does. This way, you should be able to quickly figure out how to write and format text, insert headers, images and other media, and whatever else it has to offer.
When you’re done, make sure that when you save, Status on the right is set to Published and you choose the correct template location under Position (pay attention that you also select your active theme!). In this case, we also want to hide the module title.

Then go to Menu Assignment (the tab under the title) and use the dropdown to choose the pages you want to display in this module on . In this case, it’s Only on Selected Pages and then Home.

Save and you should see it on your home page (and only there).

You can use this same method to insert other things into Joomla pages , such as blog posts (we’ll talk about that later in the tutorial), banners, menus, images, and iframes. In addition, you can also add new modules via extensions (more on that too below).
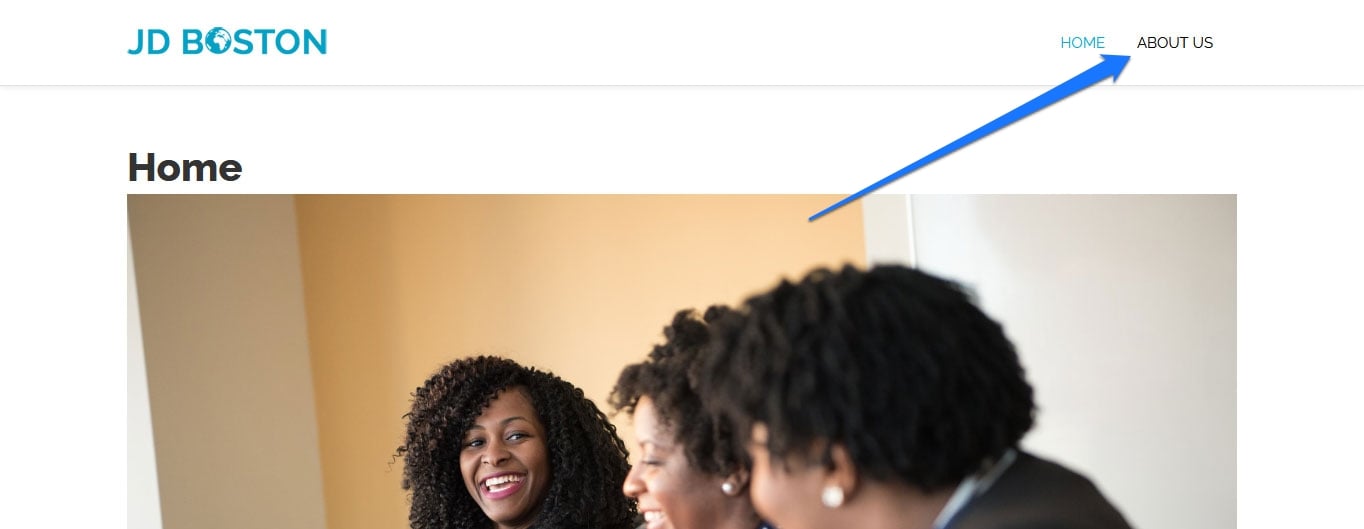
For example, this is how the home page looks like when we add the main image in the form of a slider in the main section position with the help of a plugin and move the text module to the top of the content:

Better already, right?
9 . Creating new pages
Now something easier: pages. The first thing to learn here is that you create them in one place and make them appear in another. This is a general thing to keep in mind throughout the tutorial: anything you do in Joomla will not automatically appear on your site.
In this CMS, pages are simply called articles. This can be a bit confusing if you’re coming from a blogging background, but don’t let that stop you. You can create articles via Content > Articles > Add New Article. Alternatively, use the shortcut in the control panel. Both will take you to an editing screen very similar to the one you used before.

Create and format the content in the same way as before. When you are done, under Alias you will be able to determine a permalink (i.e. the URL of the page). It often makes sense to put a keyword here instead of using the article title. Under Status, make sure it is set to Post before saving.
10. Assign Pages to Joomla Navigation Menu
To allow visitors to access your new page, it’s time to assign it to a menu. For that, in Menus, look for the one with the house icon assigned to it. That’s the one that’s currently active.
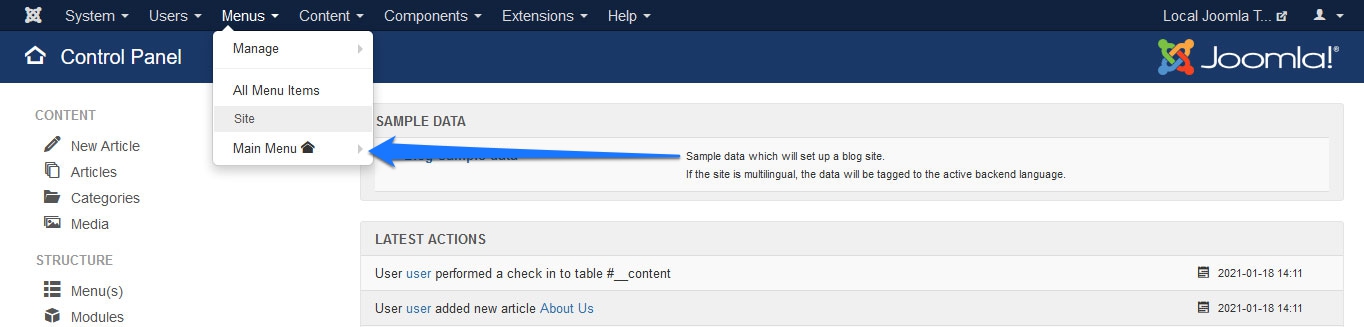
To assign a new link to it, hover over it and choose Add New Menu Item. Doing so will take you to the following screen.

Under Menu Item Type, select Item > Single Item. Then, under Select Article, you can choose the existing content on your site via Select and then click the title of the one you want to assign.

Now you just need to enter a menu title at the top (which is the text that will appear in the menu) and make sure the menu to assign it to is selected on the right.When you save and close now, you can use the three-dot icon on the left to drag the menu items around and change their order.

When you are satisfied and return to your site, the new item should appear.
11. Adding a Blog Section
Publishing blog posts in Joomla basically works the same way as creating pages. The only difference: you assign your blog posts to a category. For that, we first need one.
Go to Content > Categories > Add New Category. It takes you to the same editor as before. In this case, just enter a name at the top (for example, Blog), then save and close.

After that, you can assign the category to your menu in the same way as you did with the previous page. Only this time, for Menu Item Type, choose Articles > Category Blog.

Be sure to select your blog category under Choose a category. Then check that it is assigned to the correct menu and give it a meaningful menu title. Save and close to get it on your site. From now on, any article you assign to your blog category will display as a blog post under that menu item.

12. Installing Extensions
The last thing we want to talk about in this Joomla beginner’s tutorial is extensions. With their help, you can bring new features and functionality to your site. You can find them in the official Joomla extensions directory.
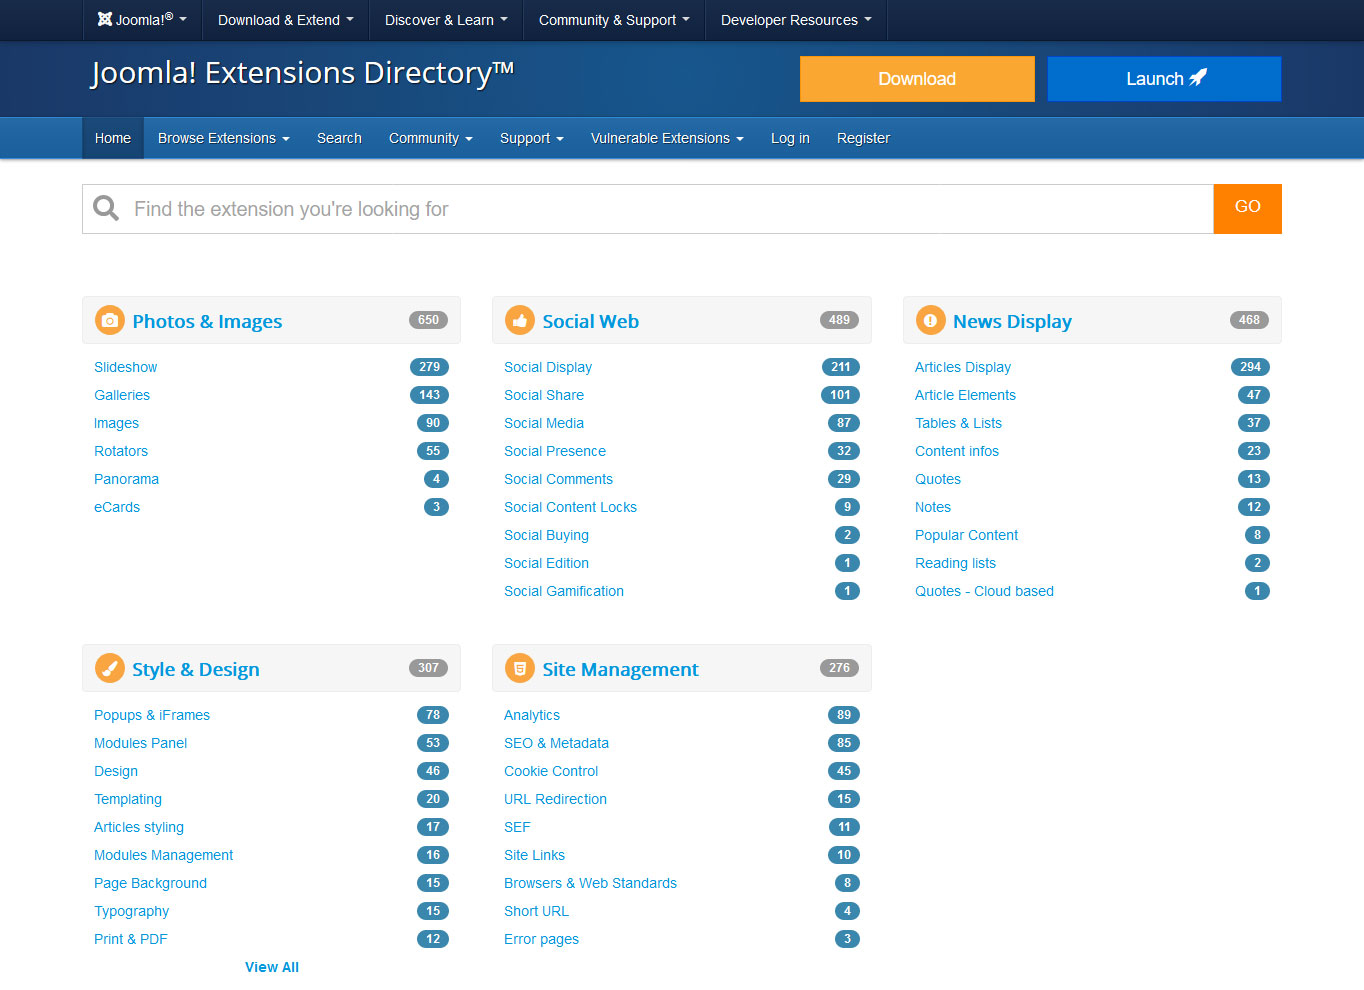
Simply enter a search term, use the categories or advanced search to find what you are looking for. With over 6,000 extensions available, it can be hard to choose, so start with collections like this:
- Joomla Extensions: 101 Essential Extensions You Need in Your Life Right Now</li
- Top Rated Joomla Extensions
Once you know what to install on your site, there are several ways to go about it. You can find all the extensions in Extensions > Manage > Install. When you’re there for the first time, at the top, use the option to set up Install from the web. When it does, it gives you access to everything in the Joomla extensions directory directly from its back-end.

Click any extension and then press the Install button (twice) to automatically upload it to your site. If this doesn’t work for you for some reason, you can simply download the extension or copy the URL where it is located. After that, you can use the Upload Package File and Install from URL tabs to get it to your site.
Note that you may still need to enable parts of the extension in Extensions > Manage.
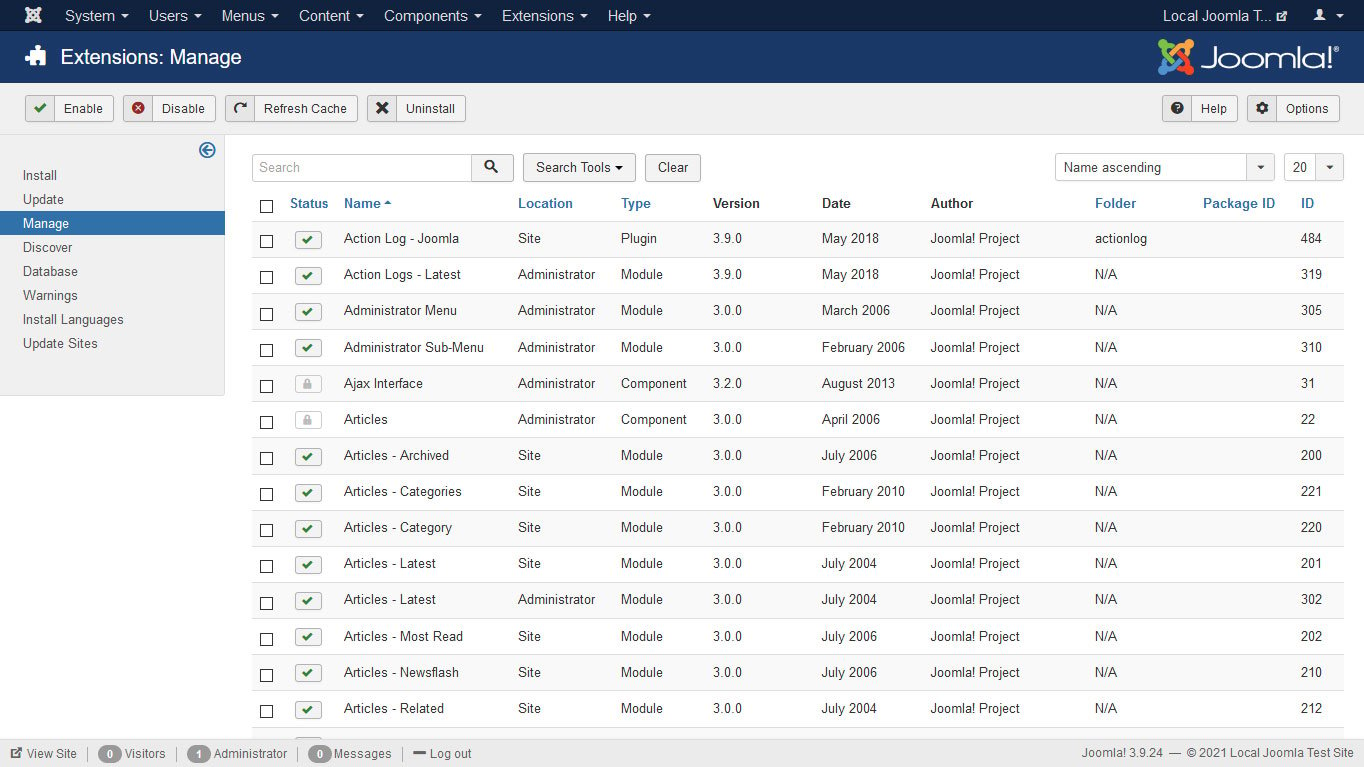
From here, you can also disable and uninstall extensions that you no longer need. Unfortunately, it’s a bit confusing and cluttered, so you may have to search for your extension by name.
For this example, we’ve installed the popular JCE content editor. With it present and active, and after setting it as the default editor in System > Global Settings, the content creation experience changes dramatically.

Joomla Tutorial: Final Thoughts
Joomla is an excellent tool for create a website with The CMS is powerful, flexible, widely extensible, and also free.
In this Joomla tutorial, you learned how to install the platform, navigate its back-end, change your site design, add content, and install extensions.
Of course, there is much more to learn. However, now you know enough about how to use Joomla to start exploring on your own. If you want to dive deeper into the platform, here are some recommended resources:
- Joomla Documentation
- Joomla Forums
We are looking for Can’t wait to see what you’ll create!
.