The importance of blogs is well known to many. People often blog for personal reasons when they share information on the web about ideas and topics that they are passionate about. When businesses blog, they do so primarily to increase their visibility and draw potential consumers’ attention to their business.
There are many free and paid blogging platforms that help people create blogs. ‘Blogger’ is a free blogging platform powered by Google that helps users to create and work with blogs in a much easier way.
Here is a step by step process with pictures on how to create a blog on Blogger-
1. Open blogger.com and log in
The first step in creating your blog is to open the website in your browser.

Once done, click the orange button ‘Create your blog’ ‘ which can be seen right in the center of the page. After doing that, the site will ask you to sign in with your G-mail ID to continue. If you don’t have one, please create a G-mail account before starting this process.

2. Give the blog a name, blog address and choose your display name
 Giving a proper name for your blog is an important step. Be sure to give it a catchy, memorable name. If you want to change the name of your blog in the future, you can do so in the ‘Settings’ option.
Extra tip: DO NOT use numbers, symbols, or special characters (such as underscore, hyphen, etc.)
Here are some original creative blog names:
• Food – Tasty Treats, Soul Food, The Baker Bites, Happy Bowls, The Healthy Way
• Fitness- Fun n’ Fitness, Some Shape, Cardio Choice, Burn Bright
• Travel- Street Lights, The Blue Skies, Wind and Warm, Sandy Spots
Click on ‘Next’ to enter a URL for your blog.

 Display name is the name that appears to your readers when they comment on posts or on your page Profile. Click “Finish” after this step.
Good! You’ve created your first blog on Blogger.
Readers’ Choice: 9 Reasons You Should Start a Blog in 2021
3. Creating a new post and using the toolbar
After you have completed the steps above, you finally have your own blog for writing and publishing posts.
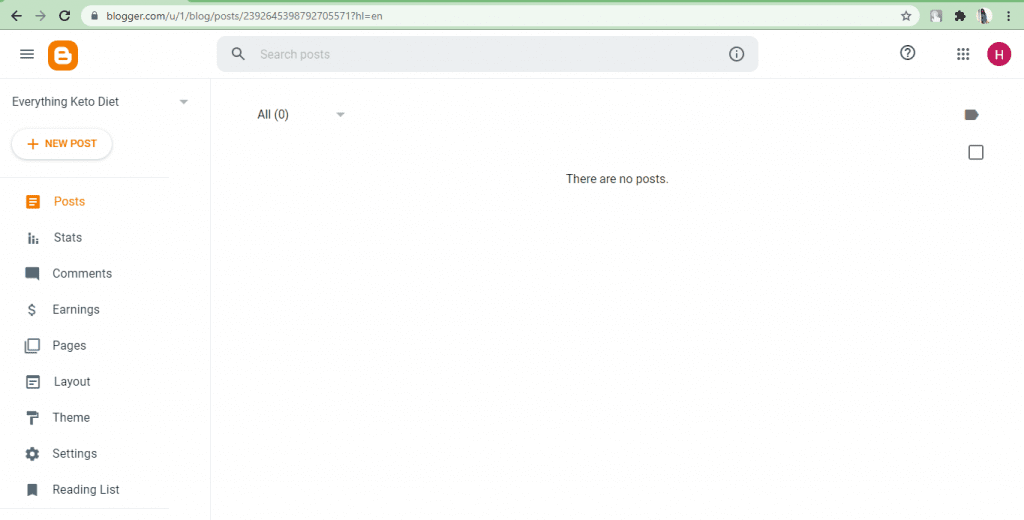
This is the screen that you will be able to see after having created the blog. On the left side panel of the blog, you will see the blog dashboard. Click the ‘New Post’ option to write your first post.

Type your post in the space provided and also give your post a title. blog post in the ‘Title’ space provided at the top of the toolbar. Writing on Blogger is an easy task as there are not many complications with using the available features. It’s similar to writing in any other text editor like MS Word or Google Docs.
The toolbar at the top of the compose section helps you edit your content and make it look more structured. and presentable.
You can change your font styles, font size, add images or links, change the layout of your post and do much more . If you want to write your post in HTML format, you can do so by clicking the pencil icon in the far left corner of the toolbar.
4. A sneak peek at important post settings
Before publishing your post, you might want to take a look at the post settings provided in the right hand corner of your screen.
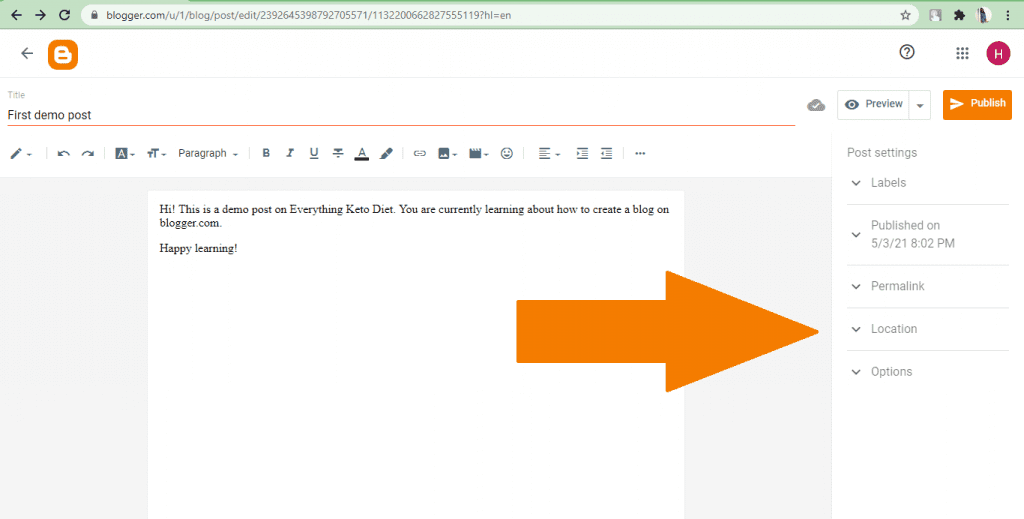
Under Post Settings, you can find Tags, Post Time, Permalink, Post Location, and other options.
Tags– Adding tag tags can help you group posts of similar content together and also help readers find your blog post in search engines that match the user’s search.
Publish Timing: This feature allows you to decide if you want to publish your post immediately or at some later time. You can set a specific date and time in the future to publish your post.
Permalink: In this option, you can customize the URL that links directly to your post to make it a Search engine friendly URL. By default, this address will be based on the title of your post, but you can edit it however you like.
Location: You can add a location tag to your post. It will help readers to know where you are publishing your post from. This is mainly used for travel blogs.
Options – Under this, you can select your preference when it comes to posting comments.
5. Publishing the post
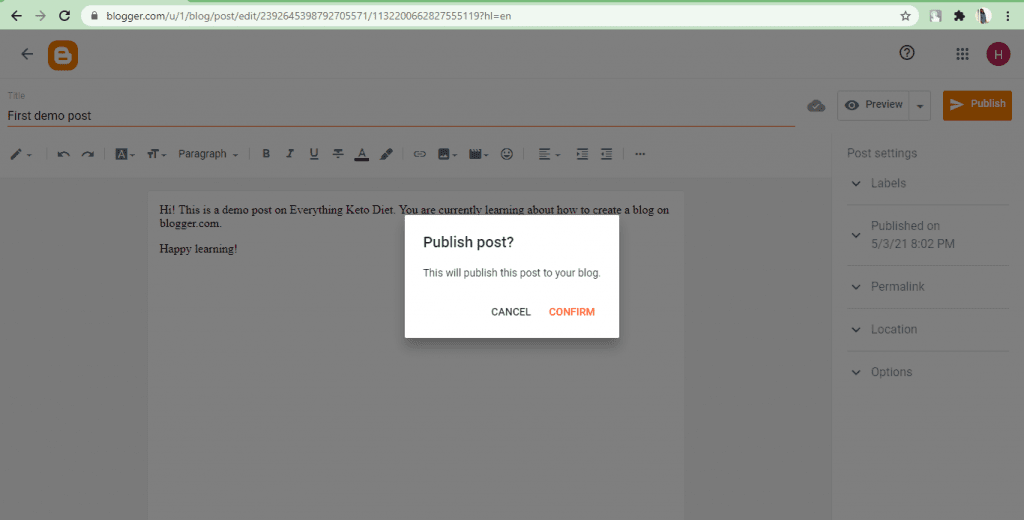
For the final step, click the ‘Post’ button in the top right corner. Click “Confirm” on the message if you’re happy with your post.
Hooray! Give yourself a pat on the back for successfully publishing your first blogger post.
You may also be interested in: 31+ Blogging Power Words That Sell and Make Money
Aside from Following these steps, here are some more tips on how to optimize your blog for more efficiency with the help of the options available in the ‘Settings’ option. You can also customize your blog by changing the themes and layout according to your preferences.

Here are some basic settings you’ll find. You can change the name of your blog and add a short description of your blog to tell readers what your blog intends to share. If you think your blog will discuss sensitive topics and often require a trigger warning, be sure to enable the ‘adult content’ option.
If you scroll through the settings, you can find ‘Meta Tags’, ‘Errors and redirects’, and ‘Crawlers and indexing’. These features help in optimizing your blog for search engines and getting better search engine rankings.

Meta tags Allow readers to focus on the blog content and provide a concise summary of what your blog is about. Your meta tag description must be a maximum of 150 characters.
‘Custom 404’ allows you to customize the ‘Page Not Found’ error message. If someone uses a URL that no longer exists, you can tell them what to do next by setting custom text. The ‘Custom Redirects’ option helps you shorten the duration of your full permalinks.
‘Crawlers and Indexing’ should be handled with due investigation and care. If not handled carefully, this can lead to loss of search engine visibility.
With this, you have completed the SEO setup for your blog. One last step before you start exploring and working with your blog is to take a look at your blog ‘Themes’.

Click ‘ Theme’ option on the dashboard to your left and select from a variety of themes and click ‘apply’ to use them. Having an attractive and beautiful design for your blog will definitely make your content look better and also help grab the reader’s attention.
Readers Choice: Blog Glossary: Essential Blog Terminology Before You Begin a blog
That’s it! You’ve done it! Creating a blog and setting it up can seem like a tedious task. But once you get the hang of it, you can finally sit back and enjoy blogging.
You’re in for a fun and crazy blogging adventure!
Have any questions? Don’t hesitate to ask.
.