NOTE This feature was introduced in LearnDash 3.0 and works with the LearnDash 3.0 template. This feature does not work with the legacy template.
NOTELearnDash 3.6 introduced a new login system that allows users to set their passwords from the login . form and log in automatically after registration. If you’d like to check that instead, click here.
There are many ways to handle the existing user login and new user registration process. LearnDash has always provided great flexibility for you to choose how to handle this. As of version 3.0, we now have our own built-in registration and login process. You no longer need a third-party plugin to create a seamless sign-up and/or login process for your users.

Video Tutorial
Enabling LearnDash Login and Registration
There are four important steps to enable LearnDash Login and Registration:
- You must be using LearnDash 3.0 or top
- You must select “LearnDash 3.0” as your active template
- You must enable the Login and Registration option in LearnDash General Settings
- IMPORTANT: You must enable logging for your WordPress site by selecting the Anyone can sign up checkbox located under SETTINGS > GENERAL (only needed if you want to allow logging l registration)

Upload a login logo
While not required, we recommend uploading a logo to use on the login screen. This logo will appear below the login form. To upload a logo:
- Navigate to LEARNDASH LMS > SETTINGS
- In the Design Elements & Content section, look for Logo Upload logo
- Click the Select Image
- Choose an image from your media library or upload a new one
- Click Use this image at the bottom
- Make sure to save changes
button
You can delete your image by clicking the X or upload a new one by repeating the steps above.
![]()
How it works
Native login and registration of LearnDash works in different ways, depending on the following:
- Whether or not the user is currently logged in
- The access mode assigned or the course
NOTE LearnDash login and registration does not affect the default WordPress login page located at yoursite.com/wp-login.php. You can still use a third-party plugin to customize the default WordPress login page, and users can still log in that way.
Registered Users
Registered users never they will see a login because they are already logged in.
- If the user has access to the course, they will see a progress bar at the top of the page and will be able to navigate through the steps in the course.
- If the user is logged in but does not have access to the course, they will see a “Take this course” button
“Open” and “Closed ” Courses
These course access modes will never display a login link and therefore will never use this feature.
- Open courses are available for everyone, even those who aren’t logged in. Since you don’t need to log in to view these courses, no login link is displayed.
- Closed Courses are most commonly used to integrate with a 3rd party Membership or eCommerce Plugin.Login and access to the course is usually handled through the 3rd party plugin.
“Free” Courses “
Visitors viewing a course with the access mode set to “Free” will see a Login to Enroll button. Clicking this button will display a formula rio for the user to register for an account to gain access to the course (or log in if they already have an account).

“Buy Now” and “Recurring” Courses
Visitors viewing a course with the access mode set to “Buy Now” or “Recurring” will see a “Take This Course” login link ” section. If the user has already purchased and enrolled in the course, they can use the “Login” link to open the registration form and log into their account.Otherwise, they can click the “Take this course” button to pay through their configured payment gateway (Stripe, PayPal, or 2Checkout) or use our new optional registration flow.
Introduced in LearnDash 3.6, the new registration The flow for LearnDash’s native registration page acts like traditional e-commerce platforms with a registration and payment page. They can also register using this new method without purchasing a course.
This new registration flow no longer asks users to set their password separately from an email after purchasing a course. Once the registration process is complete, they will be redirected to a specific page based on the following rules:
- If per-course redirect is set, the user will be redirected to the specified redirect URL.
- If it is not set, they will be redirected to the option in the payment gateway settings (depending on the payment gateway).
- If that is not set, we use the option successful registration of the new registration tab.
See our detailed article here on the registration tab.

Shortcode Option
Yes If you want to use the login in a modal popup somewhere other than a course page, then you can do so using the following shortcode:
[learndash_login]
You can place this shortcode on a regular course page WordPress, post n, widget ( for the sidebar), and will display a Login link for visitors, and a Logout link for anyone who is logged in.
When a visitor clicks the Login link, the LearnDash login and registration mode will appear.
Use the shortcode as an element Link
If you want to add login and registration mode as a WordPress menu item, you can add a custom link to your menu.
- Navigate to APPEARANCE > MENUS
- Select the desired menu location
- At the top right of the screen, select the Display Options tab
- Select all options in Show Advanced Menu Properties
- In the Add Menu Items section, select Custom Links — In the URL field, add #login: in the field Link Text, add “Login”NOTE: The Link Text is not what will be displayed on the menu. That will be configured in step 7.
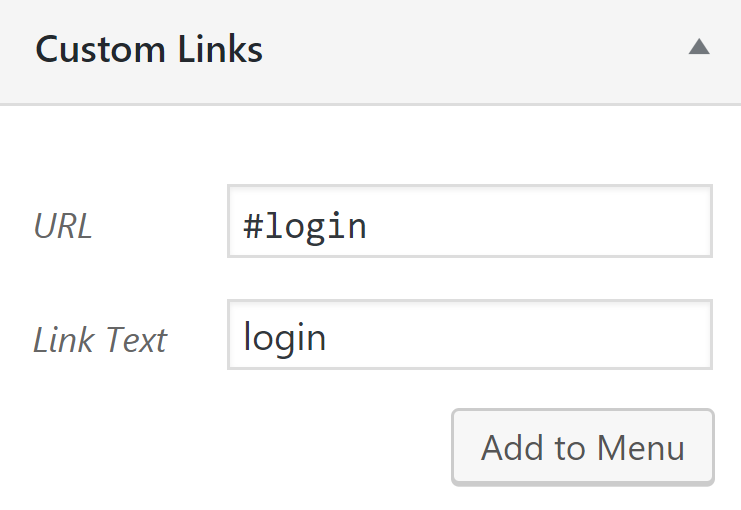
- Click Add to Menu
- Expand the new menu item and add the following: — Under CSS Classes (optional) field, add button ld — In the Description field, add [learndash_login login_label=”Login” logout_label=”Logout”] — You can change the labels for logging in and out here. Just change the text between “”.
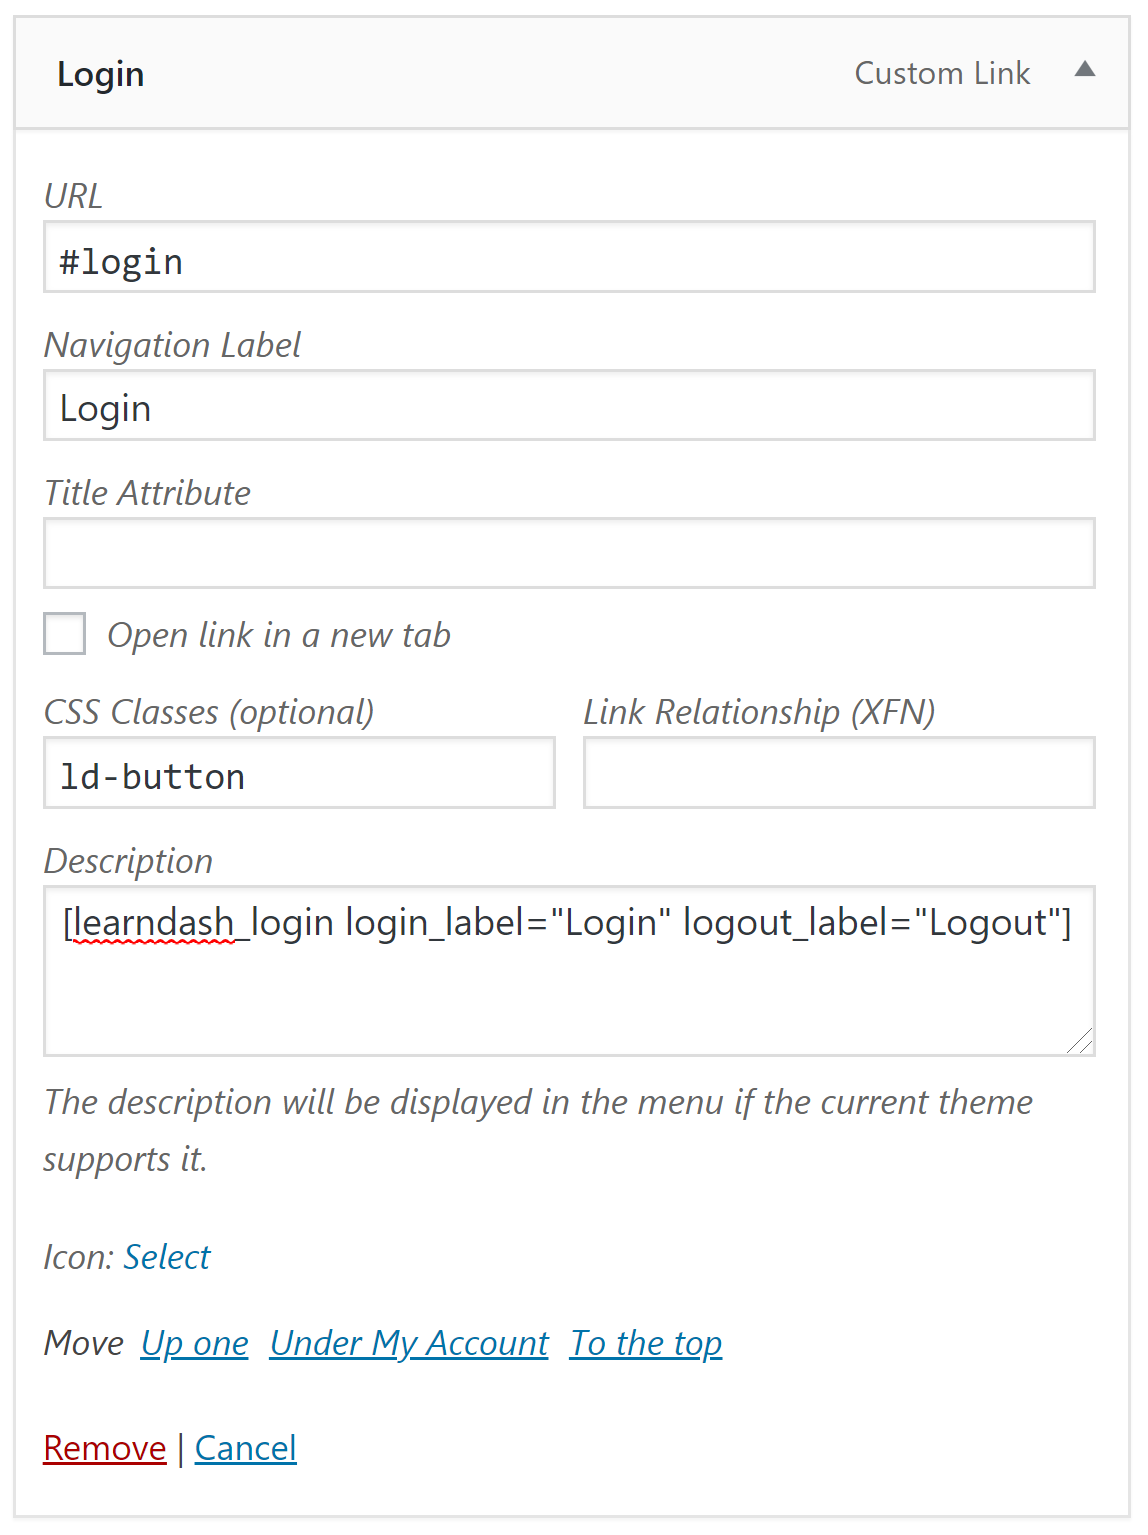
- Click Save Menu

WordPress User Registration Settings
In In this webinar we will show you how to easily set up a better experience for your students. Whether you’re using LearnDash or not, these tips will help you get your WordPress user registration right!
If you’re looking to further customize your user registration process (i.e. make it more enjoyable aesthetically, leveraging sign-ups for success, and even going as far as changing and updating your email notification options) here’s a follow-up webinar talking about power user registration with LearnDash.
FAQ & Troubleshooting
The login form is visible but the registration option is not available.Follow the instructions in this FAQ to enable registration on your WordPress site.
Can I allow Can users create a password when registering? The registration fields are WordPress default and can be modified with a code or a complement.
Can I create a completely custom registration form with unique fields? Only WordPress default supported fields are supported. If you need a completely custom registration form, you’ll need to use Gravity Forms. You can also check the new LearnDash registration process here.
Is there a way to redirect users to the profile page or a different page after login?
You can use third-party plugins to achieve this. Plugins like:
- Uncanny Toolkit Login/Logout Redirects Module for LearnDash (Free Version)
- LoginWP (formerly Peter’s Login Redirect)
Can I add login/logout links anywhere else on my site?
Yes, you can do this using the shortcode [learndash_login].You can find all the information about it in our shortcodes documentation here.
.