Make sure the power is off
 Family Handyman
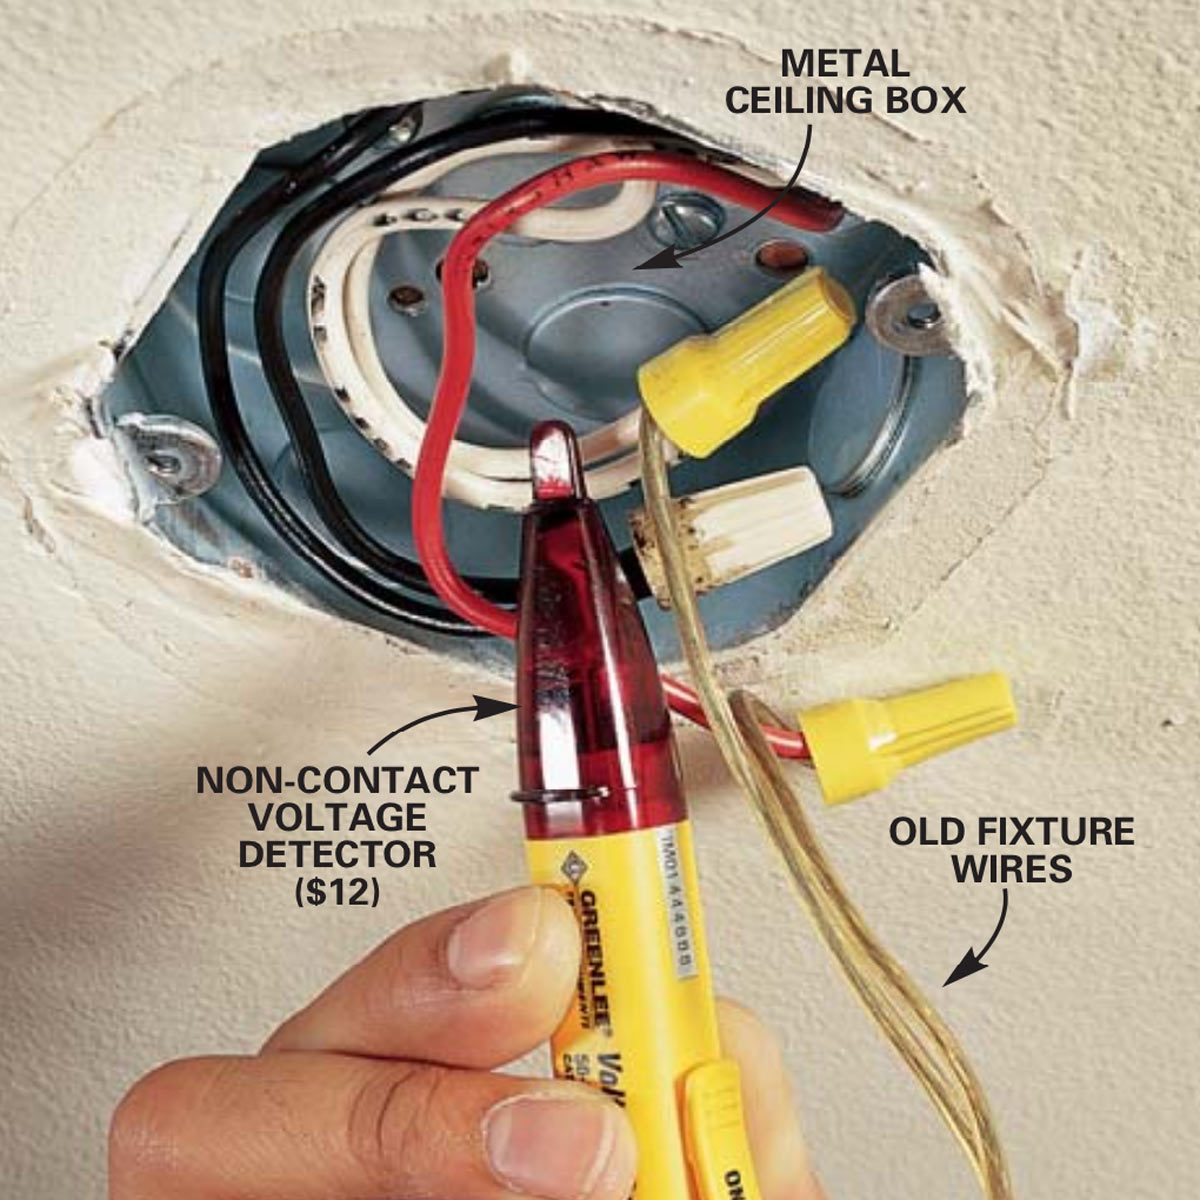
Test the wires to make sure there is no power. Move the tip of a non-contact voltage detector near each wire to make sure all the wires in the box are off (make sure the light switch is on). If the tester lights up, turn off the breakers or loosen the fuses one at a time until the light on the tester turns off. Disconnect the wires from the lamp. Leave other wires connected and tucked into the electrical box.
It’s hard to believe, but many of the light fixtures now sold at home centers and lighting showrooms cannot be installed securely. safe in most homes wired before 1985. These fixtures are clearly labeled with a warning that reads “For supply connections, use wire rated for at least 90 degrees C.” The reason is simple: accessories with this label generate enough heat to damage the insulation of older wires and create a fire hazard. Cables manufactured after 1985 are required to have jackets that can withstand the higher temperature.
If you know your wiring was installed before 1985, do not use fixtures that require 90 degree rated power cables . To confirm that you have a 90 degree rated power cable, look at the cable jacket or cable insulation. If you have a plastic-jacketed cable (often referred to as a Romex), look for the letters NM-B or UF-B printed on the plastic jacket. If your wiring is fed through conduit, look on the wire insulation for the letters THHN or THWN-2. If you’re still unsure, call an electrician or choose an accessory that is not labeled with a supply cord temperature requirement.
Check the electrical box for capacity and resistance
Heavy Fixtures Require Safes
If you choose a heavy light fixture (the one we bought weighed 25 pounds), check your outlet box to make sure it will hold the weight. The National Electrical Code (NEC) allows you to hang up to 50 lbs. from any electrical box that is threaded to accept #8-32 machine screws to attach the cross bar (see “Mounting with Screws and Acorn Nuts” and “Mounting with a Threaded Pipe” in Additional Information below). This includes almost all types of ceiling boxes.
For practical purposes, make sure your electrical box is securely fastened to a solid frame before hanging a new light fixture. If your light fixture weighs more than 50 pounds, it must be supported independently of the electrical box. An easy fix is to install a fan bracket box (available at home and hardware stores) that is designed to mount without drilling additional holes in the ceiling. Check the label to make sure the box is designed to support more than 35 pounds.
Most roof boxes are big enough: The NEC dictates how many wires and clamps can be safely attached to an electrical box. Typical 1-1/2 to 2 in. Deep octagonal or round top boxes are quite large and crowding is rarely a problem. Still, you should do the math to be sure. See the section on “Calculating Box Sizes”. But if you find a round box that’s only 1/2 inch deep, replace it. Again, the easiest way to install a new electrical box in an existing ceiling is to use a special fan clamp and a box made for retrofit.
Calculating Box Sizes
To calculate the minimum box size required by the National Electrical Code, add: 1 for each live and neutral wire entering the box, 1 for all ground wires combined, 1 for all clamps combined, and 2 for each device (switch or receptacle, but usually not light fixtures) installed in the box. Multiply this number by 2 for 14 gauge wire and by 2.25 for 12 gauge wire to get the minimum box volume in cubic inches. The plastic boxes have the volume stamped inside.
.