Adding a 4 channel amp is a great idea. I’ve enjoyed clear, powerful sound in my vehicles for years using my own 4-channel amplifiers.
But how do you connect them?
In this guide, I’ll show you how to connect a 4 channel amplifier to the front and rear speakers. After installing hundreds of amps in vehicles just like yours, I’m going to share with you the essential tips you need to get great results.
And hey, don’t worry…in most cases , you can do it yourself and get professional results on a budget.
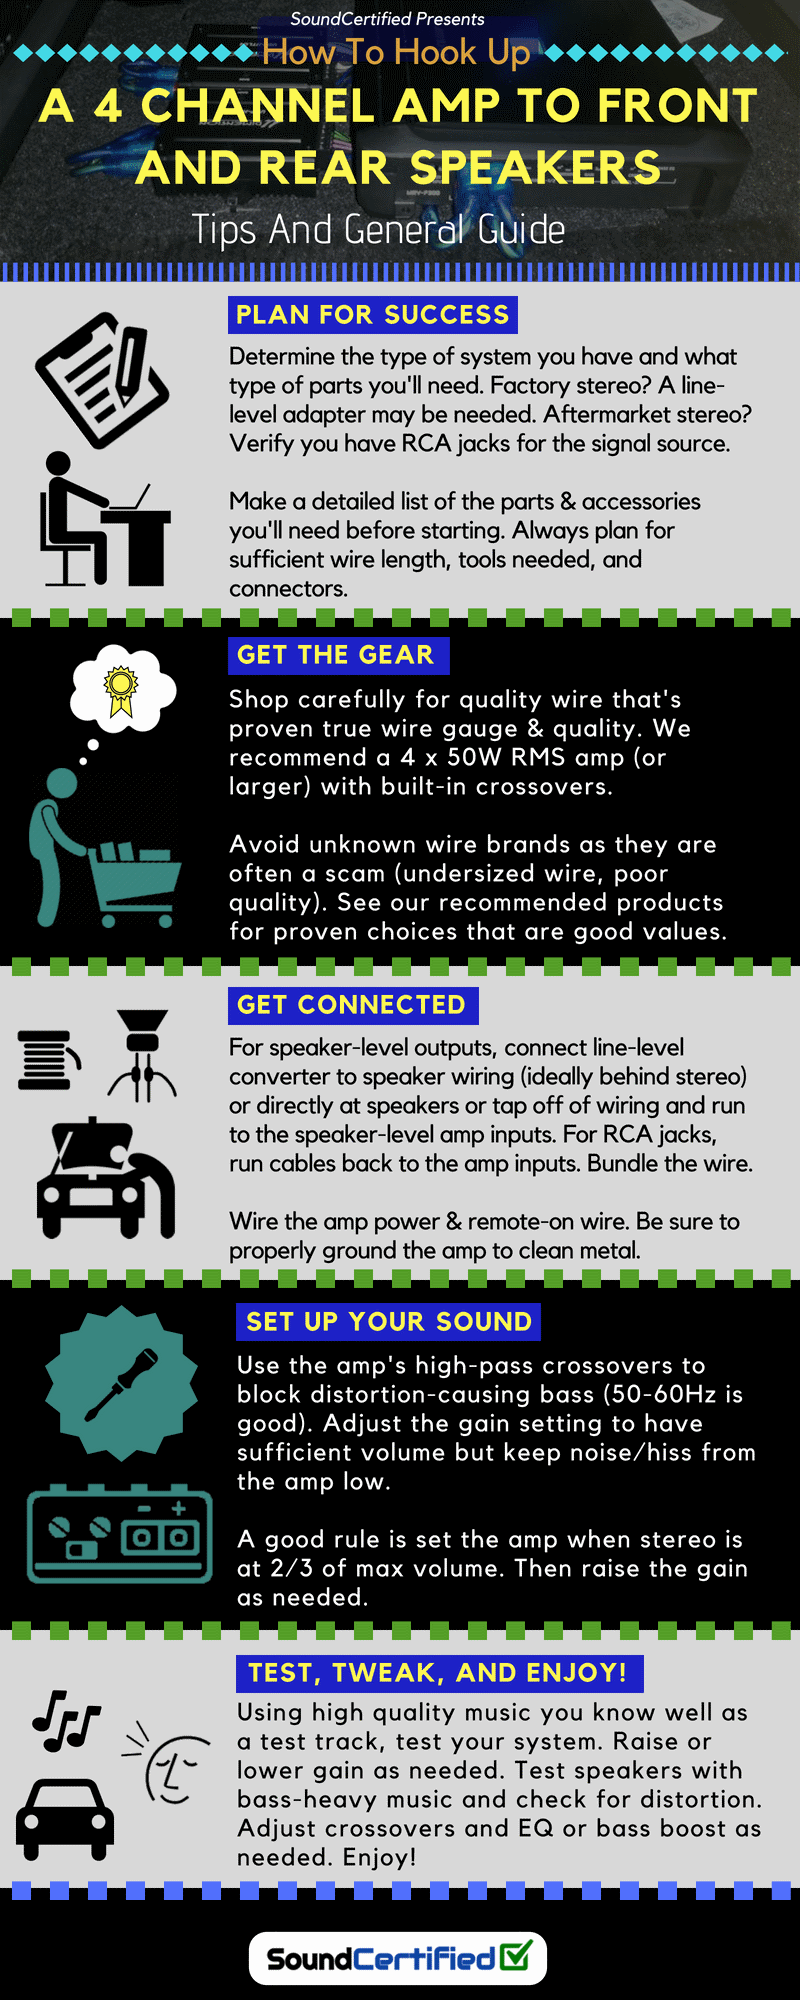
Infographic: How to Hook Up a 4-Channel Amplifier (Tips and General Guide)
Basics First
If you’re reading this, chances are you’re not familiar with the installation of an amplifier, connection wiring and other details related to the connection of a 4-channel amplifier in a vehicle.
Not everyone has installed a car stereo before it is, so I’ll be as thorough as possible and avoid making any assumptions about how much you know.
What is a 4-channel amp?
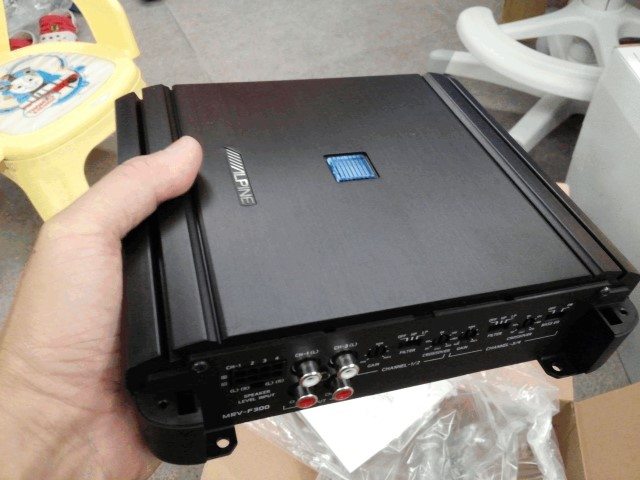
Today’s 4-channel amplifiers offer newer technology, better sound, and a more compact size than in the old days. An excellent example is the Alpine MRV-F300 50W x 4 model. It uses Class D amplifier technology to run extremely cool, and yet is small enough to fit under the seat of a car or truck. Great!
What a 4-channel car amplifier is might seem obvious at first, but there’s a little more to know. Also, there are some interesting (and nice) ways that they differ from 2-channel amps.
There are actually some benefits you’ll get from using a 4-channel amp instead of 2 stereo ones to power your front and rear speakers.
4-channel amplifiers add more channels to a more compact and efficient design than separate amplifiers would.
In addition, they offer more flexibility, since that most can be configured for “bridged” operation, which can provide more power when you don’t need all 4 channels.
What is “bridged” an amplifier?
The bridging mode capability is a specially designed feature in which a “push-pull” configuration is created: one channel (normally used for the left speaker) produces a signal that is opposite to the second channel (normally used for the right speaker) .
This causes the speaker to receive a voltage audio waveform that it’s the di difference between the two channels, resulting in more power available to the speakers.
Essentially, bridged mode is a flexible way to get more power if you’re not driving 4 speakers. It means that 2 channels share the workload of one speaker between them and therefore drive it with more power. That’s useful if you want to connect 4 speakers and a subwoofer to one amplifier.
2-Channel vs. 4-Channel Amplifier Diagram

A The 4 channel car amplifier is basically an enlarged version of a 2 channel amplifier. However, because they are built together and not as 2 separate 2-channel amplifiers, they are more compact. This saves installation space and also makes it easier. Plus, most can be linked to use 2 channels (or 3, depending on your needs), so you’re not restricted to using them with just 4 speakers.
The benefits of using an amplifier to drive your speakers
Whether you have a factory stereo or a great aftermarket (non-factory) one, adding an amplifier is one of the best decisions you can make.
In-dash stereos are very limited in the amount of power they can produce. They can’t drive speakers with the same clarity and low distortion as a good amplifier.
The maximum volume you’ll be able to get out of your speakers will also be pretty low.
That’s why it’s rarely worth bothering with small amps, if there’s no it has a special power supply inside it, it just isn’t capable of putting out much power.
Getting Great Sound
Powering your speakers from an amplifier makes a big difference. It makes a difference, and I’ve enjoyed great sound for years this way.
When an amplifier drives your vehicle’s speakers, it’s often not even pushed to the limit. The sound produced in the speaker has less distortion, doesn’t “bottom out” when playing heavy bass, and you can get much more volume too!
In addition, using a Amplifier with built-in high-pass crossovers means you can block out low-end bass that causes your speakers to distort and try to reproduce music tones they’re not suited for.
The result is cleaner sound, less distortion, and great volume – you can turn your music up even higher!
Imagine driving down the road with your windows down and finally being able to play the music you love. I’m sure you’ll love it as much as I did.
Things to know before you start

Just take a few minutes make a list of the parts, cables, tools and other parts you will need. Planning ahead can mean the difference between making your system run smoothly or having a frustrating time, or failing altogether! I always organize myself and gather my supplies before starting a job.
Planning ahead is very important. You don’t want to run out of cables or find out you don’t have the right parts. , For example. That will mean you can’t finish your project.
It’s even worse when you have to drive around town looking for items or can’t do anything after the stores close. Trust me, I’ve been there, and it’s terrible!
Notes on cables, tools and a few other things
When it comes to installations, always plan to have more cable, in rather than insufficient. This applies to both speaker wire and RCA cables.
The amp kits I recommend are just the right length for your amp installation, but the speaker wire Speaker and RCA cables are another matter in this case.
What length and size of speaker cable do I need?

No need to spend an excessive amount money on speaker wire 18 gauge is sufficient for many installations, but 16 gauge is also a great option if the price is right. A great example is this AmazonBasics 100-foot roll. I recommend a 100 foot roll for many installations with a 4 channel amplifier (see why below).
Here is a worst case estimate for the length of speaker wire required. I will use the example of installing an amplifier using speaker level inputs, with the following typical installation:
- Amplifier is located in the trunk
- Speaker level signal connections speaker near the radio (center console)
That means you need 2 rolls of 100 foot wire. Or at least 1,100 foot roll and 1,50 foot roll. If you plan to use a line level adapter, expect to pick up a 100 foot roll.
If your installation uses RCA connectors, expect a 100 foot roll as well (4 channels x 15 foot length cable estimate amp speaker).
What about RCA cables?
 If you are installing a 4 channel amplifier and using connections of RCA cable, you’ll need to purchase a second pair along with your amp’s wiring kit, since most only include a 2-channel cable.
For most installations, I recommend 18-foot cables long. It is generally long enough for most vehicles and should generally be long enough to hide wires inside the interior and under the rear seat, etc.
There is no reason to spend an excessive amount of money. Just pick some good quality, well made cables. Even No products were found. will be fine in most cases.
Tools you’ll need.
 Crimping tools are ideal for installing amplifier and speaker wiring with professional results. If you’re doing your own installation, you can get by with an inexpensive tool like this Pros’Kit crimp tool. Crimp connectors are sold separately at many auto parts or general stores and are very affordable.
I recommend a few tools. By shopping carefully, you can avoid getting ripped off on tool prices. When connecting speaker wiring to factory wiring, it’s easier to use crimp connectors than to solder.
Never just twist the wire and wrap it in electrical tape. Always use a reliable connection.
During hot weather, the adhesive on electrical tape may fail and the tape may come loose from the wire. This exposes you to possible electrical shorts and potential damage to your radio or amplifier.
If you have access to a cordless drill, that’s great! They are great for drilling holes in the vehicle’s metal to mount your amp or connecting the ground wire to bare metal.
I also recommend the following:
- Wire cutters (some crimp tools have this built in)
- Roll of quality electrical tape
- Zip ties, 6″ long, bag of 100
- A digital test meter for measuring voltage

A test meter is often incredibly helpful when installing an amplifier. However, you don’t need to spend a lot of money! A basic but good cheap model like this one on Amazon will do just fine.
I recommend getting a cheap but good digital test meter to find a switched +12V wire to get a remote turn on signal for the amplifier
They are also extremely helpful in troubleshooting power when something is wrong.
Gather your installation shopping list

Here is a general but fairly precise list of what you will need to connect a 4-channel amplifier to the front and rear speakers.
Types Installation Kit 1 or 2: Factory radio or no RCA connections
- 4-channel amplifier with speaker or amp level inputs and line level adapter
- 120 ft or longer speaker wire, 18 gauge or larger
- Amp Wiring Kit
- Crimping Tool and Butt Connectors (Wire Crimps) (25 or more minimum)
- Cutting Pliers
- Insulating Tape
- Cable Ties, 6″, bag of 100
- Wire Gauge test
Installation Type 3: RCA connections
- 4-channel amplifier with speaker level inputs or line level adapter and amplifier
- 100′ coiled speaker wire, 18 gauge or larger
- Amplifier wiring kit
- Extra RCA cables, 18″ minimum
- Crimping Tool and Butt Connectors (Wire Crimping) (25 or more minimum)
- Cutting Pliers
- Insulating Tape
- Wire Ties, 6″ , bag of 100
- Test Gauge
Be sure to plan well and estimate how much speaker wire you will need. For the installation of the amp itself, I highly recommend using a pre-made amp wiring kit like the one you’ll find here in my amp kit buyer’s guide.
You’ll also need to get a second pair of RCA cables. I recommend 18 feet long or more. Don’t spend too much money, but get some decent quality ones.
How to send a signal to your amp

Image of an aftermarket (not factory) stereo showing RCA connectors and speaker output wiring. Either one can be used to send a signal to an amplifier, but the RCA connectors offer a better option. They typically have lower distortion and allow the use of plug-in RCA cables. If these are not available, an amplifier with speaker-level inputs or a line-level (speaker-level) adapter can be used.
To set up a 4-channel amplifier and drive all 4 speakers, in many cases, the biggest hurdle is getting a signal to the amplifier. Once this is done, the rest is usually a standard amp setup.
There are 3 basic ways to send a signal to your 4-channel amp:
- Connect the speaker outputs to the speaker level inputs of your amplifier
- Connect a line level adapter to the radio and then use RCA cables to the amplifier
- Connect your radio to the amplifier using RCA cables directly
In some cases, adapters are available to connect an amplifier to the audio wiring of a factory amplified system, but often it’s difficult or there are obstacles that you won’t find until you start.
One reason is that factory amplified systems often have non-standard wiring connections for the audio path and are prone to noise problems. if you connect an amplifier without the proper adapter or wiring. .
What type of connection do I need?
If you have a radio with RCA connectors, skip to the next section.
However, if you have a stereo without RCA connectors (which is always the case with factory-installed stereos), you’ll need to purchase one of the following:
- A “line level” converter
- A speaker level amplifier (“high level”) inputs
1. Line Level Converters
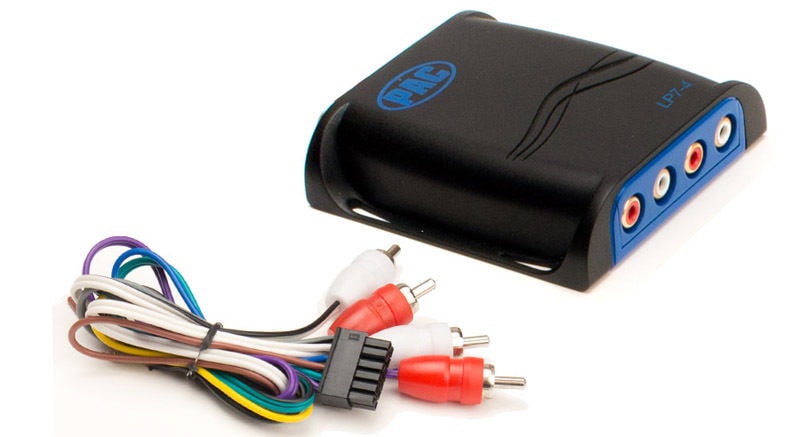
Line level converters like this 4-channel model PAC LP7-4 are designed to take speaker outputs from a stereo without RCA connectors and adapt them to RCA connectors. With this, you can connect RCA cables to your amplifier.
Line level converters are designed to allow connection to the RCA inputs of an amplifier by converting the speaker outputs of a stereo to a low level signal that can be used by an amplifier.
p>
It is very important to buy a quality, well-designed line-level adapter to avoid noise, poor sound quality, and other problems. Don’t buy the cheapest; instead, get a brand name model you can trust (like the one above).
2. Speaker Level Inputs
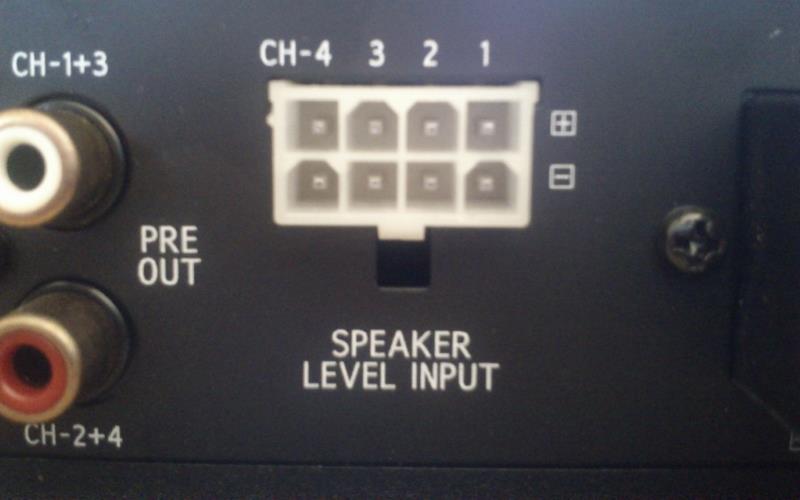 Amplifiers with high level (speaker level) inputs like this allow you to connect to speaker wiring for a signal source. This saves you having to purchase a separate adapter.
Speaker level inputs are common on many 4-channel amplifiers. These amplifiers contain electronics that reduce signals from the speaker wiring to a safe lower signal for the amplifier’s input circuitry.
They are easy to connect – usually just a matter of connecting both the wired positive (+) and negative (-) for each speaker channel in a small included wiring harness. It is then connected to the speaker level input connector.

A typical speaker level input harness for a 4 channel amplifier. Wires are color coded for ease of installation. White = front left, gray = front right, green = rear left, and purple = rear right.
Although it can save money (in this case you won’t need a line level adapter) we often recommend that people consider buying a line level converter anyway.
This allows for an easier upgrade to your stereo later on, which is very common for people to do. Using the line level converter will now allow you to connect RCA cables to your 4 channel amp for later use if you buy a better stereo (which will include RCA connectors, most of the time).
3. RCA Jack (Line Level) Connections
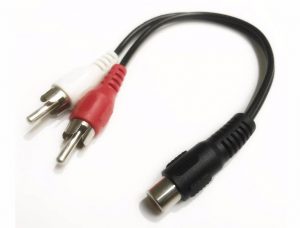
RCA jacks offer a clean connection with less noise than speaker-level adapters, but honestly, the average person doesn’t notice. RCA cables (line level connections) are the preferred way to connect a signal to your amplifier if you have that option.

RCA jacks on the rear of a Pioneer head unit. This is the ideal way to connect your amplifier’s signal inputs, if available. For a 4 channel amp you will need 2 stereo RCA cables to do this. White represents the left channel, red white represents the right. These are the standard colors for both car and home audio outputs.
If your stereo has RCA jacks, congratulations. Things just got a little easier, and potentially better sound too!
You’ll need 2 RCA male to male stereo cables (4 audio channels total) to connect the radio to your 4 amp amplifier. channels. . There are 4 signal channels: front left and right and rear left and right.
4 Channel Amplifier Signal Connection Diagram
This is a helpful diagram showing the most common connections. Common steps you’ll need to do one of the 3 most common cases I mentioned above:
- Connect your amplifier’s speaker level inputs
- Use a line level converter
- Connect your amplifier to the RCA jacks on the radio
 You can also click here to view the document .pdf for printing or downloading.
Connecting and Signal Wiring in Operation
Speaker Level Connections
As mentioned above and as shown in the diagrams, if you are using speaker level outputs z To get a signal from the radio, you will need to connect the cable. Ideally, you’ll do this near the radio and then bundle the wires together.
You can bundle your speaker wires with cable ties to keep them neat and make installation easier.
p>
Calculate the length of speaker wire you need to reach the amplifier (or line level converter) for each audio channel. To do this, run a length of wire from the radio to where the amplifier will be installed, then leave a little more and just enough length to go around the curves and inside parts.
Cut 7 more lengths of cable, for a total of 8:
- 4 channels (4 pairs of cables) going to the speaker level inputs of the amplifier
- 4 channels from the amplifier to the factory wiring of the radio speakers

I recommend connecting to speaker level outputs using crimp connectors and a crimp tool for a solid and reliable connection. The blue connectors are normally the proper size for 18-16 gauge wire.
Factory Stereo Color Codes
If you have a factory stereo, you’ll need to find the wiring colors for your speaker wiring.
A great One resource for that is The12Volt.com, where you’ll find wiring diagrams for your vehicle and listed color codes.
Making Connections

After removing the radio, you will find the connectors like this for the factory stereo wiring harness. You will need to separate the speaker wires, cut them, and connect them to reach the amplifier.
Remove the radio and disconnect the factory wiring plugs or aftermarket radio wiring harness.
Cut the speaker wires, leaving enough length to move the wire and enough length to connect to the wire freely.
Strip a small portion of both the speaker wire from the stereo and the speaker wire from the stereo. the amplifier speakers. If you are using a line level adapter, connect it to the speaker output side of the stereo. Then connect the 4 pairs of wires to the speaker wiring in the harness.
Insert the bare wire (about 1/4″ of bare wire) into the connectors and carefully crimp using a crimping tool if necessary. It has one. Alternatively, you can twist the wire, solder it, and carefully wrap it with electrical tape or use heat shrink tubing to insulate it.
If you are using speaker level inputs on your amplifier, also connect 4 pairs of wires to the output of the amplifier. stereo.
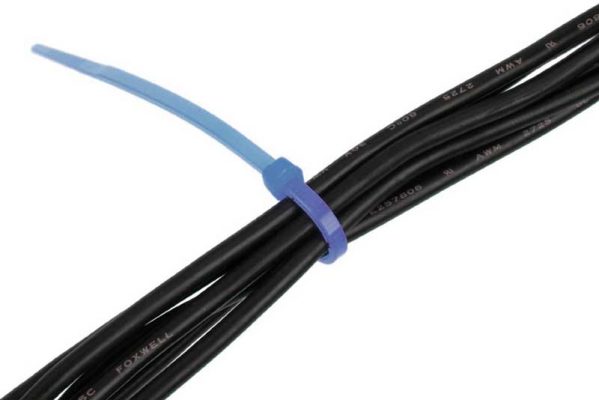
For a neater and more professional installation, tie the speaker wiring similar to this using wire ties (“zip”). I recommend using 6″ cable ties which are often sold in packs of 100.
Once all the wiring is connected, tie it down with cable ties or optionally wrap it with some electrical tape. In both cases, it works well to attach zip ties or tape every 1″ to 1.5″ along the length of the cable.
Connecting RCA Cables

Connecting RCA cables to an aftermarket (aftermarket) stereo to connect to an amplifier.
If you are using a line level converter or have a stereo with RCA connectors, connect the 4 cable plugs to the front and rear outputs.
RCA cables are sometimes marked with left and right symbols (“L” and “R”). In some cases, white, clear, or some lighter color may be used to represent the left channel.
Connect the wires consistently so you can recognize which is which. If the front and rear RCA cables are the same, you may want to mark the front and back with tape and a marker or pen.
Connect the remote amp cable
Don’t forget the remote cable! Amplifier wiring kits include a small wire that is used to connect the amplifier so that it turns on and off with the accessory position of the ignition switch.
Locate a +12V wire that has power when the ignition is switched to “ACC” or the like but is turned off by the key. You may also have good luck finding an existing wire color on the vehicle wiring diagrams I mentioned above or on a Google search.
I recommend checking the wiring even if you’ve already located it online, just to be sure.
Before reinstalling the radio, connect this wire and run it along with the speaker wiring.
How to connect a 2 ch. car stereo to 4 channel amplifier

You can connect a head unit car stereo with only 2 channels (left and right) to a 4-channel amplifier easily. Usually all you need are 2 RCA Y adapter cables. The head unit’s left channel RCA jack should be connected to the front left and rear left amplifier inputs. Similarly for the right channel. If you are using speaker level inputs on the amplifier, use the connections shown above. NOTE: Use only ONE of the two connections above! Never connect both types at the same time! Speaker level outputs will break RCA connections.
If your head unit (car stereo) only has 2 RCA jacks or two pairs of speaker outputs, that’s fine.
As shown in the diagram above, you can connect 2 channels to a 4 channel amplifier using the parallel connected speaker level inputs or using simple RCA adapter cables.
All you need is a decent pair (2 total) female to male RCA “Y” adapters like these inexpensive ones from Amazon.
The sound quality will be exactly the same.Today’s amplifiers are designed in such a way that there is no problem in using a Y-adapter to connect the amplifier. The amp will receive exactly the same signal, with the same quality, on both the front and rear channels.
The only downside is that there will be no front to back fader control like on the head units . with 4 channels of outputs.
After connecting the stereo to the amplifier, you will need to adjust the rear gain to set the volume level of the rear speakers as needed for proper volume depending on the stereo’s signal strength. .
Installing the amplifier
 An amp wiring kit like this will make installing your 4 channel amp much easier. A good quality one like this complete 8 gauge kit from Belva not only includes wiring but much more. You’ll also need to pick up a second pair of RCA cables (if you use them) and enough speaker wire.
Your amp needs a good, solid metal ground connection and you’ll need to run the positive battery cable to the speaker compartment. engine. Your amp’s wiring kit will also include a fuse holder that should also be installed near the battery (most kits include instructions, by the way).
You’ll also need to connect the amp’s speaker outputs to the wire you ran from the radio. Here’s a basic diagram as well to help:

Setting up your amp
 Once installed, you need to set the gain and crossover levels of your amp for the best sound In this image, you can see the adjustable crossovers for the front and rear channels. Turn on the high pass crossovers and set them to a setting near 50-60 Hz, to allow good bass for the music but block out the distorting bass.
Once installed, you will need to set the gain levels and crossovers from your amplifier, if available. Most of those sold today have that. (See my recommendations at the end for some great models)
The gain control is the amount of signal amplification the amp does. Ideally, with a good input signal, it can be kept low to reduce any hiss or noise that might appear when it’s high.
Here’s a great rule of thumb on how to set the gain for this type of system:
- Turn down the gain controls on the amplifier
- Turn the stereo volume to 2/3 of maximum
- Slowly raise the gain controls until the volume is sufficient
When you’re done, you should have enough volume available on the stereo but the noise should be minimal. You will still need to adjust it a bit if the volume is too loud or too soft.
Setting up the crossover
As I mentioned at the beginning of this guide, using step crossovers will allow more volume with less distortion and will help protect the speakers from heavy bass.
For the front and rear channels, turn on the high-pass feature and, if an adjustable dial is available, set it near 50 to 60 Hz. Some Some models do not offer an adjustable frequency for cutoff, but they are likely preset to a good level.
Test and adjust

Once installed, test and adjust your amp as needed . A great way to mount your 4 channel amp is to use a car mount plate, covered with speaker box mat or other material.
Play music you are very familiar with and adjust things like bass, treble and fader as needed. Using music that you’re very familiar with (high quality) means you’ll be able to pick up any problems with the sound fairly easily.
If you don’t already have one, you might consider upgrading later. to a head unit with built-in equalizer (EQ) functions to help customize your sound.
.