In most exchange server 2010 environments, certain hosts, devices, or applications will need to be allowed to relay in order to send email through the exchange server. this is common with multifunction devices such as network-connected printers/scanners, or applications such as backup software that email reports.
SMTP communication is handled by the Hub Transport server at an exchange organization. the transport service listens for smtp connections on its default receive connector. however, this socket is protected by default from allowing anonymous connections (ie, the type of connection most systems will make without sharing).
You can see this in effect if you telnet to the server on port 25 and try to start unauthenticated smtp communications.
For some Hub Transport servers that face the Internet, anonymous connections may already be enabled. in those cases, the retransmission will still be denied, but it will behave differently than the first example.
You will notice that the relay is denied if I try to send from an @hotmail.com address to an @gmail.com address, because neither is a valid domain for the exchange organization. but with anonymous users enabled on the receive connector, I can send from a @hotmail.com address to a valid local address.
however, if I try to relay to an external recipient, the exchange server doesn’t allow it.
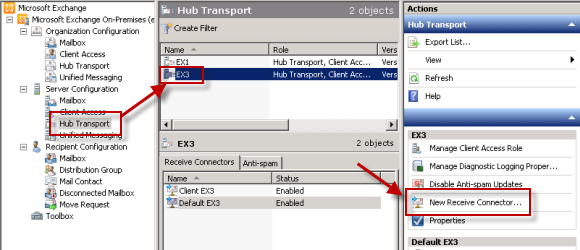
To allow a non-Exchange server to relay mail, we can create a new Receive connector on the Hub Transport server. start the exchange management console and go to server management and then central transport. select the Hub Transport server on which you want to create the new Receive connector, and in the actions pane of the console, select new Receive connector.
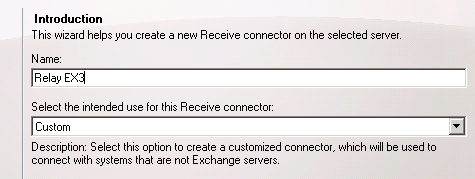
give the new connector a name like “relay” and click next to continue.
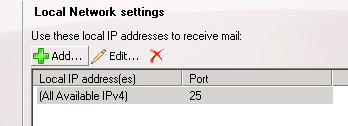
You can leave the local network settings as is, or you can optionally use a dedicated ip address for this socket if one has already been assigned to the server. Using dedicated ip addresses for each connector is sometimes required if you need to create connectors with different authentication settings, but for a general relay connector you don’t need to change it.
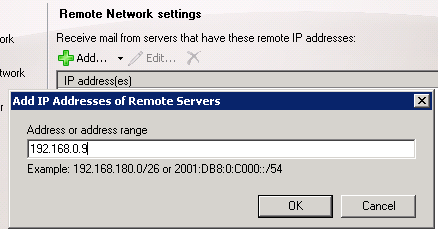
highlight the default ip range in the remote network settings and click the red x to remove it.

Now click the add button and enter the ip address of the server you want to allow to transmit through the exchange server. click ok to add it and then next to continue.
click the new button to complete the wizard.
The Receive connector has already been created, but it is not yet ready to allow the server to relay it. return to the exchange management console, right-click the newly created receive connector and choose properties.
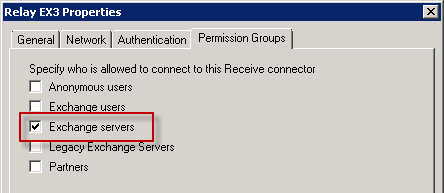
select the permission groups tab and check the exchange servers box.
select the authentication tab and check the externally protected box.
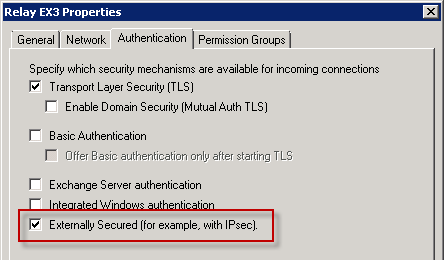
apply the changes and the Receive connector is now ready for the server to retransmit.
because the remote ip address range was secured to that single ip address, any other servers on different ip addresses will still not be able to transmit through the exchange server. from any other ip address not included in the remote ip range in the receive connector relay will be denied.
Later, you can add more ip addresses, ip ranges, subnets, or even add multiple ip addresses to the Receive connector using a script if needed.