Use your cricut explore or cricut maker to create this valentine’s day box! Use the free svg files and tutorial to make this adorable mailbox, perfect for holding valentines or as a decoration for valentines day!
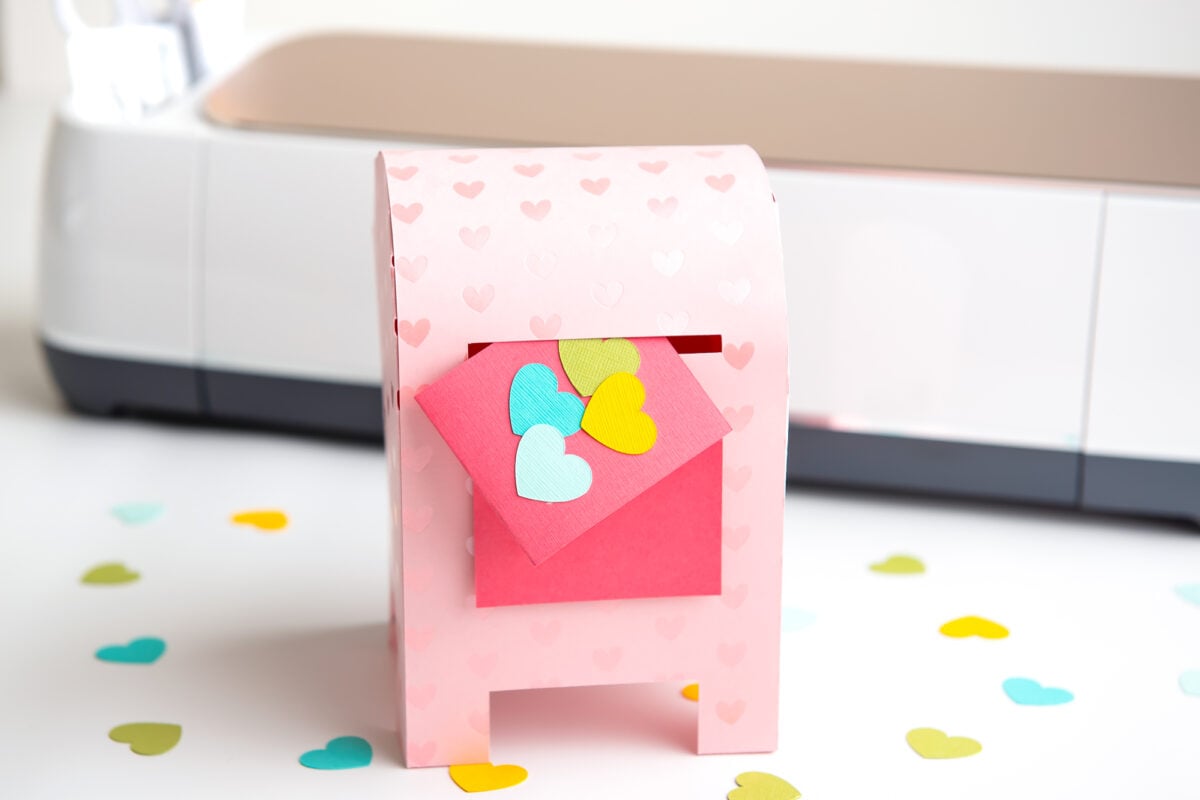
I love making 3D designs with my Cricut—there’s something about watching a few pieces of flat card stock grow into a standing object that makes me really marvel at all we can do with a Cricut. This Valentine’s Day mailbox is one of those projects—the pieces don’t look like much after they are cut, but with a little bit of glue, you have an adorable mailbox, ready for valentines!
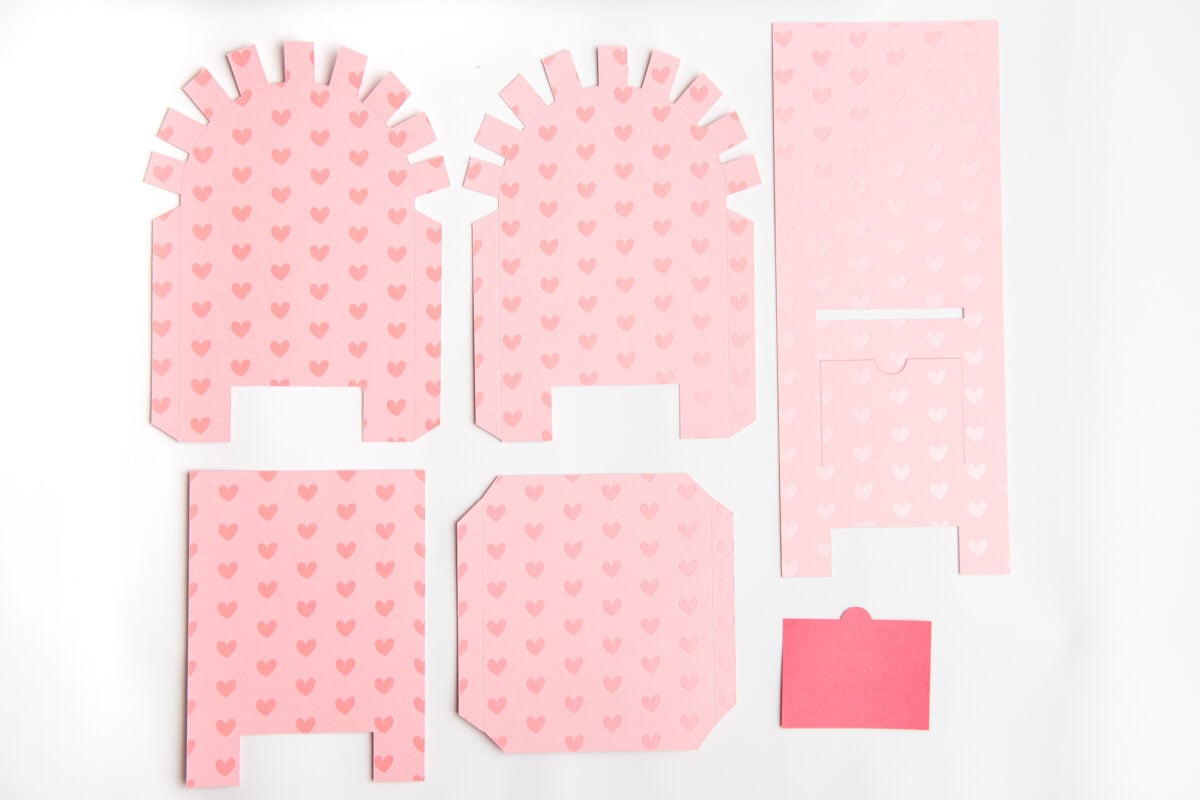
valentines day box supplies
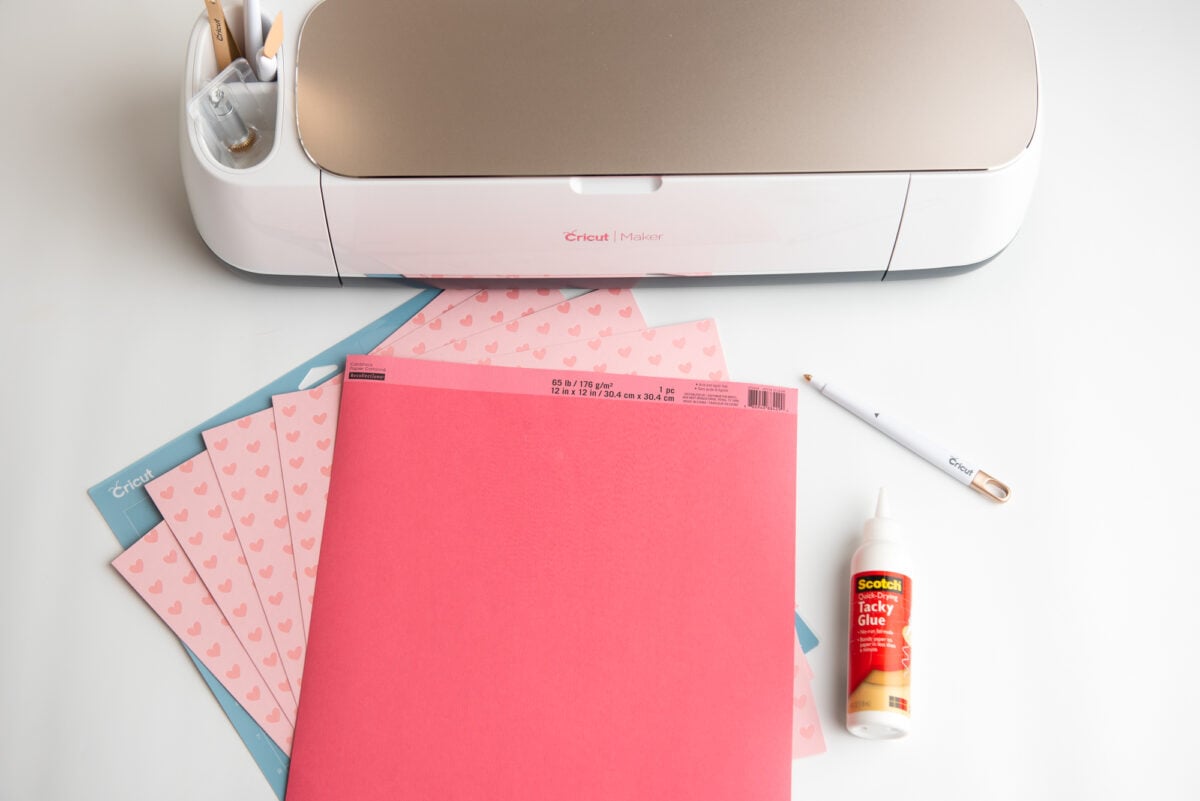
To make this valentine mailbox, you just need a few simple supplies and your cricut!

- Cricut Explore or Cricut Maker
- Blue LightGrip mat or green StandardGrip mat
- Scoring Stylus or Scoring Wheel
- Two pieces of light pink card stock
- One smaller piece of pink card stock
- Tacky glue
- SVG Files (download using box below)
valentines day box instructions
set your file to design space
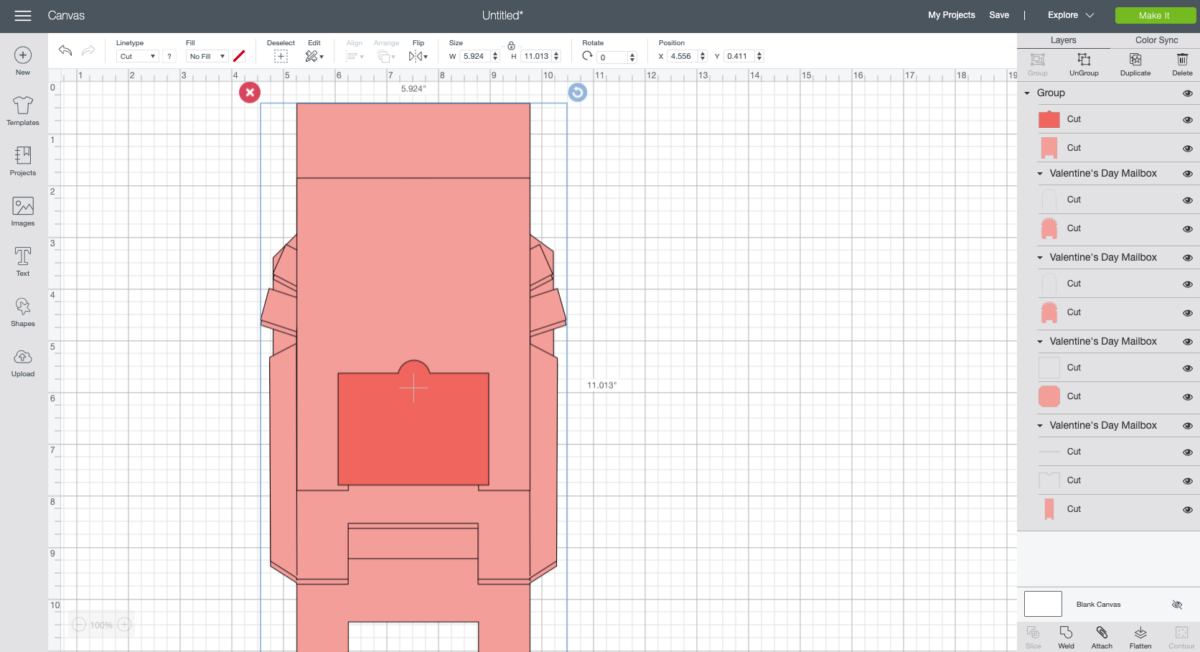
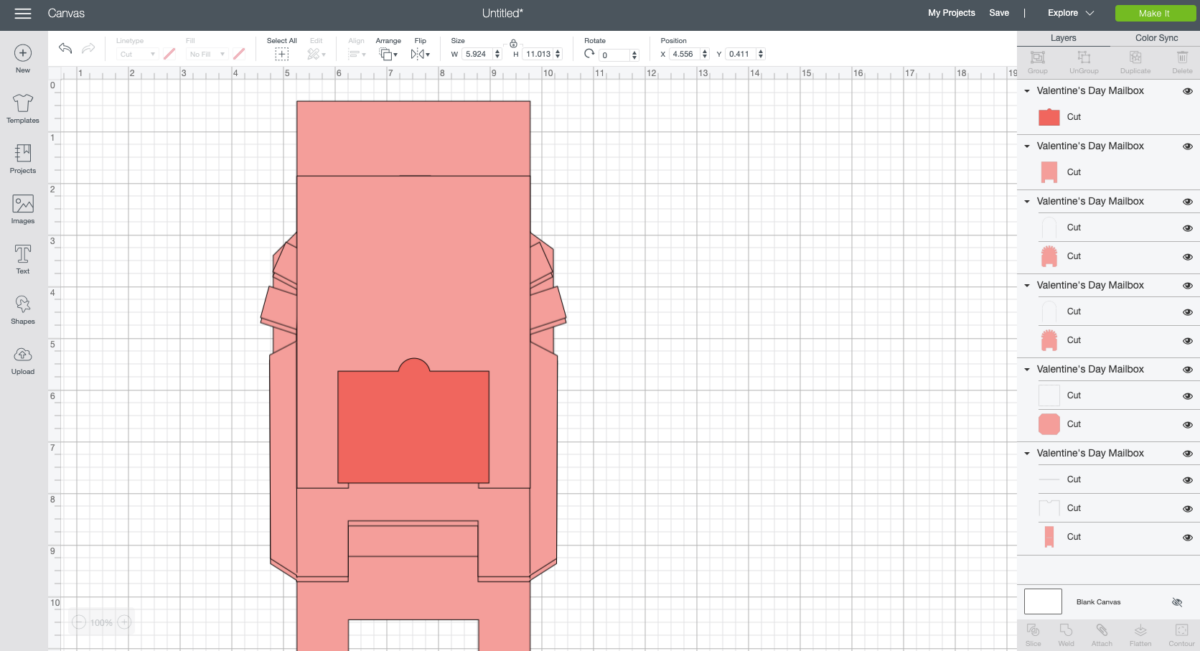
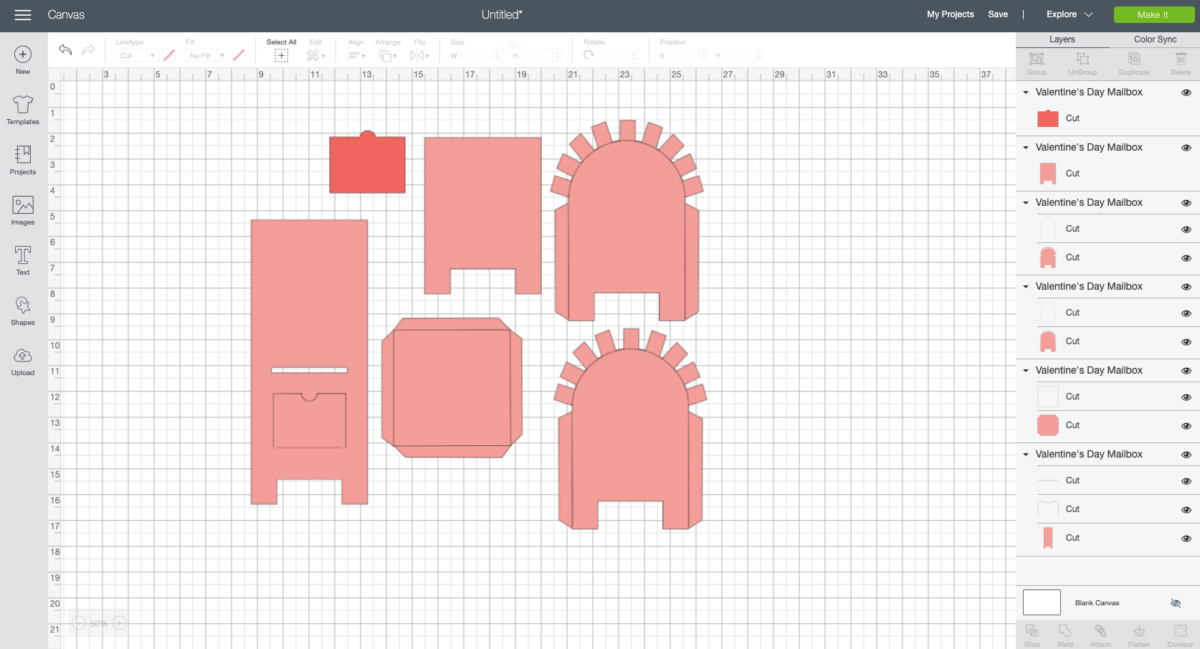
Begin by uploading your svg file to cricut design space (for more information, see how to upload an svg to design space). when you import the file, all the pieces will be stacked on top of each other.
Select the group and click “Ungroup” at the top of the Layers Panel on the left. This will separate your different pieces—you’ll see this reflected in the Layers Panel as well.

Now you can move those pieces individually.
separate them so you can see each piece. use the zoom feature at the bottom right to zoom out if needed. you’ll see a total of six pieces: two sides, front, back, bottom, and door.
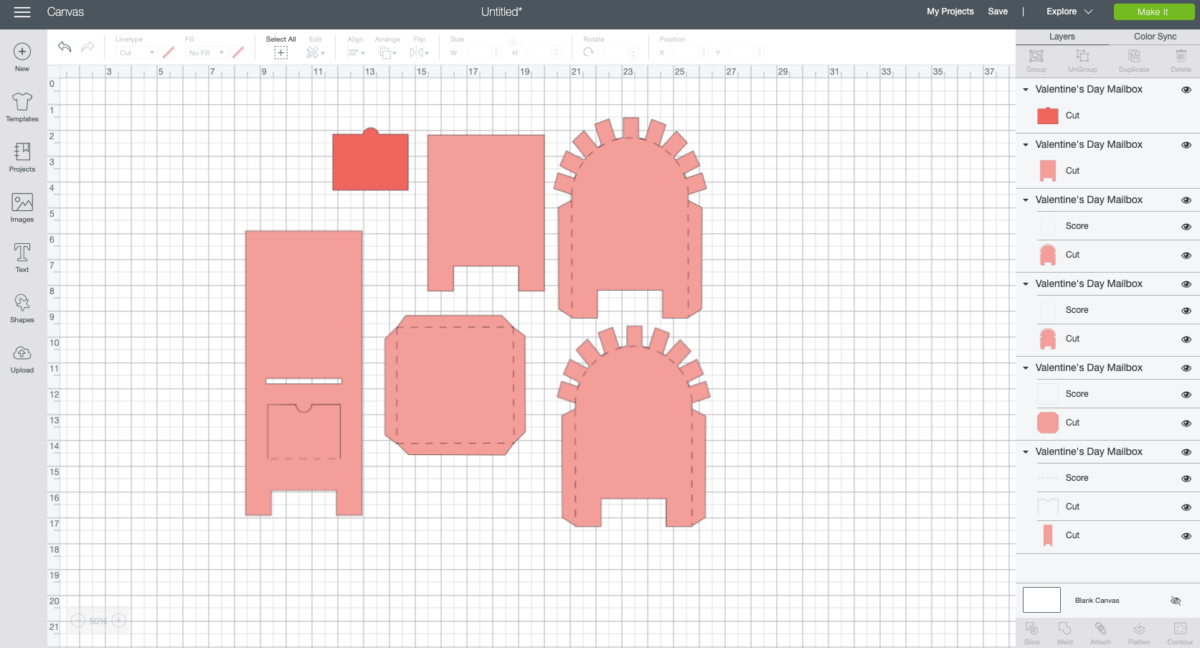
Before we can cut our project, we need to change most of those black lines to score lines. Start with the side pieces. In the Layers Panel, click just the black arch to select just that line.
then go to the linetype dropdown menu at the top of the editing toolbar and change the linetype from cut to punctuation.
now the line will be dashed; this indicates that this line will be scored rather than cut.
do this with the remaining lines. first the other side, then the bottom, and then just the straight, flat line on the front of the mailbox. you want to leave the other three sides of that as a cut line; this will create the slot for your valentine cards. see the image below for reference—remember dashed = mark, solid = cut.

Now we need to attach each of the pieces to their score lines so they score and cut properly. Select both the side piece and its score line and click Attach at the bottom of the Layers Panel.
You’ll see that the two pieces are now nested under an attached title in the layers panel. now your scored line and mailbox side piece will score and cut correctly.
do the same with the other pieces. then click do it on the top left!
cutting your valentine box
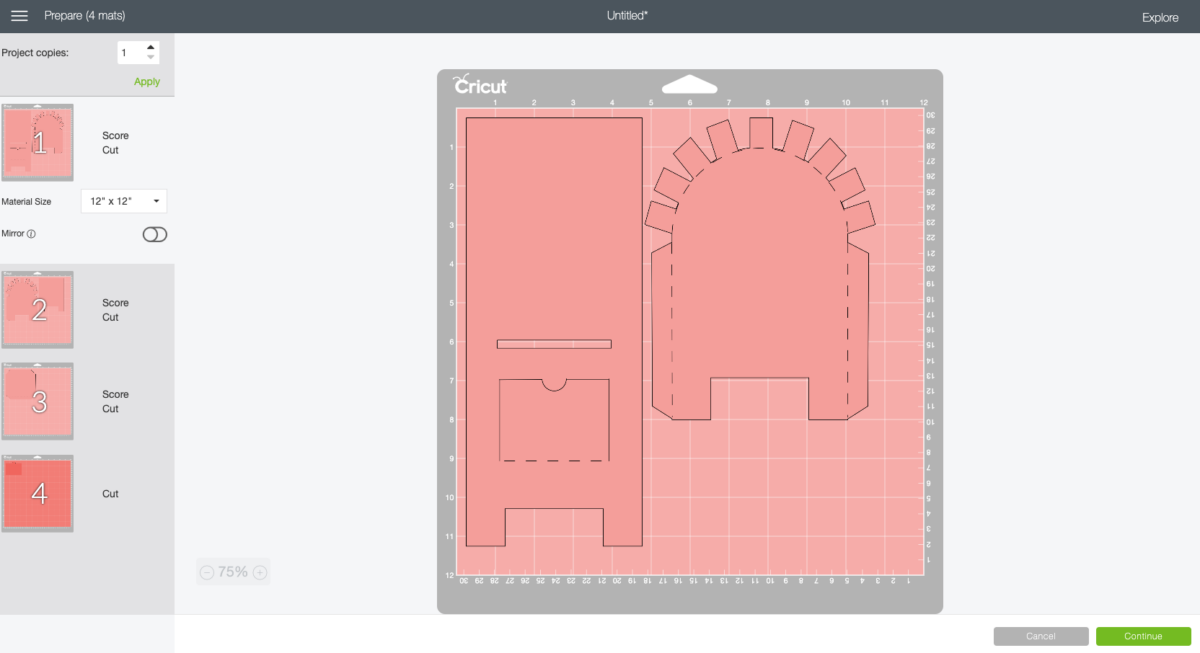
From here, you’ll see all of your pieces laid out on their mats. if any of your score lines are on their own mat, click cancel and go back and attach them to your pieces correctly.
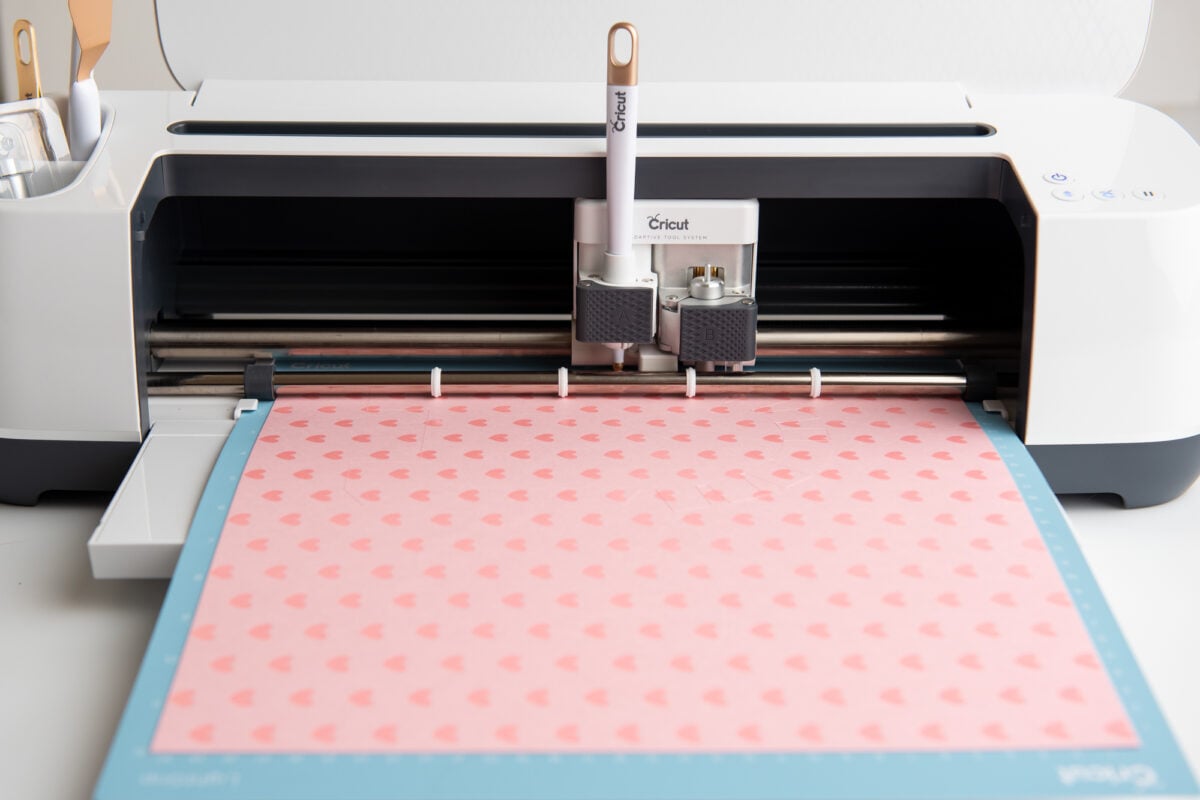
Then hit continue. Insert your scoring stylus or scoring wheel into your machine, and score and cut out your pieces! Check out these posts if you need help scoring:
- use cricut scoring pen
- use cricut scoring wheels
remember to choose the correct material settings for your material; for example, glossy cardstock is different than regular cardstock.

Assembling Your Valentine’s Day Box
once you have cut all the pieces, fold along all the marked lines and start assembling your valentine box. As you assemble, let the glue dry between steps so your mailbox stays solid as you build it.
see assembly guide below. by matching the numbers, you can see how this mailbox will be joined.

Start by gluing the tabs of the side pieces to the front panel, matching up 1L to 1L, 1R to 1R, and the top 2 tabs to the sides of the front panel as shown here:
To do the arches, begin gluing them to the front panel. Glue a few at a time and let the glue set, do the opposite side, and let those set, and then repeat until all the tabs are glued and dry. This will form the rounded top of the mailbox.

You will have one tab left, and this will be used to glue the back on in a bit.
Next, glue the bottom panel tabs (3) to the front and sides of the mailbox.

Now you’re ready to glue the back panel to the bag tabs of the arch and sides that were left from earlier, including the bottom piece. Once glued, the box will officially be closed off with the bottom attached.

Finally, attach the darker door piece to the cut out slot on the front panel. Make sure to line up the tops of both door panels so they are even. Valentines go in the slot above the door, and the door will work to retrieve your valentines!
Then you’re done! You can make this size for small valentines, or increase the size in Design Space for larger valentines! Decorate even further if you’d like—and then collect valentines from classmates and friends!

If you have any questions about this mailbox or how to assemble it, let me know in the comments. Happy Valentine’s Day!