manual setup of adelphia.net email account on your android phone using incoming (imap) and outgoing (smtp) server details
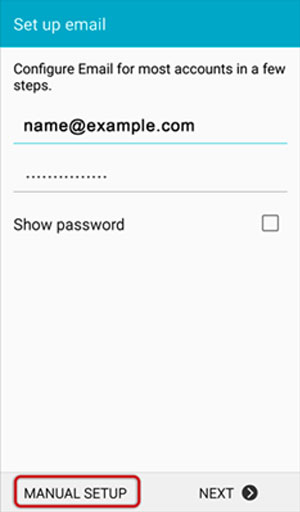
step 1: start by selecting the mail icon on the applications screen. enter the email address and email password. choose manual configuration
step 2: choose map
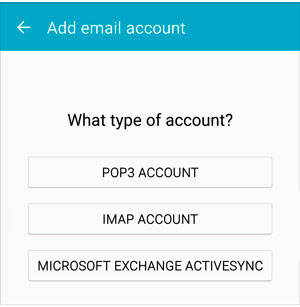
Step 3: If you have chosen imap, make sure to enter the following settings and click next
- imap server: mail.twc.com
- security type is none
- port is 993 for imap
- secure – port: 993 and security type: ssl/tls (accept all certificates)
- insecure – port: 143 and security type: none (accept all certificates)

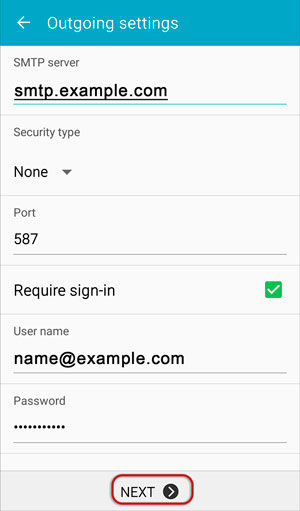
Step 4: Enter the following outgoing smtp settings for adelphia.net and click select next
- smtp server: mail.twc.com
- security type is none
- port is 587 for smtp
- outgoing (smtp) secure – port: 465 for and security type: ssl/tls (accept all certificates)
- outgoing (smtp roaming server) secure – port: 587 and security type: ssl/tls (accept all certificates)
- outgoing (smtp) – port: 25 and security type: none (accept all certificates)
- outgoing (smtp roaming server) insecure – port: 587 and security type: none (accept all certificates)
step 5: select done. Congratulations! You are done here and you are ready to use your email account on your android phone. if you still have problems, visit this article.
manual setup of adelphia.net email account on your apple iphone
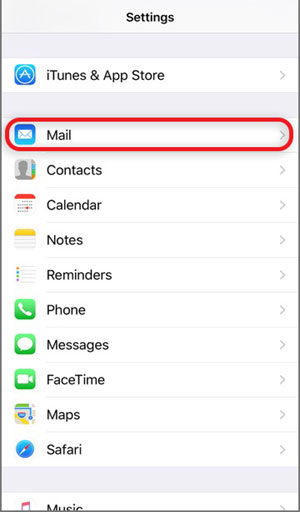
step 1: select the settings icon on your home screen
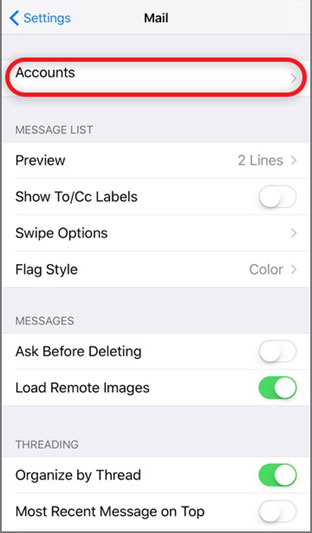
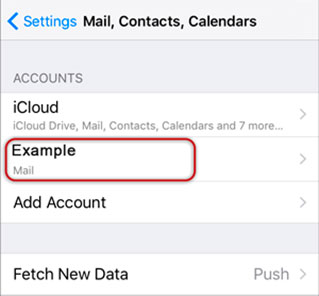
step 2: select mail
step 3: select accounts
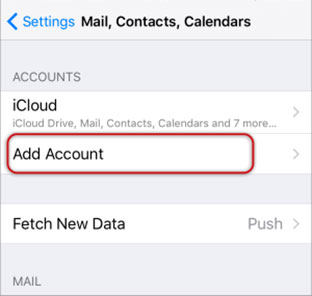
step 4: select add account
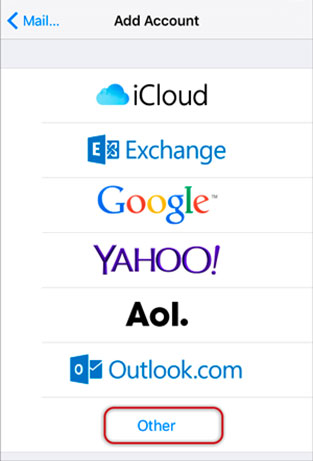
step 5: select other from the menu
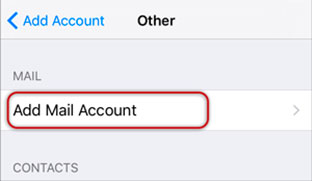
step 6: select add email account
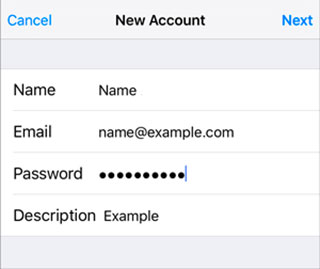
step 7: enter your name, email & password and then click next
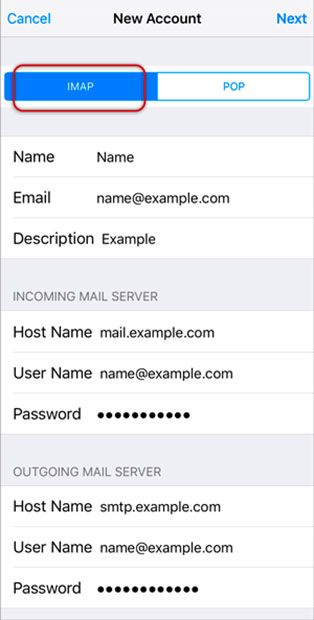
step 8: select imap . scroll down to the incoming mail server and enter all the relevant details, then do the same for the outgoing mail server, as in the screen below, then select next.
- make sure the username is the full email address. username & passwords are the same for incoming calls & outgoing servers.
- incoming mail server hostname is mail.twc.com
- outgoing mail server hostname is mail.twc.com
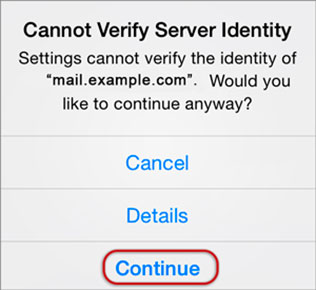
Step 9: You may receive a message asking you to check the incoming and outgoing servers; you can click continue for each or tap “details” and then tap “trust”
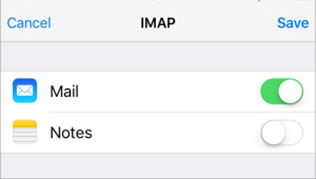
step 10: save
step 11: choose the new account you just created
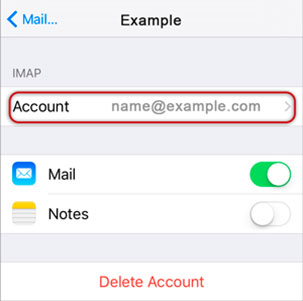
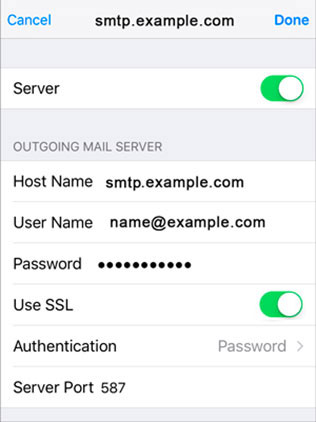
step 12: choose the smtp server
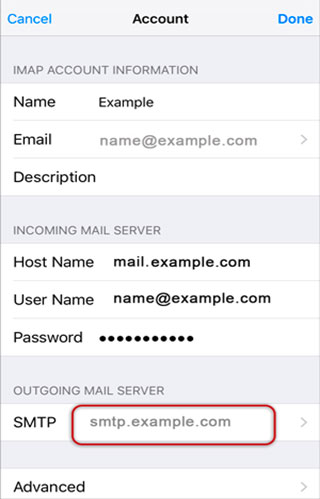
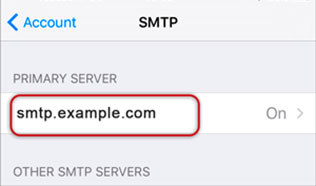
step 13: verify smtp settings and click done
- outgoing mail server hostname for adelphia.net is mail.twc.com
- username: full adelphia email address .net
- password: your email password
- use ssl is enabled. you can also turn it off and use the correct port number as shown below.
- outgoing (smtp) secure – port: 465 for y security type: ssl/tls (accept all certificates)
- outgoing (smtp roaming server) secure – port: 587 y type security: ssl/tls (accept all certificates)
- outgoing (smtp) – port: 25 and security type: none (accept all certificates)
- outgoing (server smtp roaming) insecure – port: 587 and security type: none (accept all certificates)
congratulations! You’re done here and you’re ready to use your email account on your iPhone. if you still have problems, visit this article.
manual configuration of the adelphia.net email account in your apple mail
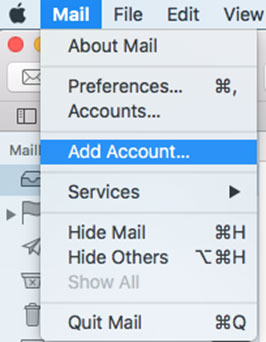
step 1: start the mail application. from the toolbar at the top, select mail and then add account
step 2: you can choose automatic email setup for known used email accounts from the list and if you don’t, you need to choose another email account and configure your email manually

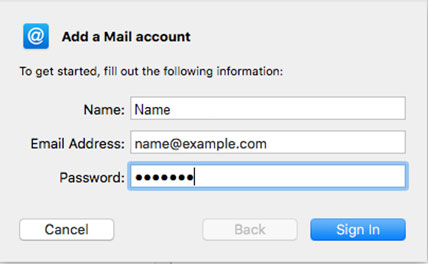
step 3: enter your details and then click sign in
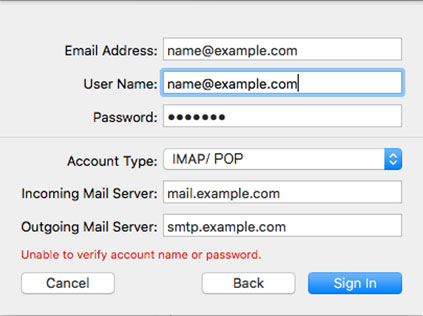
Step 4: Complete the setup as follows and click Login
- email address & username: your full adelphia.net email address
- password: your adelphia.net password
- account type is imap or pop according to preference (imap is the default).
- incoming mail server hostname for adelphia.net is mail.twc.com
- outgoing mail server hostname for adelphia.net is mail.twc.com
- for domains still being transferred or propagated, temporarily use ip address instead of incoming address & outgoing mail server
- ignore cannot verify account name or password
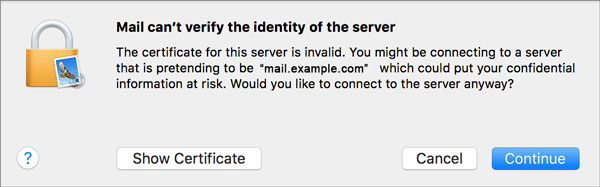
step 5: ignore the 2 identity messages from the server > continue. you can add the certificate to your trust settings to avoid seeing this message in the future.
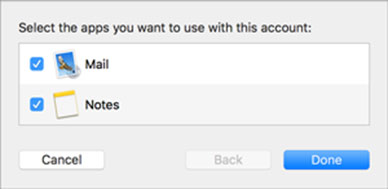
step 6: select any application > done
congratulations! You are done here and ready to use your email account in your apple mail. if you still have problems, visit this article.
manual configuration of the adelphia.net email account in the em client
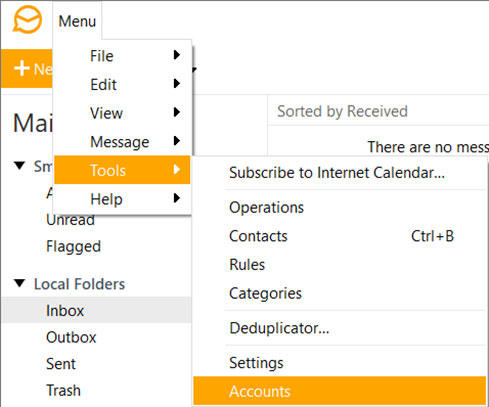
Step 1: Start the client. click the menu tab, then tools and select accounts
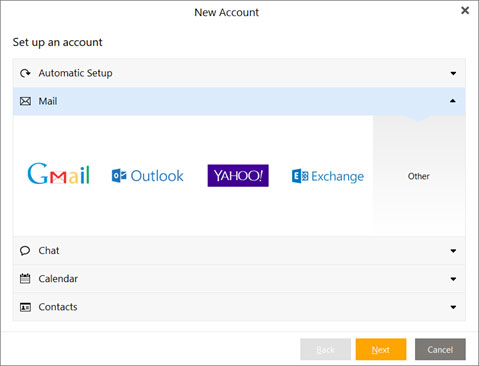
step 2: expand the mail section. you can choose automatic email setup for known used email accounts from the list, and if you don’t, you must choose other, then next and set up your email email manually
step 3: enter your full adelphia.net email address
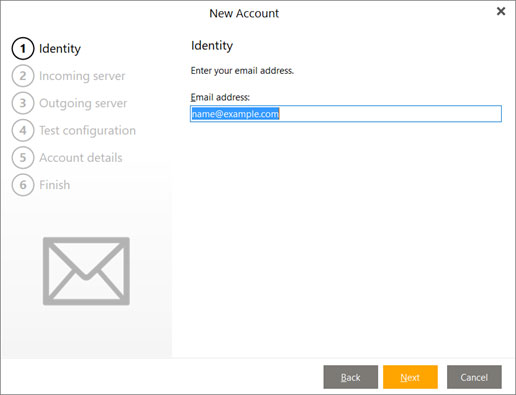
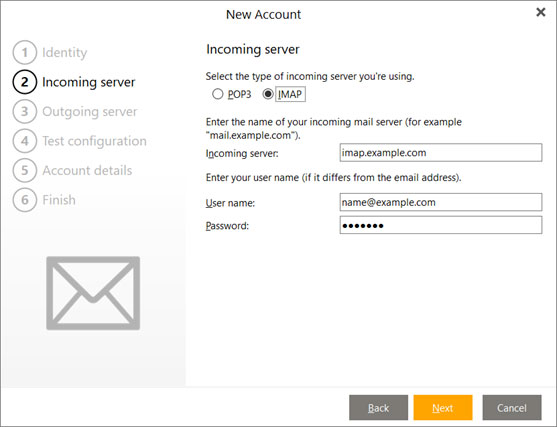
Step 4: You will need to enter the following information, choose imap or pop. here we choose imap.
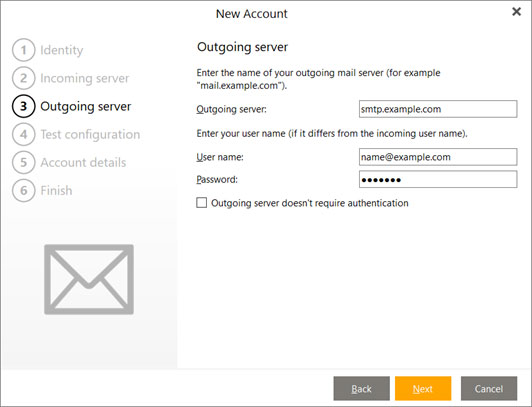
Step 5: Enter your outgoing mail server details. modify any of the autocomplete fields, if necessary, and click next
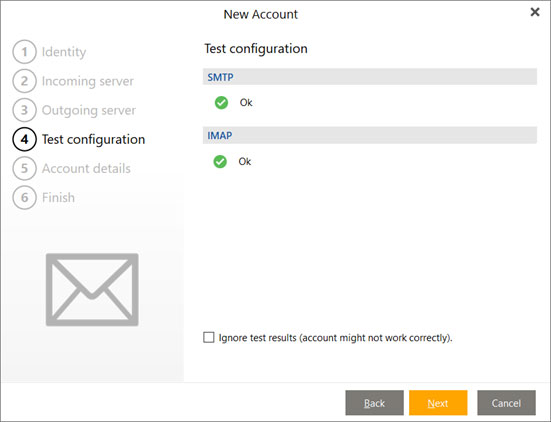
Step 6: If configuration tests failed, click fix to try to resolve the error. if there are no errors, click next
step 7: enter the name and email address that your account will use
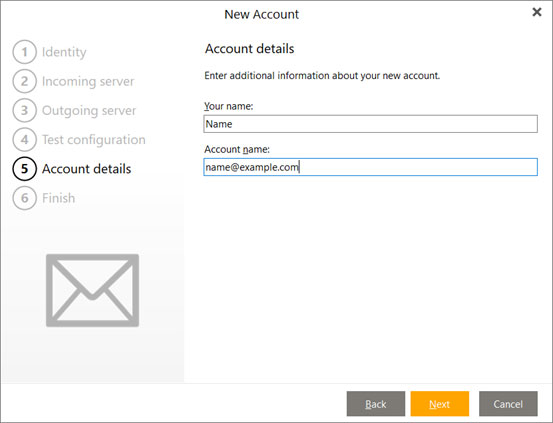
step 8: click finish to complete setup
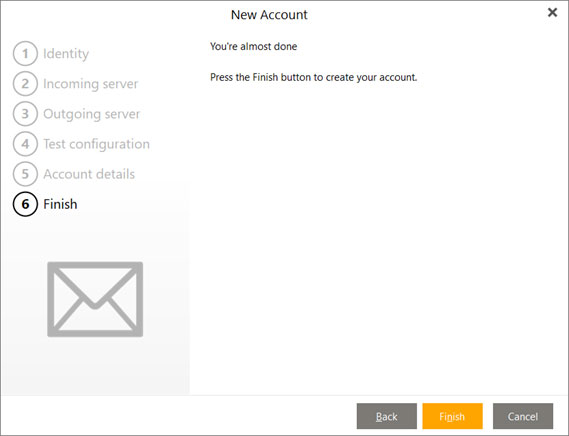
congratulations! you’re done here and ready to use your email account in the em client. if you still have problems, visit this article.
manual configuration of the adelphia.net email account in the environment client
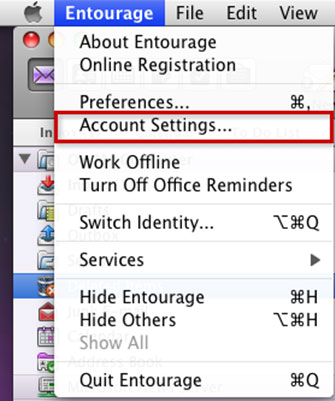
step 1: start microsoft entourage. click the entourage menu and choose account settings
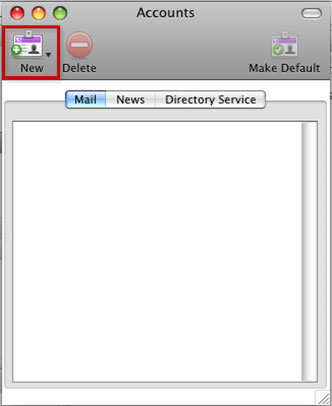
step 2: click the new icon in the accounts window that opens
step 3: choose the type of email account you will use (imap, pop or exchange). we choose imap
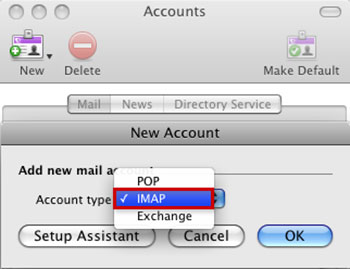
step 4: click the ok button to continue

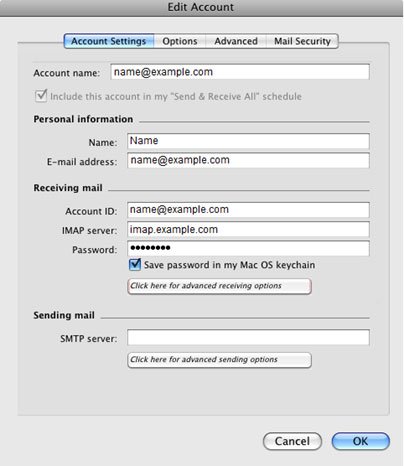
Step 5: You will need to enter the following information and then click click here for advanced receiving options
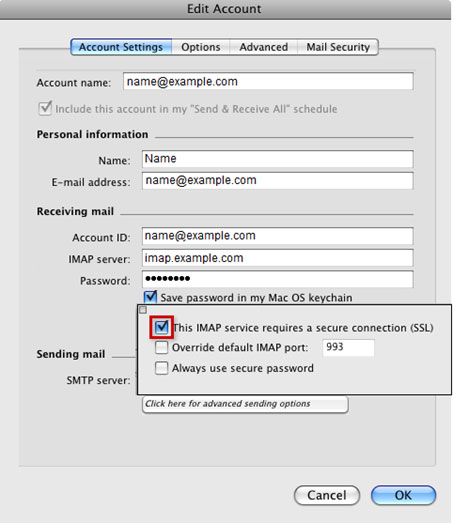
step 6: check the box for this imap service requires a secure connection. then click anywhere in the account editing window at the bottom to return to the previous window.
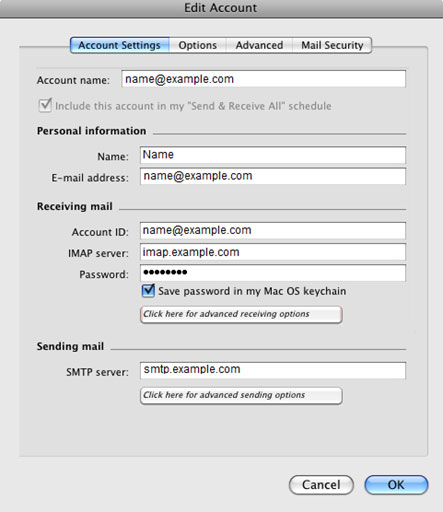
step 7: fill in the details of your outgoing mail servers and then click the button that says click here for advanced sending options
step 8: check the following boxes:
- smtp service requires a secure connection (ssl)
- override the default smtp port and enter port 587 or 587 instead. below is the general smtp settings you can use
- secure outgoing (smtp) – port: 465 for and security type: ssl/tls (accept all certificates)
- outgoing (smtp roaming server) secure – port: 587 and security type: ssl/tls (accept all certificates)
- outgoing (smtp) – port: 25 and security type: none ( accept all certificates)
- outgoing (smtp roaming server) insecure – port: 587 and security type: none (accept all certificates)

step 9: click accept
congratulations! you’re done here and you’re ready to use your email account in entourage. if you still have problems, visit this article.
manual configuration of the adelphia.net email account in the incredimail client
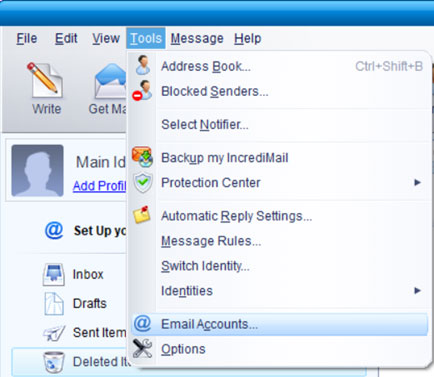
step 1: start incredimail. select tools in the top menu bar and then email accounts. note: if you are setting up your email account for the first time, you must start from step 4.
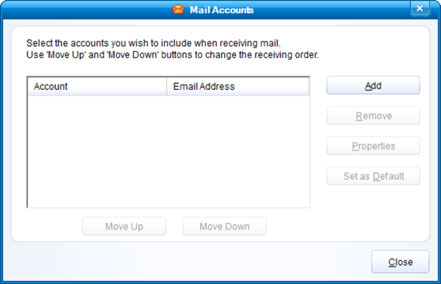
step 2: click add
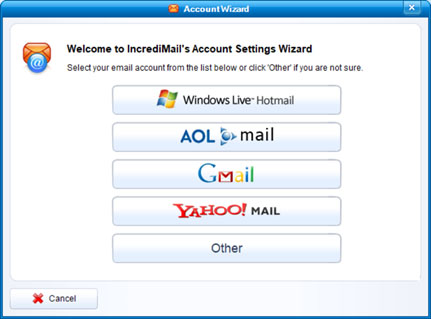
Step 3: You can choose automatic email setup for known used email accounts from the list, and if you don’t, you need to choose other and configure your email manually
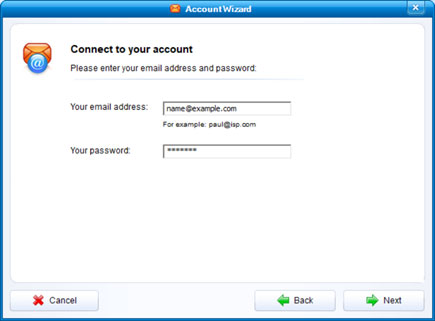
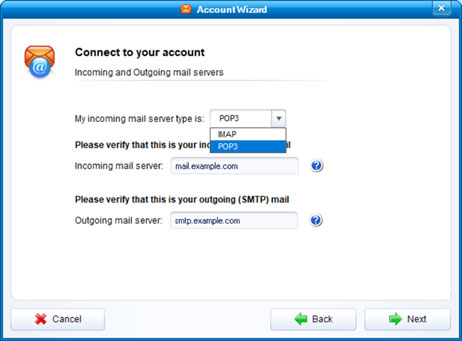
step 4: enter your details on the account wizard screen, then click next
step 5: fill in the details of the incoming (imap) and outgoing (smtp) mail servers. then click next
- account type: imap. select imap from the dropdown menu
- imap incoming mail server: mail.twc.com
- smtp outgoing mail server: mail.twc.com
- general details server port for incoming and outgoing:
- outgoing (smtp) secure – port: 465 for y security type: ssl/tls (accept all certificates)
- outgoing (smtp roaming server) secure – port: 587 and security type: ssl/tls (accept all certificates)
- outgoing (smtp) – port: 25 and security type: none (accept all certificates)
- outgoing (smtp roaming server ) insecure – port: 587 and security type: none (accept all certificates)
step 6: click accept
congratulations! You’re done here and you’re ready to use your incredimail email account. if you still have problems, visit this article.
manual setup of adelphia.net email account in mailbird lite
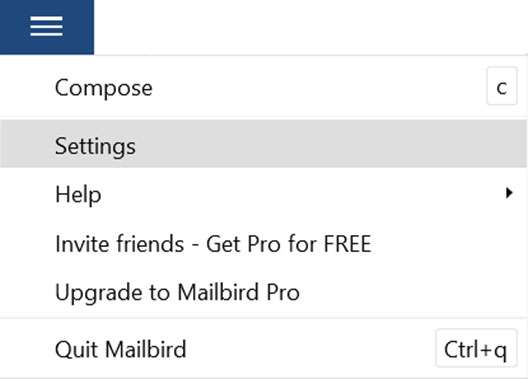
step 1: run mailbird lite. click on three parallel lines in the upper left corner and then choose settings note: remember that the lite user can only have a maximum of 1 account. If you are setting up your email account for the first time, you must start from step 4.
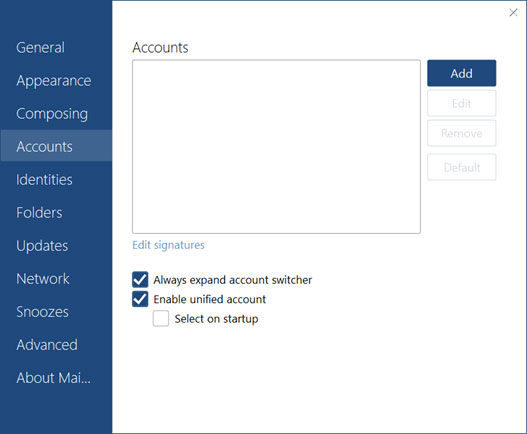
step 2: switch to the accounts tab and click the add
button
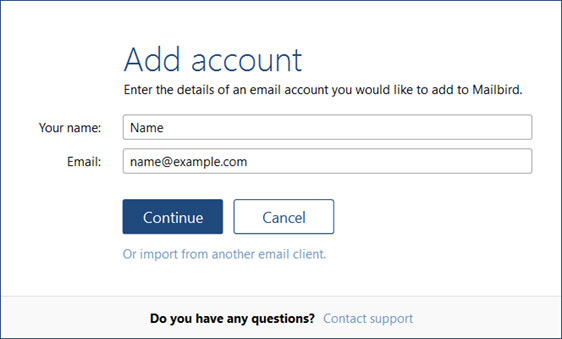
step 3: enter your details on the add account screen, then click continue
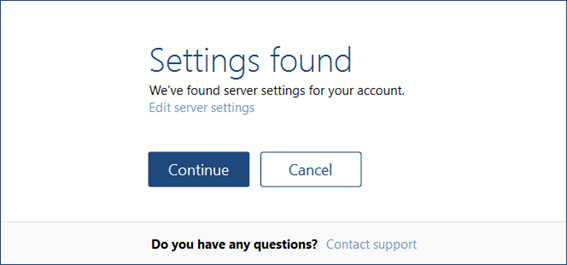
step 4: if mailbird knows the imap or pop3 settings of your email account, mailbird will display this window. you must first enter your password before you can continue. however, you can still edit your settings by clicking “edit server settings“.
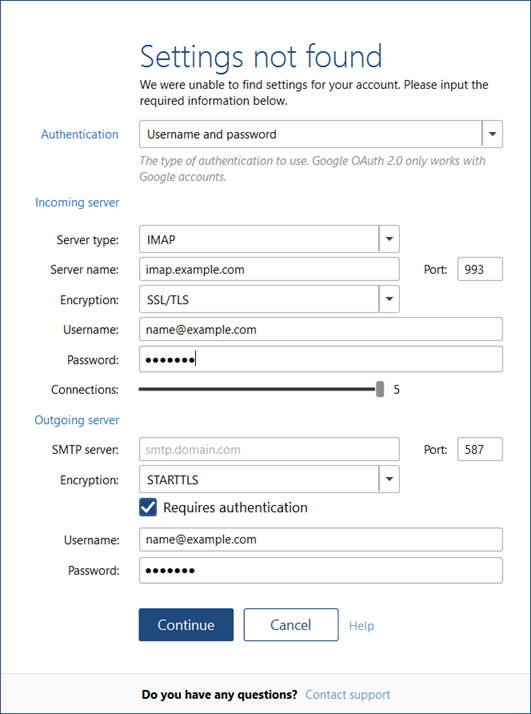
step 5: if mailbird cannot find your email account settings or if you choose to edit server settings, mailbird will display this window. enter your details on the screen and then click continue. note: if you use secure ssl / tls settings, choose the corresponding encryption in the current field.
- incoming server type for adelphia.net, select imap
- incoming server name for adelphia.net, enter mail.twc.com
- username for adelphia.net – enter your full email address
- password for adelphia.net – enter your password
- outgoing server name for adelphia.net, enter mail.twc.com
- enter your adelphia.net email address and password for the username and password field.
- general port details for incoming and outgoing server
- pop
- secure – port: 995 and security type: ssl/tls (accept all certificates)
- insecure – port: 110 and security type: none (accept all certificates)
- secure – port: 993 and security type: ssl/tls (accept all certificates)
- insecure – port: 143 and security type: none (accept all certificates)
- outgoing (smtp) secure – port: 465 for y security type: ssl/tls (accept all certificates)
- outgoing (smtp roaming server) secure – port: 587 y type security: ssl/tls (accept all certificates)
- outgoing (smtp) – port: 25 and security type: none (accept all certificates)
- outgoing (server smtp roaming) insecure – port: 587 and security type: none (accept all certificates)
step 6: click close and voila!
congratulations! you are done here and ready to use your email account in mailbird lite. if you still have problems, visit this article.
manual configuration of the adelphia.net email account in opera mail
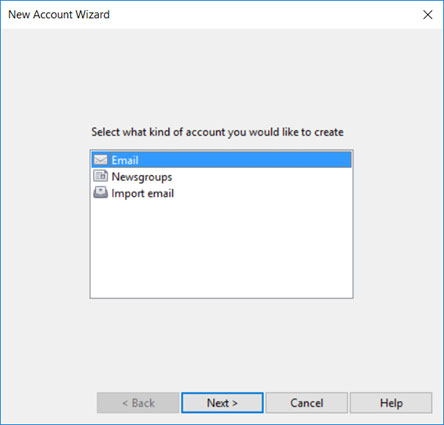
step 1: start opera mail.select email, then click next
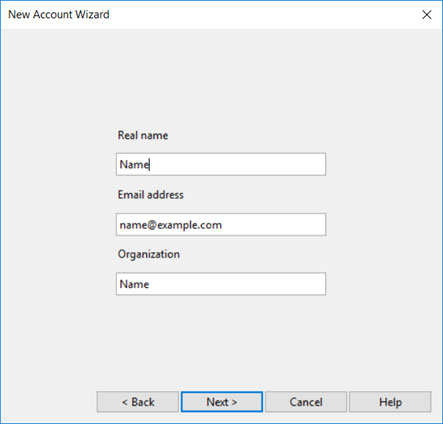
Step 2: Enter your name, adelphia.net email address, and organization in the appropriate fields. then click next
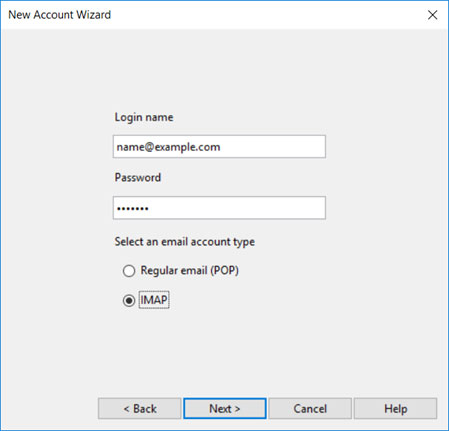
Step 3: Enter your login name (your full adelphia.net email address) and your email account password. select the type of email account (pop or imap). we choose imap. click next
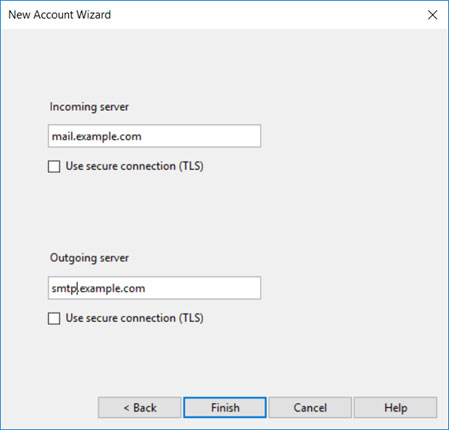
Step 4: Enter the incoming mail server (imap) for adelphia.net as mail.twc.com and the outgoing server name (smtp) as mail.twc.com. note: if you use secure tls settings, please check the “use secure connection (tls)” box on incoming and outgoing mail. click finish
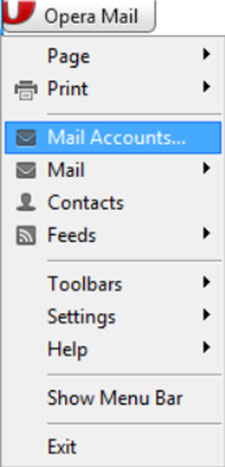
step 5: click the menu (opera mail) tab in opera and select mail accounts
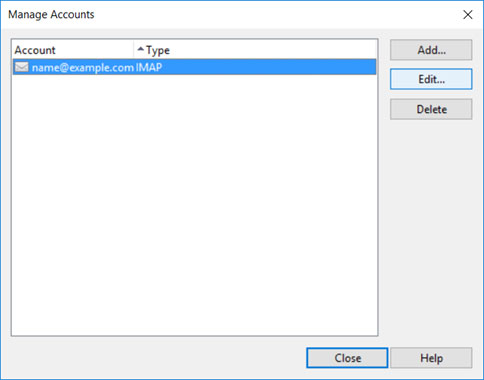
step 6: select the account you are setting up and click edit
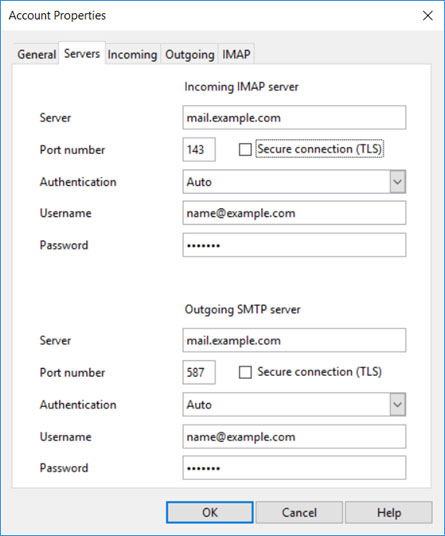
step 7: click on the servers tab. for imap the port number should be 993. for outgoing smtp server, the port number should be 587. authentication should be set to auth login. note: if you use secure tls settings, please check the “secure connection (tls)” box on both incoming and outgoing mail. Below are the general details of the port.
- pop
- secure – port: 995 and security type: ssl/tls (accept all certificates)
- insecure – port: 110 and security type: none (accept all certificates)
- secure – port: 993 and security type: ssl/tls (accept all certificates)
- insecure – port: 143 and security type: none (accept all certificates)
- outgoing (smtp) secure – port: 465 for y security type: ssl/tls (accept all certificates)
- outgoing (smtp roaming server) secure – port: 587 y type security: ssl/tls (accept all certificates)
- outgoing (smtp) – port: 25 and security type: none (accept all certificates)
- outgoing (server smtp roaming) insecure – port: 587 and security type: none (accept all certificates)
step 9: click ok and close to finish
congratulations! you’re done here and ready to use your email account at opera. if you still have problems, visit this article.
configure manual configuration of adelphia.net email account in thunderbird
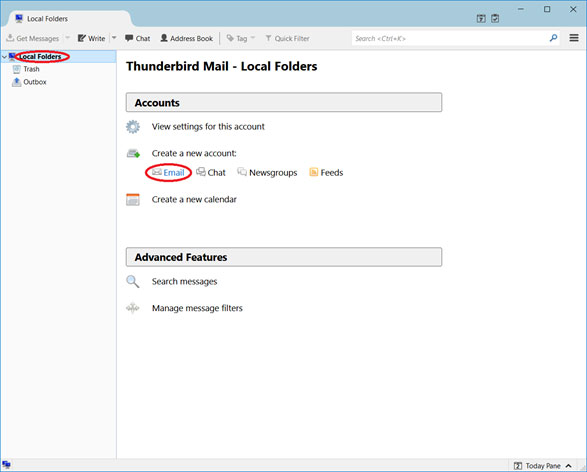
step 1: start thunderbird. click local folders > email
step 2: click skip this and use my existing email

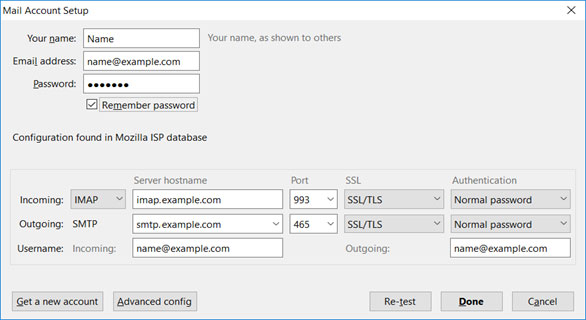
Step 3: You will need to enter the following information and then click Continue Your Name – Enter your name. this is the name of the sender on email messages you send from this account email address: your full adelphia.net email address password: your adelphia.net email account password

step 4: choose the type of email account you will use (imap or pop). if you choose secure ssl/tls settings, select normal password for authentication.

imap port settings for adelphia.net
- incoming port: 143, outgoing port: 587
- secure – port: 993 and security type: ssl/tls (accept all certificates)
- insecure – port : 143 and security type: none (accept all certificates
pop port settings for adelphia.net
- input port: 110, output port: 587
- general settings for pop
- secure port: 995 and security type: ssl/tls (accept all certificates)
- insecure – port: 110 and security type: none (accept all certificates)
general smtp port settings for adelphia.net
- outgoing (smtp) secure – port: 465 for y security type: ssl/tls (accept all certificates)
- outgoing (smtp roaming server) secure – port: 587 y type security: ssl/tls (accept all certificates)
- outgoing (smtp) – port: 25 and security type: none (accept all certificates)
- outgoing (server smtp roaming) insecure – port: 587 and security type: none (accept all certificates)
step 5: click done
step 6: click confirm security exception
congratulations! you are done here and ready to use your email account in thunderbird. if you still have problems, visit this article.
automatic configuration of adelphia.net email account in outlook 2007
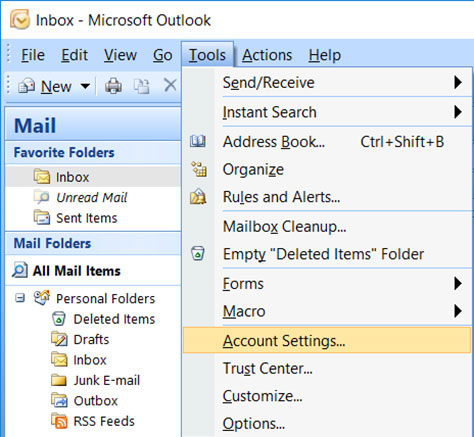
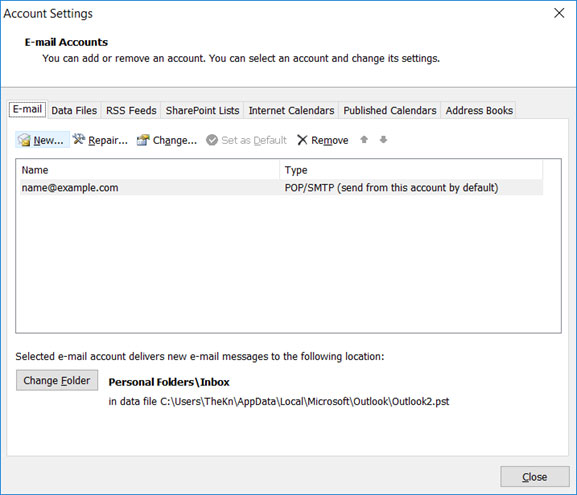
step 1: launch outlook 2007. select tools from the top menu bar, then account settings
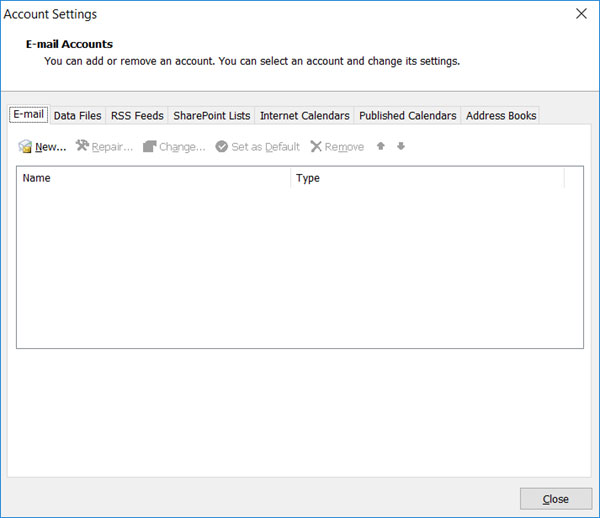
step 2: on the account settings screen, click new under the email tab >
step 3: select microsoft exchange, pop3, imap or httpand click next

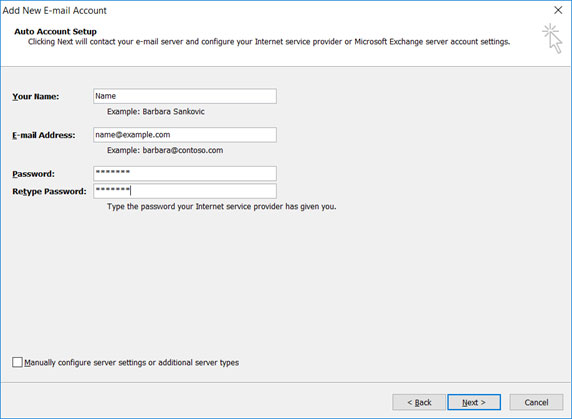
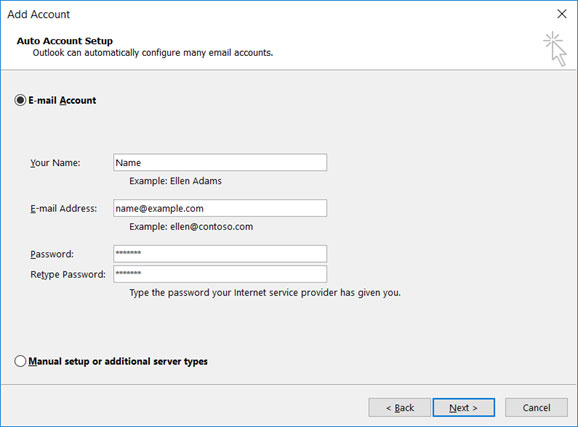
step 4: on this screen enter your name, your adelphia.net email address and password and click next
step 5: outlook will now automatically set your account as an imap account with all the correct settings
step 6: finish > close
manual configuration of adelphia.net email account in outlook 2007
step 1: launch outlook 2007. select tools from the top menu bar, then account settings

step 2: on the account settings screen, click new under the email tab >

step 3: select microsoft exchange, pop3, imap or httpand click next

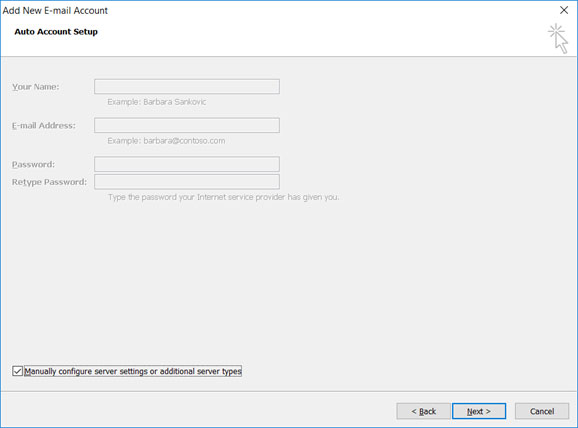
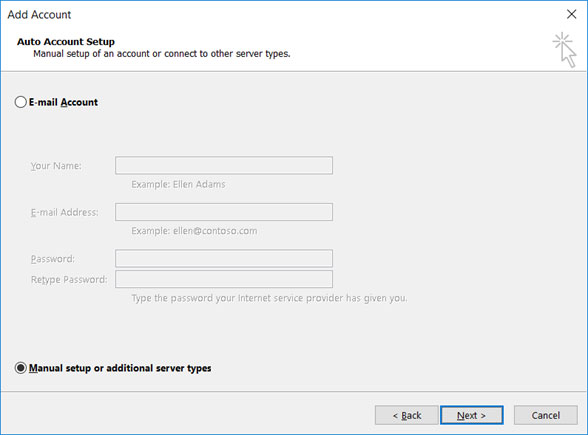
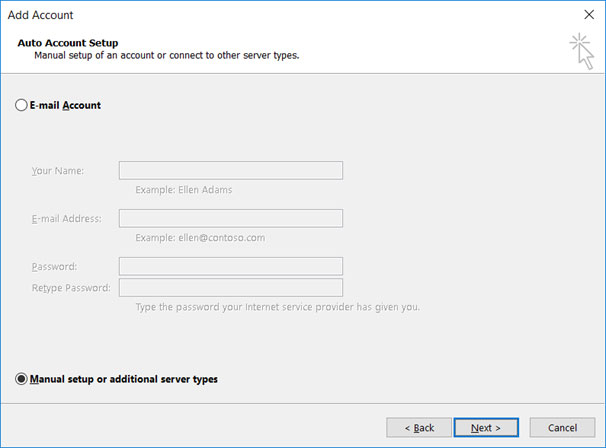
step 4: check the manually configure server settings or additional server types checkbox and click next
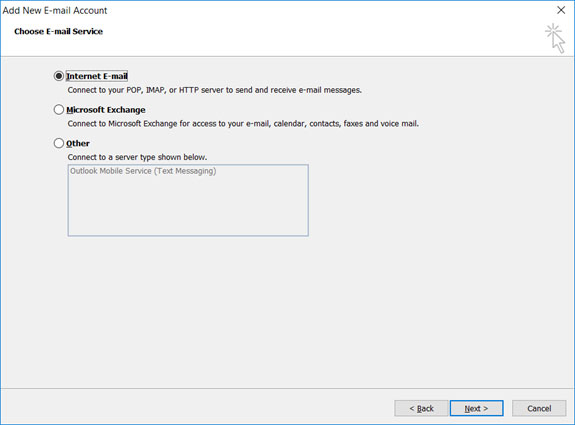
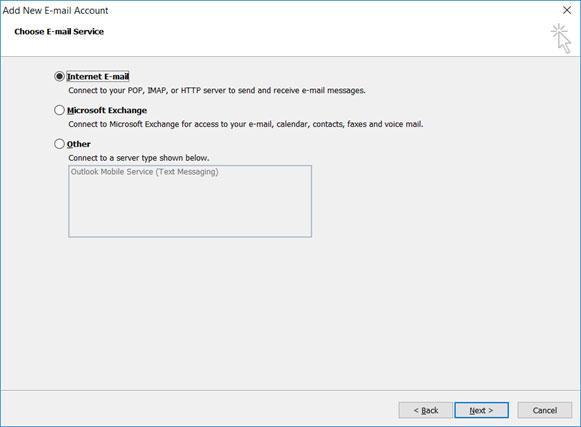
step 5: select internet email and then click next
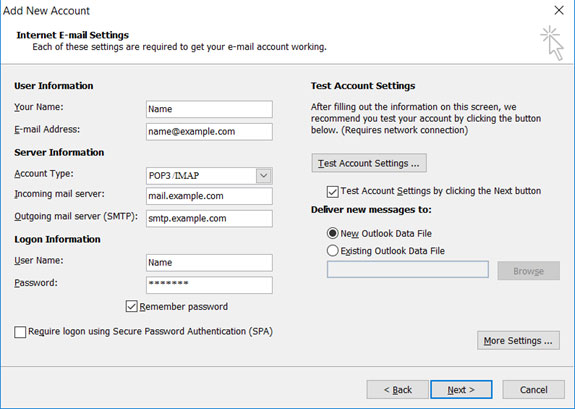
step 6: enter all the relevant details (choose pop or imap depending on your needs) and then click more configuration

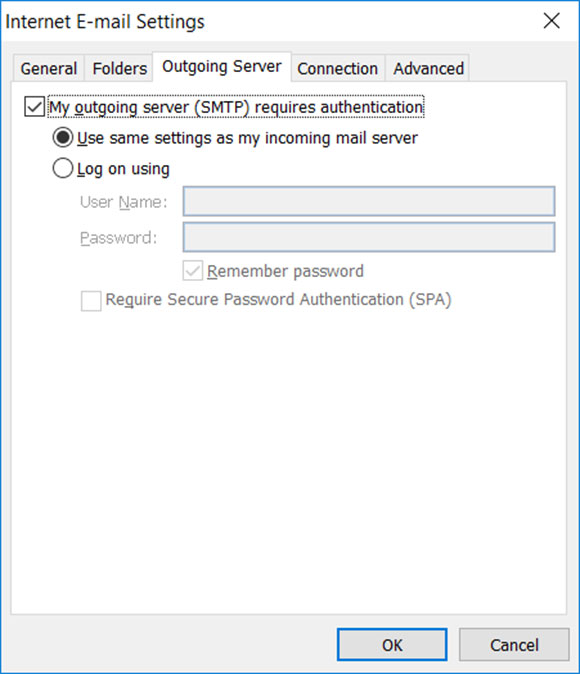
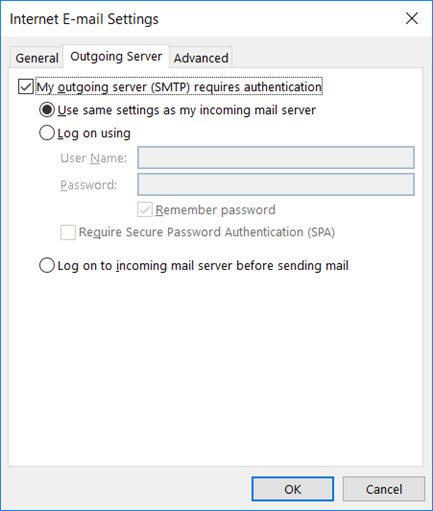
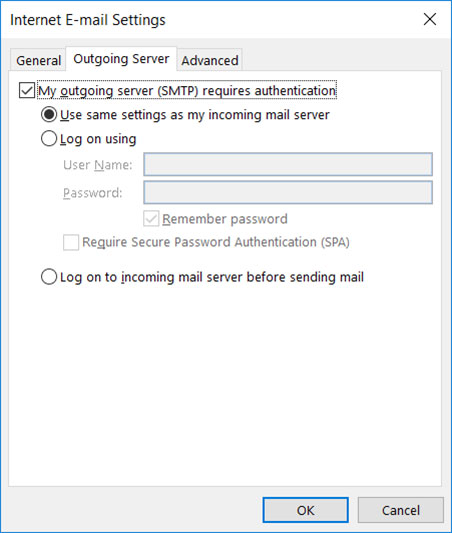
step 7: click the outgoing server tab and make sure the my outgoing server (smtp) requires authentication checkbox b> is selected, as well as use the same settings as my incoming mail server

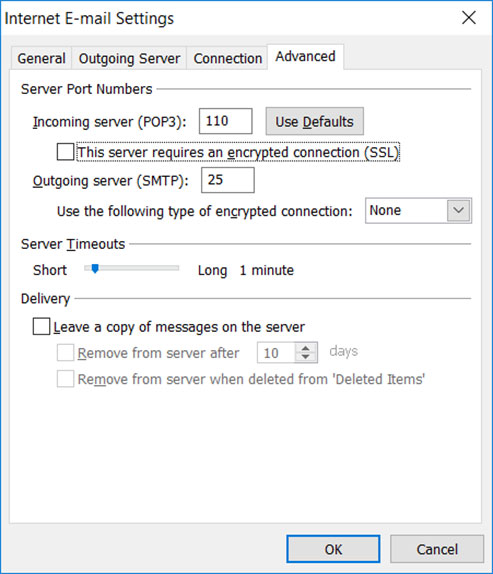
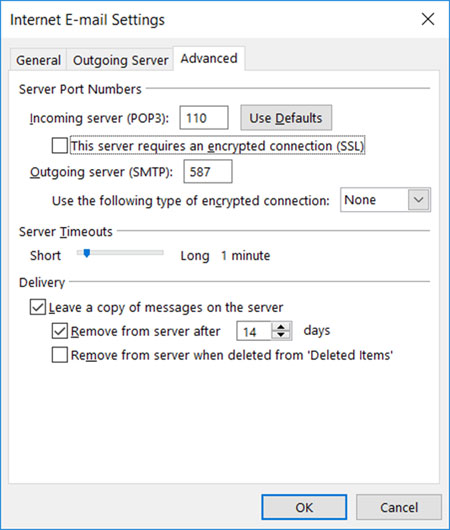
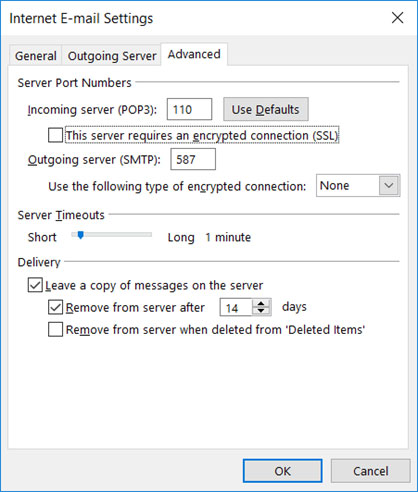
step 9: select the advanced tab. make sure your adelphia.net settings are as follows for your choice of pop or imap.
pop port settings for adelphia.net
- input port: 110, output port: 587
- general settings for pop
- secure port: 995 and security type: ssl/tls (accept all certificates)
- insecure – port: 110 and security type: none (accept all certificates)
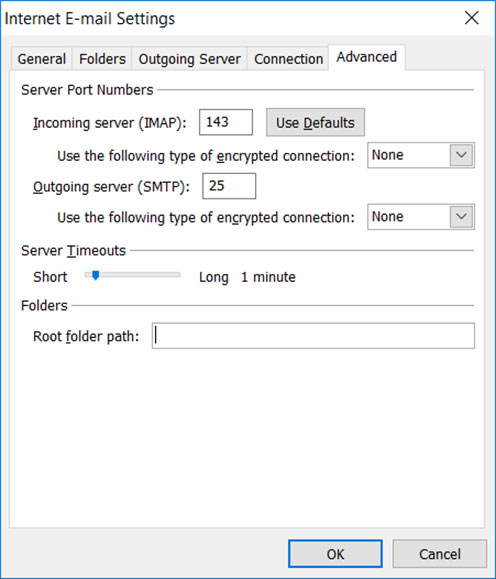
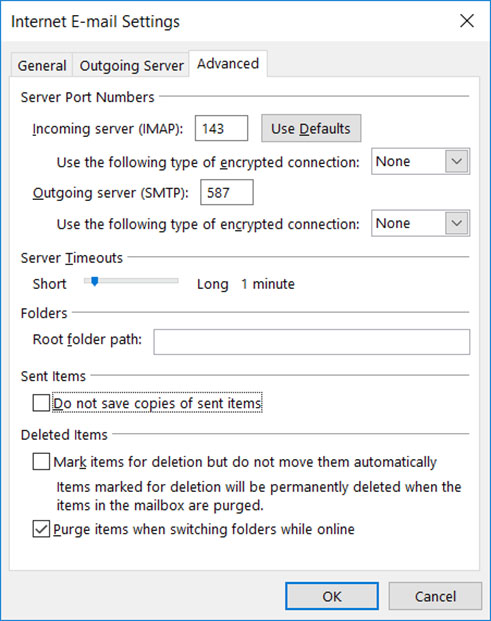
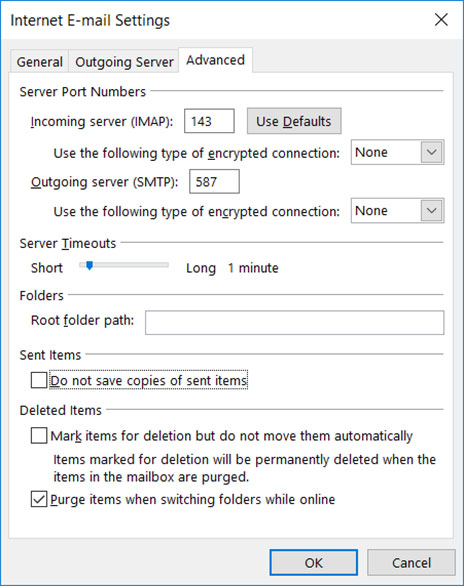
imap port settings for adelphia.net
- incoming port: 143, outgoing port: 587
- secure – port: 993 and security type: ssl/tls (accept all certificates)
- insecure – port : 143 and security type: none (accept all certificates
general smtp port settings for adelphia.net
- outgoing (smtp) secure – port: 465 for y security type: ssl/tls (accept all certificates)
- outgoing (smtp roaming server) secure – port: 587 y type security: ssl/tls (accept all certificates)
- outgoing (smtp) – port: 25 and security type: none (accept all certificates)
- outgoing (server smtp roaming) insecure – port: 587 and security type: none (accept all certificates)
step 10: click ok to save these settings
step 11: click next and finish
congratulations! You’re done here and you’re ready to use your email account in Outlook 2007. If you’re still having problems, visit this article.
auto account setup for adelphia.net email account in outlook 2010
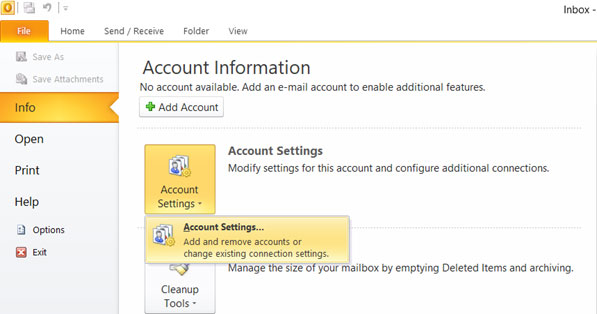
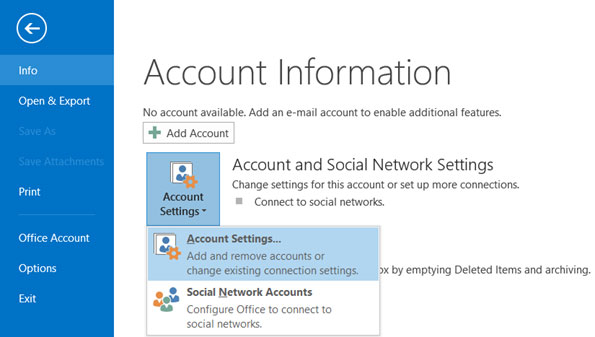
step 1: launch outlook 2010. select file from the top menu bar then info and account settings
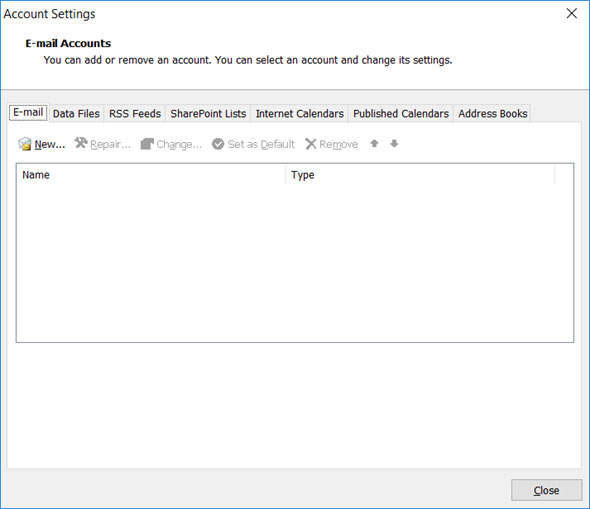
step 2: on the email tab, click new
step 4: on this screen enter your name, your adelphia.net email address and password and click next
step 4: outlook will now automatically set your account as an imap account with all the correct settings
step 5: finish > close
manual configuration of adelphia.net email account in outlook 2010
step 1: launch outlook 2010. select tools from the top menu bar and then account settings

step 2: on the account settings screen, click new under the email tab >
step 3: in the add new account box select manual configuration or additional server types > next

step 4: select internet email and click next
Step 5: Enter all the relevant details (select pop or imap depending on your preference) and then click more settings
step 6: click the outgoing server tab and make sure the my outgoing server (smtp) requires authentication checkbox b> is selected, as well as use the same settings as my incoming mail server
step 7: select the advanced tabmake sure your adelphia.net settings are as follows for your choice of pop or imap.
pop port settings for adelphia.net
- input port: 110, output port: 587
- general settings for pop
- secure port: 995 and security type: ssl/tls (accept all certificates)
- insecure – port: 110 and security type: none (accept all certificates)
imap port settings for adelphia.net
- incoming port: 143, outgoing port: 587
- secure – port: 993 and security type: ssl/tls (accept all certificates)
- insecure – port : 143 and security type: none (accept all certificates
general smtp port settings for adelphia.net
- outgoing (smtp) secure – port: 465 for y security type: ssl/tls (accept all certificates)
- outgoing (smtp roaming server) secure – port: 587 y type security: ssl/tls (accept all certificates)
- outgoing (smtp) – port: 25 and security type: none (accept all certificates)
- outgoing (server smtp roaming) insecure – port: 587 and security type: none (accept all certificates)
step 8: click ok to save these settings
step 9: click next and finish
congratulations! You’re done here and you’re ready to use your email account in Outlook 2010. If you’re still having problems, visit this article.
automatic configuration of adelphia.net email account in outlook 2013
step 1: launch outlook 2013. select file from the top left menu bar. select information and account settings

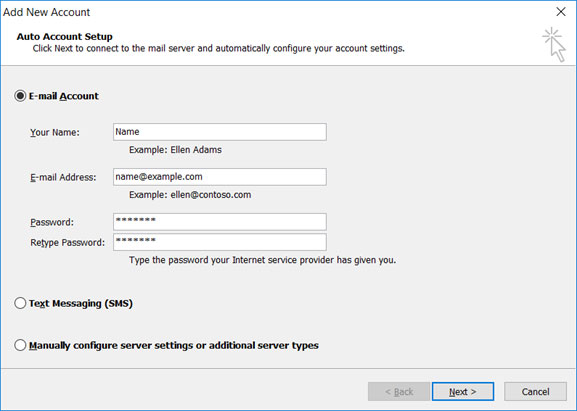
Step 2: Enter your details on the Auto Account Setup screen > next
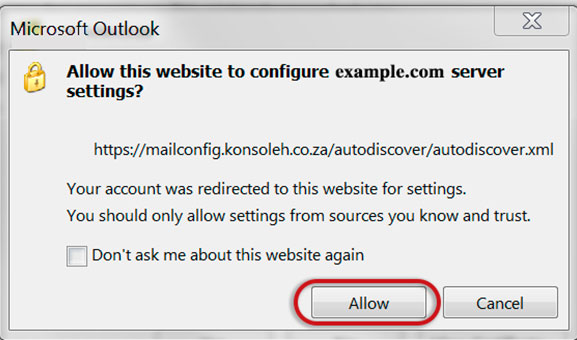
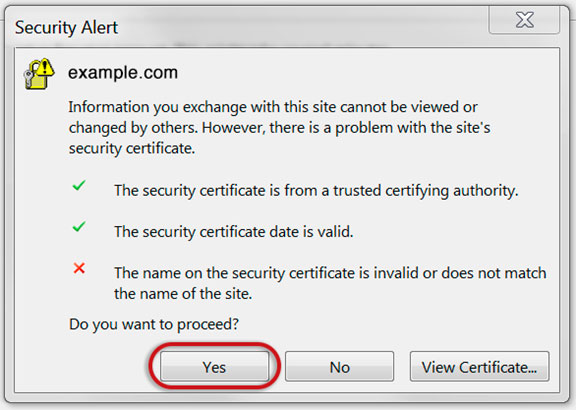
step 3: the following warning messages may appear > allow and select > yes
step 4: outlook will now automatically set your account as an imap account with all the correct settings
step 6: finish > close
manual configuration of adelphia.net email account in outlook 2013
step 1: start outlook. select file in the top left menu bar. select information and account settings
step 2: choose manual configuration or additional server types > next
step 3: select pop or imap > next

step 4: . enter all the relevant details (select pop or imap depending on your preference) and then click on more settings

step 5: click the outgoing server tab and make sure the my outgoing server (smtp) requires authentication checkbox b> is selected, as well as use the same settings as my incoming mail server
step 6: select the advanced tab
step 7: make sure your settings are as follows for your choice of pop or imap:
pop port settings for adelphia.net
- input port: 110, output port: 587
- general settings for pop
- secure port: 995 and security type: ssl/tls (accept all certificates)
- insecure – port: 110 and security type: none (accept all certificates)
imap port settings for adelphia.net
- incoming port: 143, outgoing port: 587
- secure – port: 993 and security type: ssl/tls (accept all certificates)
- insecure – port : 143 and security type: none (accept all certificates
general smtp port settings for adelphia.net
- outgoing (smtp) secure – port: 465 for y security type: ssl/tls (accept all certificates)
- outgoing (smtp roaming server) secure – port: 587 y type security: ssl/tls (accept all certificates)
- outgoing (smtp) – port: 25 and security type: none (accept all certificates)
- outgoing (server smtp roaming) insecure – port: 587 and security type: none (accept all certificates)
step 8: click ok to save these settings
step 9: click next and finish
congratulations! You’re done here and you’re ready to use your email account in Outlook 2013. If you’re still having problems, visit this article.
automatic configuration of adelphia.net email account in outlook 2016
step 1: start outlook. select the file in the top left menu bar. select account information and settings

Step 2: Enter your details on the Auto Account Setup screen > next

step 3: outlook will now automatically set your account as an imap account with all the correct settings
step 4: finish > close
manual account setup for adelphia.net email account in outlook 2016 – method 1
step 1: start outlook. select file in the top left menu bar. select information and account settings

step 2: choose manual configuration or additional server types > next
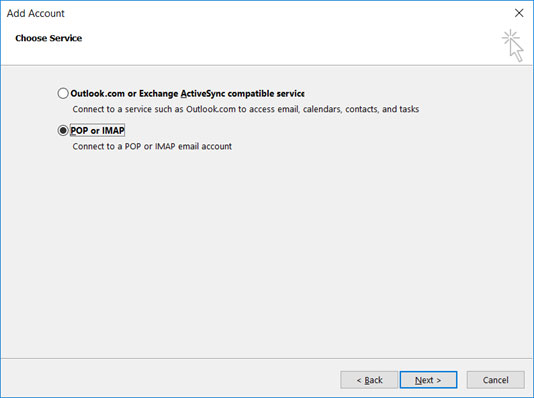
step 3: select pop or imap > next
Step 5: Enter all the relevant details (select pop or imap depending on your preference) and then click more settings

step 6: click the outgoing server tab and make sure the my outgoing server (smtp) requires authentication checkbox b> is selected, as well as use the same settings as my incoming mail server
step 7: . select the advanced tab. make sure your settings are as follows for your choice of pop or imap:
pop port settings for adelphia.net
- incoming port (pop3): 110, outgoing port (smtp): 587 or 587
- general settings for pop
- secure – port: 995 and security type: ssl /tls (accept all certificates)
- insecure – port: 110 and security type: none (accept all certificates)

imap port settings for adelphia.net
- incoming port: 143, outgoing port: 587
- secure – port: 993 and security type: ssl/tls (accept all certificates)
- insecure – port : 143 and security type: none (accept all certificates

general smtp port settings for adelphia.net
- outgoing (smtp) secure – port: 465 for y security type: ssl/tls (accept all certificates)
- outgoing (smtp roaming server) secure – port: 587 y type security: ssl/tls (accept all certificates)
- outgoing (smtp) – port: 25 and security type: none (accept all certificates)
- outgoing (server smtp roaming) insecure – port: 587 and security type: none (accept all certificates)
step 8: click ok to save these settings
step 9: click next and finish
manual account setup for adelphia.net email account in outlook 2016 – method 2
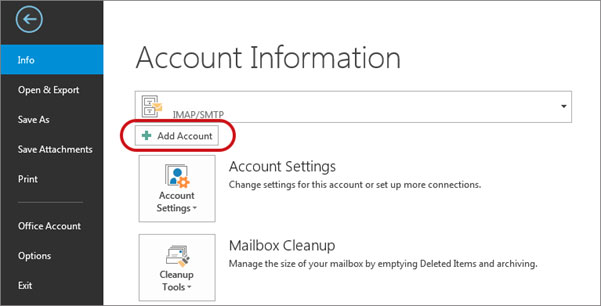
step 1: start outlook. select the file in the top left menu bar. select account information and settings. select the add account button in the middle of the screen, then account settings
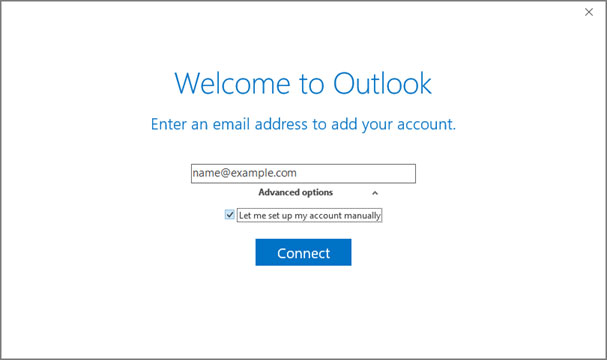
step 2: . insert your email address select advanced options, then select let me set up my account manually > connect
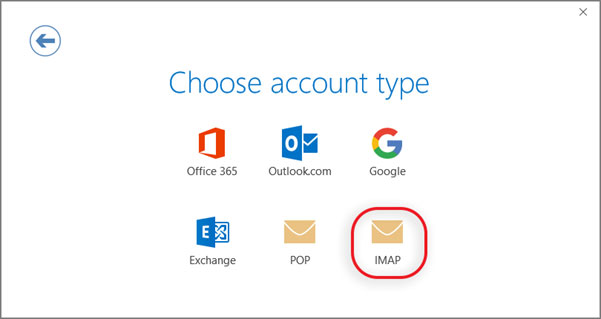
Step 3: This screen will display the different account options: select imap (or pop)>
Step 4: Server Setup – Make sure to enter the following incoming and outgoing server details
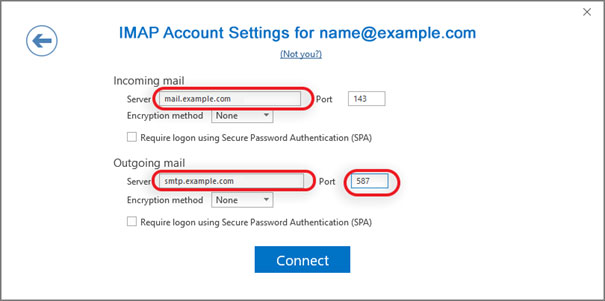
incoming mail: you can choose to pop or imap. Below are the settings.
pop port settings for adelphia.net
- input port: 110, output port: 587
- general settings for pop
- secure port: 995 and security type: ssl/tls (accept all certificates)
- insecure – port: 110 and security type: none (accept all certificates)
imap port settings for adelphia.net
- incoming port: 143, outgoing port: 587
- secure – port: 993 and security type: ssl/tls (accept all certificates)
- insecure – port : 143 and security type: none (accept all certificates
general smtp port settings for adelphia.net
- outgoing (smtp) secure – port: 465 for y security type: ssl/tls (accept all certificates)
- outgoing (smtp roaming server) secure – port: 587 y type security: ssl/tls (accept all certificates)
- outgoing (smtp) – port: 25 and security type: none (accept all certificates)
- outgoing (server smtp roaming) insecure – port: 587 and security type: none (accept all certificates)
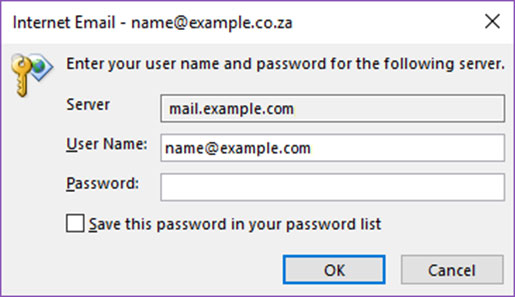
step 6: you will now be prompted for the password and then click ok
- pop