send email directly in tfs
estimated reading time: 6 minutes
my smtp mail server requires email to be sent with tls encryption and on port 587. this makes it problematic for the team foundation (tfs) server to send emails directly. To fix the problem, I installed the windows 2008 smtp server service and configured it to relay to my actual smtp mail server.
content
- install the smtp server
- set the smtp service to start automatically
- set the smtp service to route to an alternate smtp server
- internet information services manager (iis) (iis 7.0)
- internet information services manager (iis) 6.0
- command line
- ¿ want more?
install smtp server
To get started, start the server manager and add the smtp server role.
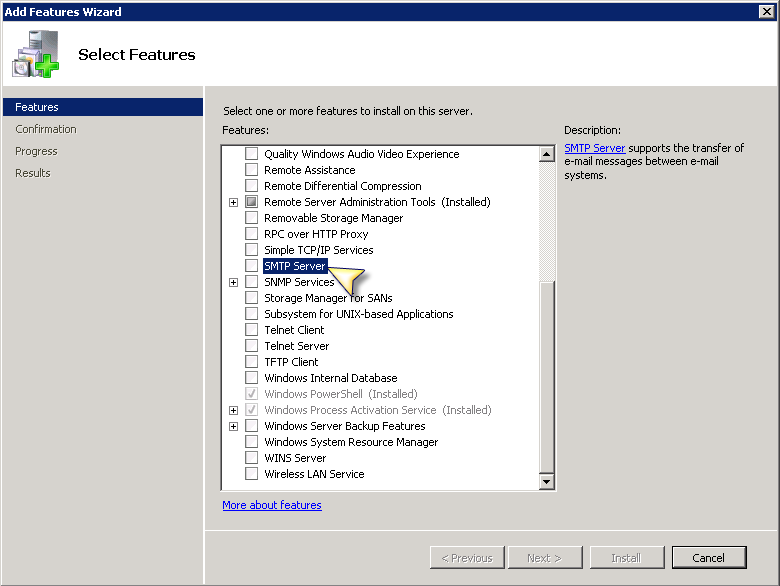
this includes a dialog to add some additional elements.
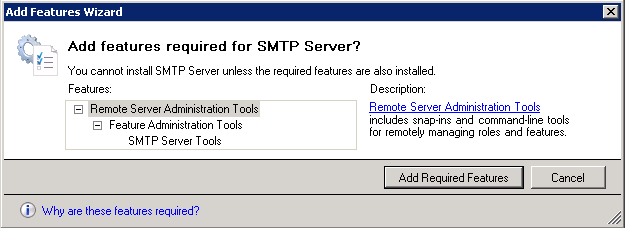
click add required features and after the dialog closes, click next> followed by install.
you can do the same from the command line using:
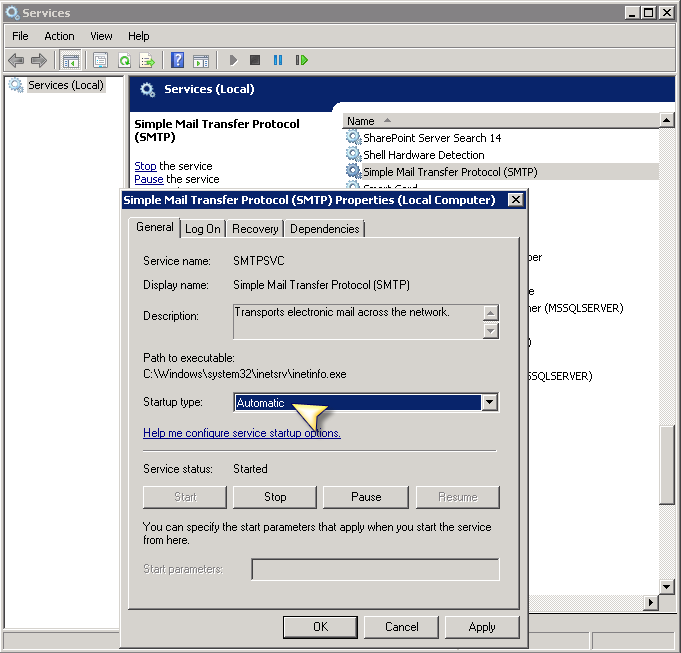
set the smtp service to start automatically
unfortunately the service is not set to start automatically by default, so you need to go into services to change this:
To perform the same action from the command line, use the following powershell commands:
from two you could use sc.exe.
configure the smtp service for routing to an alternate smtp server
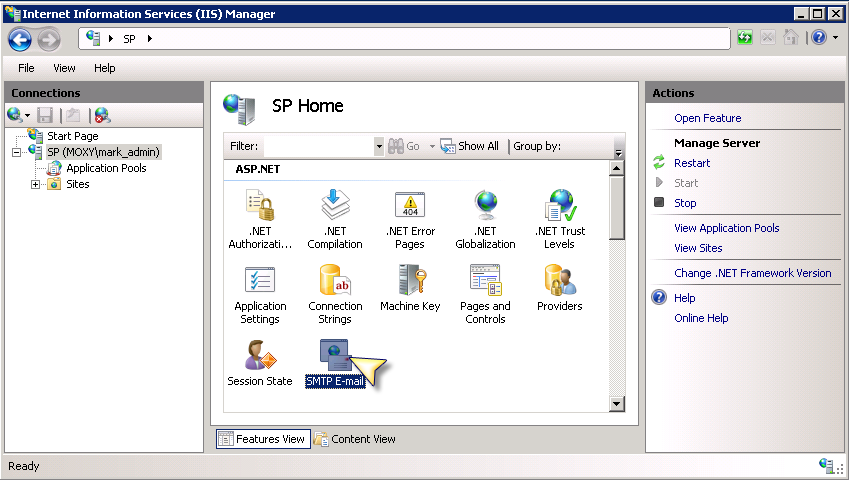
Finally, you need to configure the smtp server to redirect to an alternate smtp server (assuming you don’t send email directly). this involves configurations in both iis 7.0 and iis 6. open the internet information server (iis 7.0) and select the server node
internet information services (iis) manager (iis 7.0)
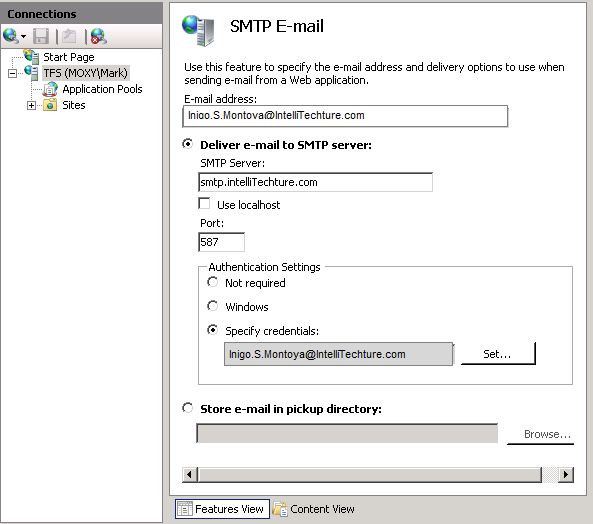
- From inside Internet Information Services (IIS) Manager, browse to the server’s SMTP E-mail feature and open it.
- Inside the SMTP E-mail windows, enter in the “send from” email address, the remote SMTP server DNS name (or IP address) and the remote server port. In addition, select Specify credentials and enter the credentials required to connect to the remote SMTP server.
To perform the same action from the command line, use the following commands (powershell is optional):
where appcmd.exe is located in %windir%system32inetsrvappcmd.exe.
internet information services (iis) manager 6.0
- Launch Internet Information Services (IIS) 6.0 Manager locate the [SMTP Virtual Server #] node and open up the Properties dialog.
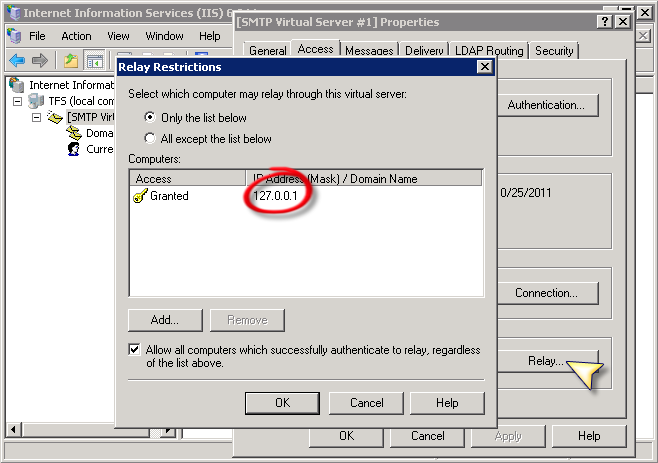 As shows, I just added 127.0.0.1 so that I was only enabling the current box to send via this SMTP Server but you can also add a group of computers by subnet or an entire domain.
 - Next, navigate to the Delivery tab and modify the settings for all three buttons, Outbound Security…, Outbound connections…, and Advanced….
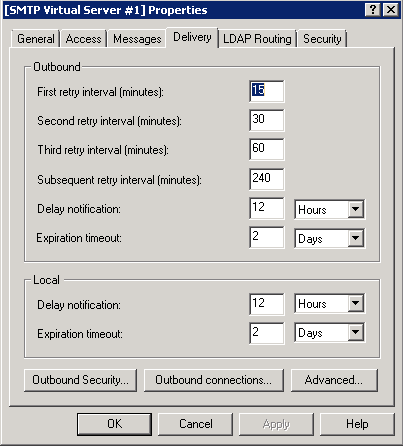
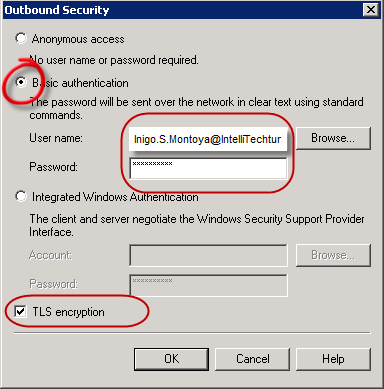
- For Outbound Security, switch to Basic Authentication and enter the remote SMTP Server credentials in addition to checking TLS encryption.
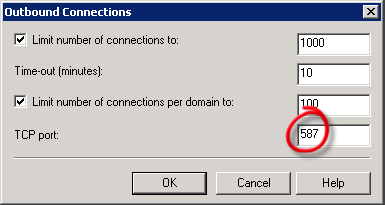
- On the Outbound Connections tab, switch the TCP port to 587 (or whatever port you need).
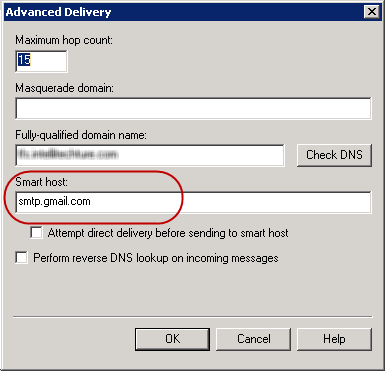
- Finally, on the Advanced Delivery tab, identify the Smart host as the DNS (or IP address) of the remote SMTP server.
 For the Fully-qualified domain name refers to the server you are configuring, the one the SMTP-Service is being configure on.
Unfortunately, I didn’t come up with the command line for this particular action. however, I found two clues as to where there might be a command line solution:
- The first is the smtpsetup.exe program (located in %windir%system32inetsrv). this program takes an inf file with the configuration information.
- Secondly, the configuration information itself is stored in %windir%system32inetsvrmebase.xml.
Although cracking the final command line seemed within reach, I had no information on how the password was encrypted and stored in the file, and without much to do, I decided to go ahead.
command line
combining all command lines together (except iis 6.0 configuration) produces the following:
note: if you are forwarding to gmail’s smtp server, these are the settings you need:
smtp server: smtp.gmail.com
smtp port: 587
tls encryption: checked
want more?
Curious about what else you can do with Windows? see an announcement: how to clone/copy a local windows 10 account to an azure active directory account!
