need help setting up google workspace (formerly g suite) for your website so you can have a professional email address?
google workspace service can help you with many things, but one of the most notable features is that it hosts your email and allows you to use the gmail interface with your own domain name (for example, you@ yourdomain.com ), thus giving you a professional email address.
That makes it a great option as an email hosting solution for your wordpress site, but this step-by-step guide isn’t just limited to wordpress users.
In this tutorial on setting up google workspace (formerly g suite), I’ll walk you through each step you need to take to get google workspace working with your website and running your professional email address.
how to set up google workspace (g suite) in 4 steps (with screenshots)
Here’s a quick overview of the steps you’ll need to take to set up Google Workspace with your website and professional email address:
- register an account and use the google workspace setup wizard
- add other users to your account (optional)
- verify domain ownership with google by adding a txt record to your dns records
- set up email by adding mx records
ready? here’s how to set up google workspace…
step 1: complete the google workspace (g suite) account setup wizard
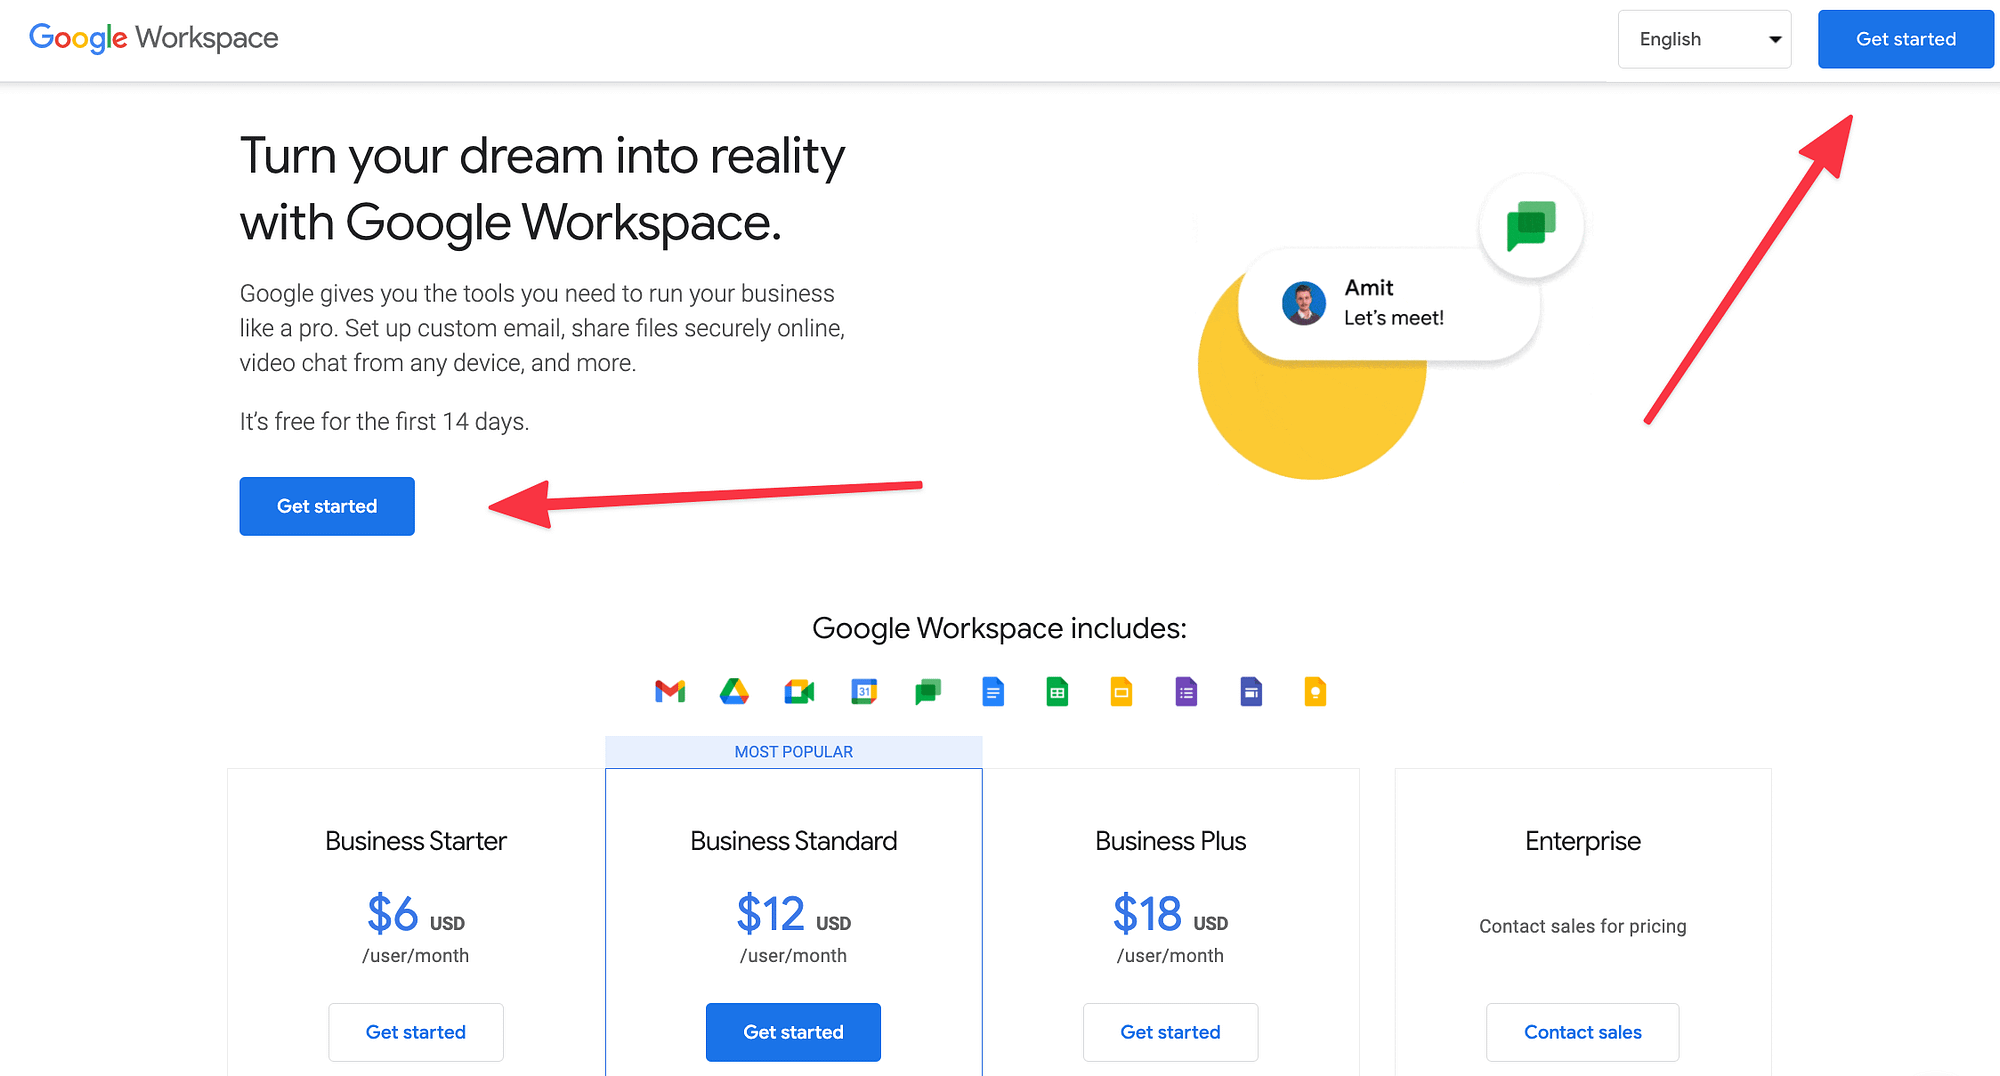
To get started, you’ll need to create your own Google Workspace account.
To do so, go here and click the big get started button:
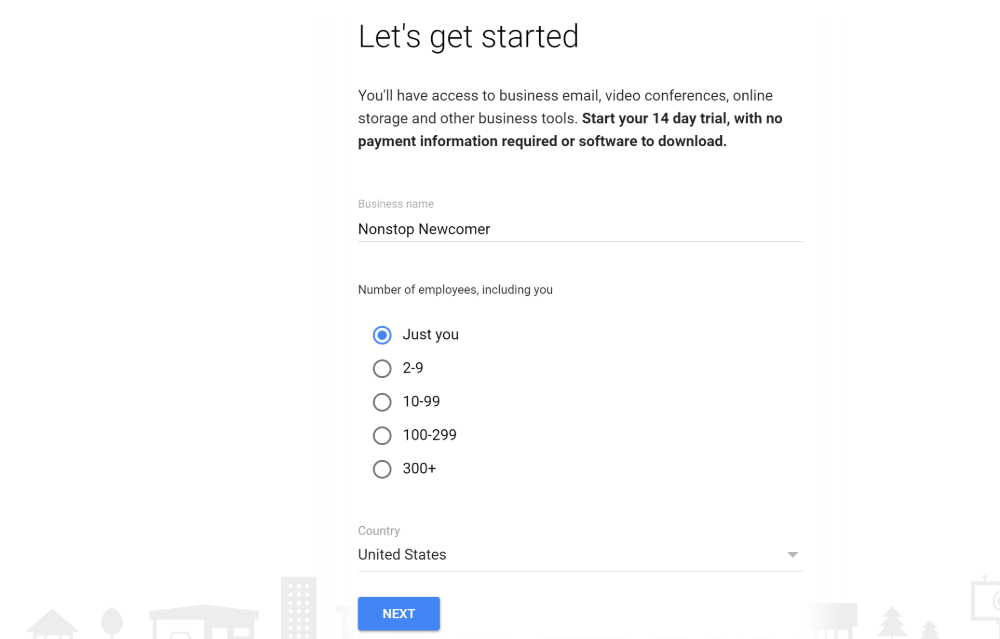
This will launch the account setup wizard, which will ask you to provide some information to google.
First, enter some basic information about your account. then click next:
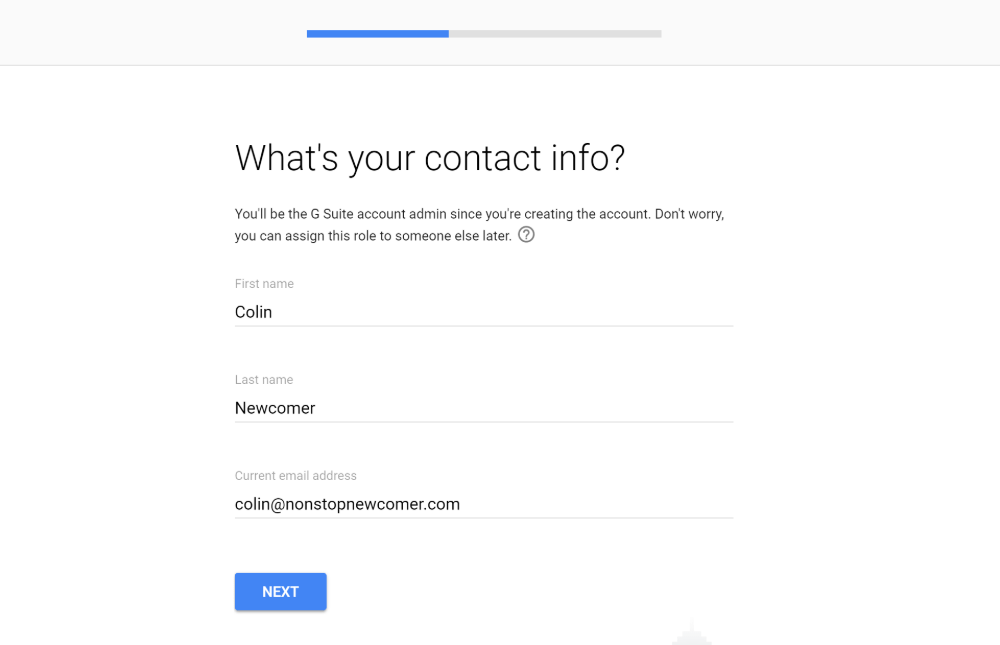
On the next screen, you’ll need to enter your google workspace admin account information.
If you’ve already set up email through your domain host, use that email in the current email address box. otherwise you can enter a personal email address:
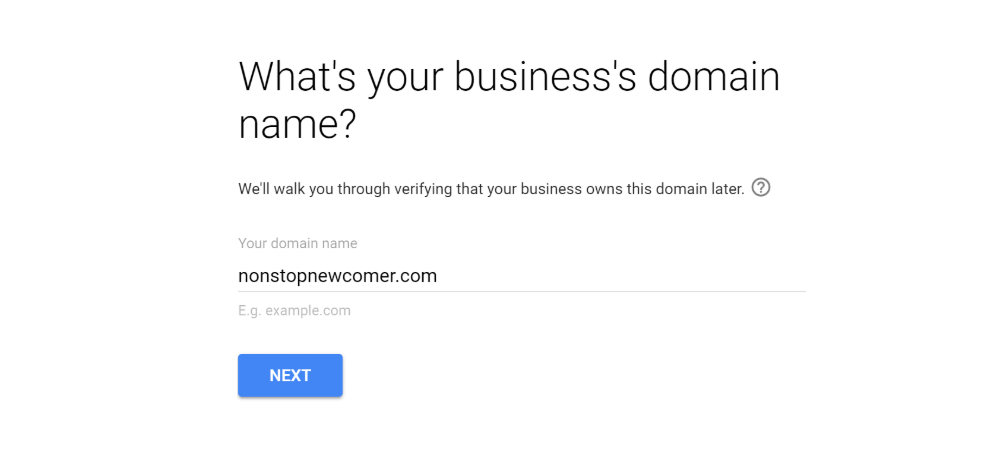
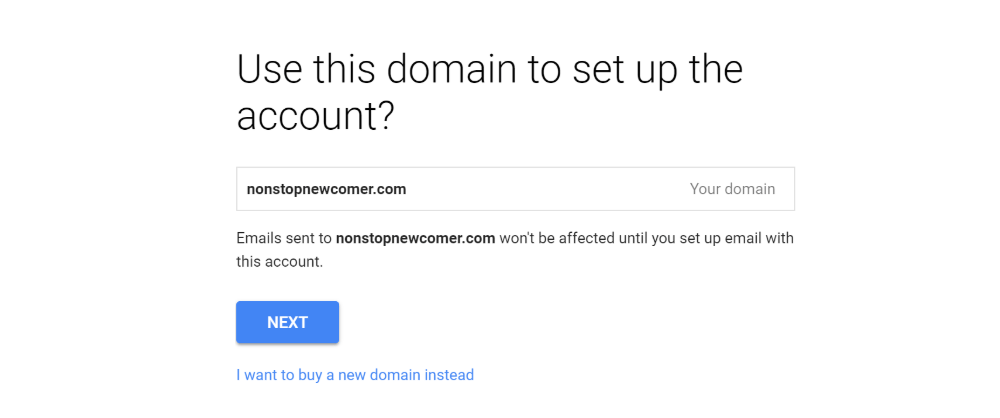
then enter your existing domain name in the box and click next:
then click next again to confirm that you want to use that domain name:
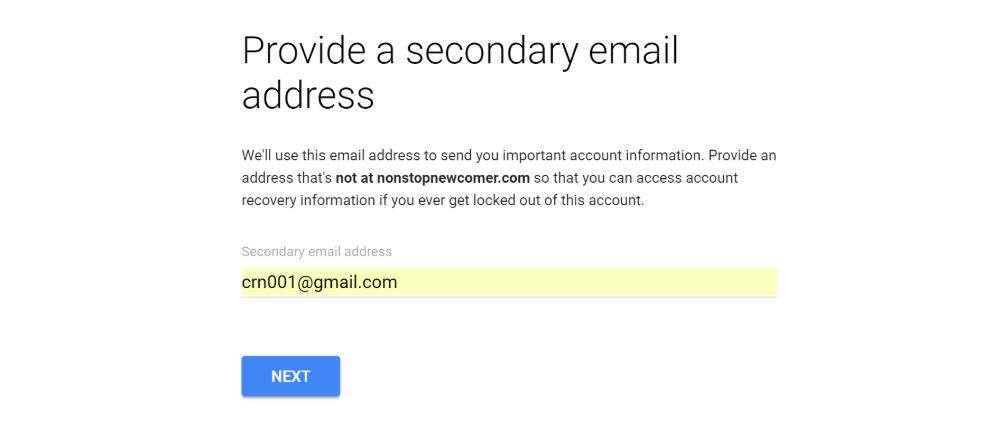
After that, you’ll need to enter a secondary recovery email address, which you’ll use in case you can’t access your primary email address. for example, you could enter your personal gmail account here, if you have one:
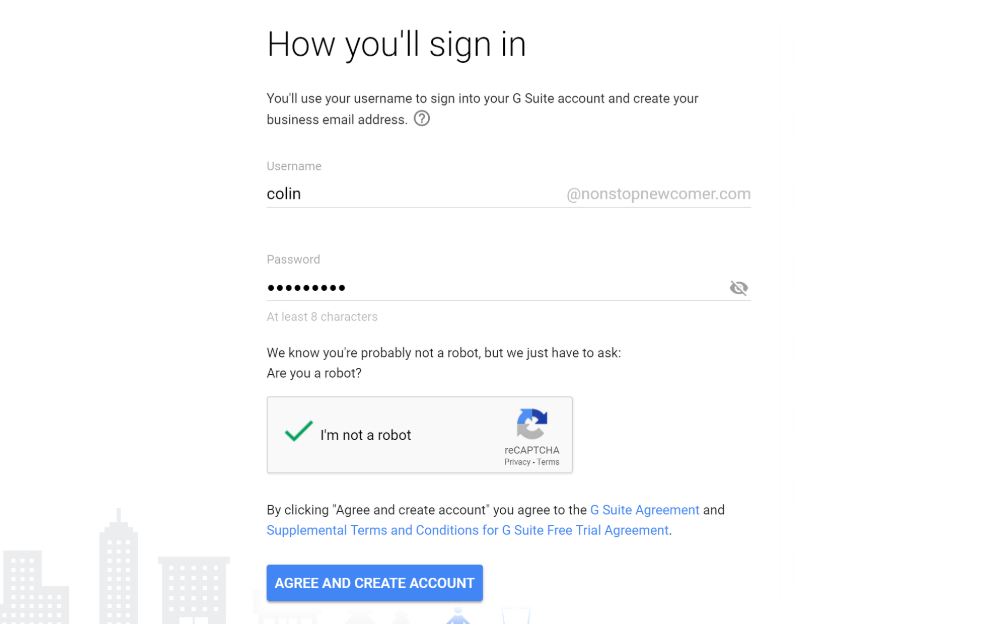
then you will need to enter a username and password that you will use to log in to google workspace. Your username will be your company email address by default (ie username@yourdomain.com), so keep that in mind when choosing which username to use.
then click accept and create account to finish the process:
step 2: add other people to the google workspace (optional)
once you finish the wizard above, you will see a confirmation that your account has been created, as well as a button to go to settings. go ahead and click that button:
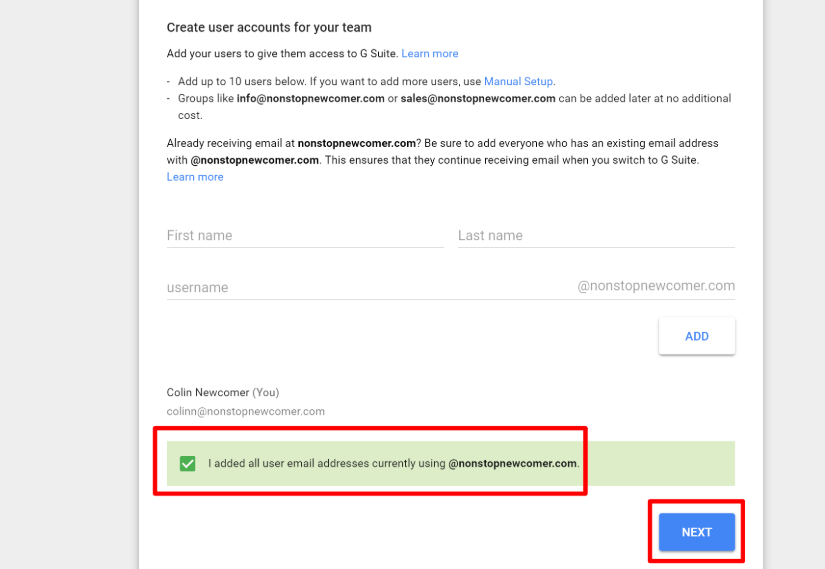
If you want to give other people access to your shared google workspace account, click start next to add people to your google workspace account. then you can add additional users.
if you are the only person who will use this google workspace account, simply check the box add all user emails… and click next >:
step 3: verify your domain name with google
Now is when you start to get into the more technical aspects of how to configure google workspace (g suite).
first, you’ll need to verify ownership of your domain with google by adding something called a txt record.
To help you do this, Google will try to detect where your domain is hosted and provide you with instructions. for example, google detected that my example site is hosted on siteground.
These instructions are quite helpful, so they may be all you need.
But to give you a little extra help, I’m going to show you how to do things using cpanel, which is the hosting panel (usually part of your hosting account) used by most web hosts (especially cheap web hosts). ). if your host doesn’t use cpanel, you may need to consult your host’s support if google instructions alone are not enough…
To get started, log in to your cpanel control panel on your host. then look for the advanced dns zone editor tool:
then select your domain name from the dropdown menu.
then you need to use the form to add a txt record containing the google workspace (g suite) website information:
- name – your domain name
- ttl – 86400
- type – txt
- txt data – copy and paste from the google workspace (g suite) interface (click below if you’re not sure where to find this)
step 4: add mx records for your professional email address
Next, you need to complete one more technical step and add something called mx records. these are the things that allow google workspace (g suite) to handle email for your new domain name.
Again, I’ll show you how to do this using cpanel. but if your host doesn’t use cpanel, you may need to contact your host’s support staff.
To get started, go back to your main cpanel control panel and search for the mx-input tool:
then select your domain name from the drop down menu. after that you should see a premade button to configure google mx. that’s all you need to click! no need to do things manually:
if you don’t see that default option for google account, you can open the advanced mx editor from your main cpanel control panel.
then you can manually remove the existing entries and then use the form to add the following entries:

once you’ve finished adding the entries, return to the google workspace (g suite) interface and click the verify domain and set up email button:
and if you did everything correctly, you should get a success message:
You’ve just set up Google Workspace (G Suite) and your email should start working soon. enjoy it! Keep in mind that it may take a few hours for your email to start working, so don’t worry if you don’t receive new email right away.
overview + how to manage your new google workspace (g suite) account
and if you need to manage your google workspace (g suite) account, like adding new users or managing apps, you can do it from the google workspace (g suite) admin console:
Do you have any other questions about setting up google workspace (g suite) with your wordpress site or professional email address? let us know in the comments and we’ll try to help.