Whether you’re a developer working nonstop on the linux command line or a server administrator who wants to extract logs or other data from managed systems, knowing how to send email from the command line is very helpful. useful.
In this post, you will find examples of how to send emails from the terminal. We’ll look at custom settings and touch on how to set up smtp connections to email accounts or email service providers. I’ll show you how to install the necessary console mail packages and provide background for the command line options as per the package manuals.
configure command line mail packages
all mail packages throughout the tutorial are available via debian’s advanced package manager, so the installation steps in the example below can be used for all packages shown.
Note that these pieces of software may be installed by other default package managers, such as yum or dnf, depending on your Linux system distribution.
in most cases sendmail or postfix is available in every linux distribution out of the box or at least that’s what similar blog posts say. either i’m unlucky or the others were wrong but i had to install one manually. however, you definitely need one of them for email delivery.
configuring sendmail with the ssmtp package
I will continue with sendmail and the ssmtp package. ssmtp contains the sendmail package under the hood, as you’ll see, and makes configuration easy, which is otherwise quite difficult for sendmail.
step 1. check if the command line mail package is installed
type the name of the mail package the same way you would run the command, to check if it is available:
-
if the package is installed, the command is executed and the prompt changes, when trying to execute the command, you will see a blinking cursor followed by the names of the recipients of the message that need to be specified in the case to send mail. conclusion: the package is installed.
if the package is not installed, you will get a warning message and a suggestion on how to install it:
In this example, I tested if the sendmail command works. after adding the ssmtp package, this command and the ssmtp command will work and change the command prompt in the terminal. Let’s see that!
step 2. install the sendmail command line mail package
As the terminal output suggests, we need to run the advanced package manager install command, usually with root permission, to install the required package. as mentioned before, configurations are much simpler for sendmail when the complexity of the configuration is abstracted away. that can be done with ssmtp:
step 3. verify the installation
After the installation is complete, you can check if sendmail can forward messages. type the following code in the terminal:
should send the email if everything works fine. here, the string “hello” piped to the sendmail command will be the subject of the sent message, while the email address defined is naturally the recipient of the email.
run the command… and, oops: sendmail: can’t open mailhub:25. the reason for this is that we do not provide any mail hub configuration. to forward messages, you need an smtp server configured. that’s where ssmtp works really well: you only need to edit its config file once and you’re good to go.
step 4. configure ssmtp
Let’s find the configuration file in /etc/ssmtp/ssmtp.conf. here, you need to put the code below to set up an smtp relay:
this means that you set up an external service that will actually forward your emails. when you provide credentials to gmail, for example, you will see messages sent from the terminal in the ‘sent mail’ directory of your mailbox. settings look similar with other services as well.
This was the basic setup for sendmail and installation steps for any commonly used command line mail package. next, we’ll move on to installing and testing various other packages.
send email using ssmtp command
This is a nice little tool that we just set up for mail delivery. as its man page suggests, it is a minimalist sendmail emulator. As such, ssmtp allows users to transfer emails through an smtp server from the linux command line. provides the means to connect to a mail center with a suitable configuration file. if your config file was configured correctly, all your worries about sending command line email can go away.
Basic implementation of the sstmp command:
if you’re just using ssmtp, the command should look like this:
Following the ssmtp command, you need to enter the address of the recipient, then you can include a file that will be displayed in the body of the email. here you can define headers for the message, list more recipients and set the content type. this way you can send html emails. ssmtp will interpret your message and use the supplied values correctly. here is an example of an html you could send:
You can’t really give more options with ssmtp as they are not honored by its minimalistic design.
troubleshooting:
In case you encounter the following error on the command line:
This is probably because gmail does not treat ssmtp as a secure application. To get rid of this error you need to change the settings in your gmail account; you can also look for more information about potential risks there.
send email using the sendmail command
For quite some time, sendmail has been the classic mail transfer agent of the unix world. it was first introduced in 1979 and its highly configurable nature and scalability made it the default resource for server administrators.
We already saw how to send basic emails with the ssmtp command, so let’s see the difference using sendmail:
I included the -v argument, which will make the communication between the mail server and its mail transfer agent visible.
There are many settings you can use if you set up your own mail server and implement sendmail on it. however, that is beyond the scope of this article. We will return to the topic in a future one. stay tuned.
send email using curl command
This tool is also extremely common for transferring data from a server. supports many protocols, such as http, ftp, pop3 or smtp. The curl package is widely used all over the world, one main reason is that it has a native php implementation and php was the default server-side scripting language for a long time.
installation:
check if the package is already installed. if not run the following:
When you’re done, you can access the cheat sheet of options available to curl by running curl -h. the more detailed version can be accessed via man curl or curl -manual. If you want to get a deep understanding of how to use curl, there’s this handy e-book that contains everything you’d ever want to know.
Basic implementation for sending email with curl:
To send an email with curl, you need to set up an smtp connection. Most of the time, Google or Yahoo outgoing mail servers are used to test sending email with SMTP. Please note that you must enable access for less secure applications in Gmail settings and similar additional security settings may apply for Yahoo as well.
In the terminal command snippet above, the -url and -user parameters define the smtp connection settings. the password section for the -user parameter is your account password for the given email address. naturally, you could also use cloud email service providers. I’ll show it using mailgun in the next section.
advanced implementation for sending email with curl:
When working with email delivery platforms, you must first obtain an api key. In this tutorial, I’ll show an example of sending curl email using mailgun, so if you get stuck during the signup process, follow this setup guide to get you on the right track.
The syntax is quite simple. you may have noticed it before, but you must end each line of the command with characters. this is a line continuation character, the command can also be executed without them on a single line. the other thing to remember is the -f option. an excerpt from the man page:
As I advised before, it’s good practice to dive into the manuals when using these command line mail commands. as the curl manual says, you’re basically creating a form to submit. each line is an input given as a name=content pair. when you attach files from your local machine, you need an @ in front of the file name.
This is how the delivered email will look like:

You could do the same using most other email sending platforms, like sendgrid for example.
send html email from command line with curl:
You can apply the same logic of creating a form in a text file, allowing you to send html messages easily:
if you run the simple command from the first example…
… and point the -upload-file parameter to the updated text file (mail.txt in our case), the received message will display the html content.
troubleshooting:
you may need the -insecure switch, which allows curl to make “insecure” ssl connections and transfers. curl will return an error message if the remote server is using a self-signed certificate or if the remote server’s certificate is not signed by a CA included in the ca certificate file.
send email using the swaks command
As its documentation indicates, swaks is a flexible, programmable, transaction-oriented smtp testing tool. It is capable of handling SMTP features and extensions such as TLS, Authentication and Pipelining and multiple versions of the SMTP protocols. it also supports multiple transport methods, including unix domain sockets, internet domain sockets, and pipes to spawned processes.
installation:
Basic implementation for sending email with swaks:
To connect to an smtp account, you must provide the server flags -s, user -au, password -ap and address -t (where you want to send your mail). the -tls flag is also important if you connect on port 587.
credentials can also be provided via command line prompts, if you just specify authenticate -a, without filling in the user and password via command line options.
advanced implementation for sending email with swaks:
there are other options that we will not touch now. let’s go to our next mail package!
send email using the mutt command
mutt is different from previous email clients as it is a feature rich command line email client. you can use it to read emails from linux terminal, connect to local users mailboxes or pop/imap servers. mutt supports various mailbox formats such as mbox, mh, maildir, mmdf, full control of message headers during email composition, and multiple colors and message labels to handle messages.
installation:
Basic implementation for sending email with mutt:
At this point you will not be surprised by the structure of the command. you can provide an empty message body with < /dev/null:
advanced implementation for sending email with mutt:
To send emails with attachments, you need the -a flag. this way you can send useful files, like system logs, to a specific address.
You can also send an html email if the file extension you add to the body of the message is in html format. mutt will recognize the file type and resolve it so it doesn’t send your html as plain text:
this is for sending email with mutt. if you have it on your machine, i suggest you test how it can work with your incoming mailbox setup and handling of incoming messages. if you do, please share your thoughts in the comments section below. I appreciate any feedback on the packages shown in the tutorial.
send email using the mailx command
mailutils is a composite package for multiple use cases. it is designed to serve regular users, system administrators, and developers. we will only touch on its basic functionalities regarding email forwarding. if you are interested in more features, please refer to its man page.
installation:
Basic implementation for sending email with mailx:
the mailx package has 2 identical command syntaxes (mail and mailx work exactly the same way). the simplest command consists of the mail/mailx command and the address to send the mail to, but it probably includes the subject and at least some text-based message body. said command should look like this:
By using the echo command and piping the output to the mail command, you can avoid additional requests from mailx for cc addresses and the message body.
advanced implementation for sending email with mailx:
for the advanced example, we will re-send a full html email. we need to provide the email html file of our choice with the < character and add the “add flag” with the content type. the complete code looks like this:
You can also set a return address with -return-address=<email-address>, which can be useful. another useful option, which I couldn’t figure out to work with html email in parallel, is to provide attachments in the same message: -a “mail.txt”. Although you can list multiple recipients, only a single attachment can be attached. you can set up an external smtp server if you feel like it.
using the alternative openssl telnet command
telnet is an interactive communication protocol to communicate with another host. could be used to open an smtp connection to another server and transfer email messages. however, since the protocol is not secure, most servers will reject this type of communication. this is where openssl comes into the picture as it is built with ssl/tls security included. is invoked similar to telnet with a host argument and implicitly executes an open command:
I’ve indented the inputs you need to provide while the communication channel is open. these entries are pretty self explanatory, but one thing I need to detail is the hash of the password. it can be a base64-encoded hash, which you can get with the following command: echo -en ’00username@gmail.com00gmailpassword’ | base64. escape characters in the string cannot be omitted. if you don’t have the base64 package installed, it is available through package managers.
As you can see above, this email sending medium only provides an interface for text-based messages, therefore it has its limitation in use cases. on the other hand, it shows all the information exchanged with the mail server, which makes debugging much easier.
mail troubleshooting
check mail logs
you need to locate your log file by navigating to the corresponding folder. I prefer to use my code editor (eg sublime text) for this, so I can have the records with syntax highlighting:
Depending on your current linux distribution, you may need to look for a different source. the log can contain useful information about deliverability issues. at this point, when you scroll to the end of this:
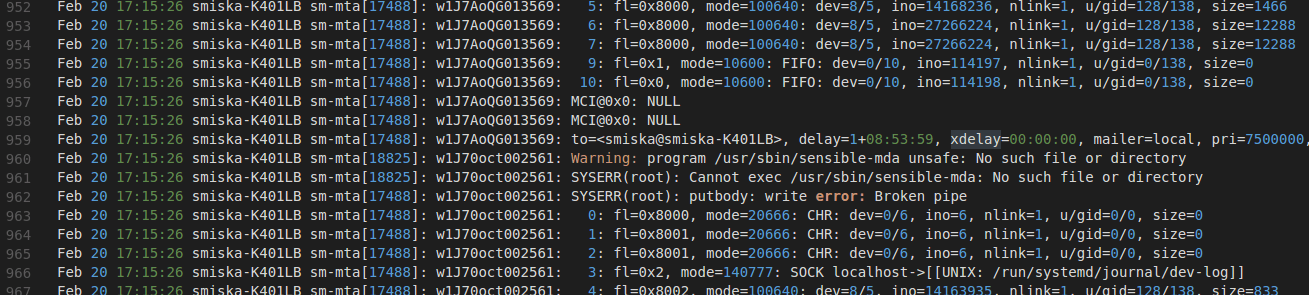
You can inspect whether the delivery was successful or understand why the process failed. it may happen that your console shows no errors, but in the mail log you can see that the message was queued for delivery, so the process didn’t stop on your machine, but was probably rejected by the mail server you sent it to. I was trying to get there.
run all commands in a sequence
then, everything is ready for the final test. all mail terminal commands are collected here in a script file. once you have downloaded the working folder with the script file, navigate to the folder that contains it and make the script executable: chmod u+x mail.sh. If you have all the files I provided ready, you can start testing the mail commands shown in the tutorial. you just need to replace the “<recipient address>” to your test email address in the code and run ./mail.sh on the command line.
once the script finishes running, your inbox will be filled with test emails.

well done!
summary
In this article, I’ve shown you many ways to send email from the linux command line. hopefully, based on what you saw, you can also install and configure these services on your machine.
The post showed the most used command line mail packages and how to send emails with them and at the end I created a shell script that collects all the commands used in the article. you can download the working files of the projects here, and if you install the packages presented in the tutorial and also fill in your credentials and recipient details, you can run the script whenever you want.
Could you follow each step of the tutorial? Very good then, I’m glad. Should you have questions or see an opportunity to further improve the content with your ideas, please hit the comments section below.
Thank you for your attention. happy shipping!