In case your business domain is configured for email hosting with zoho mail, your email administrator can enable automatic email forwarding from one organization account to another account within the same organization. this does not need any verification process.
enable email forwarding:
- Login to your Zoho Mail source account and navigate to Settings
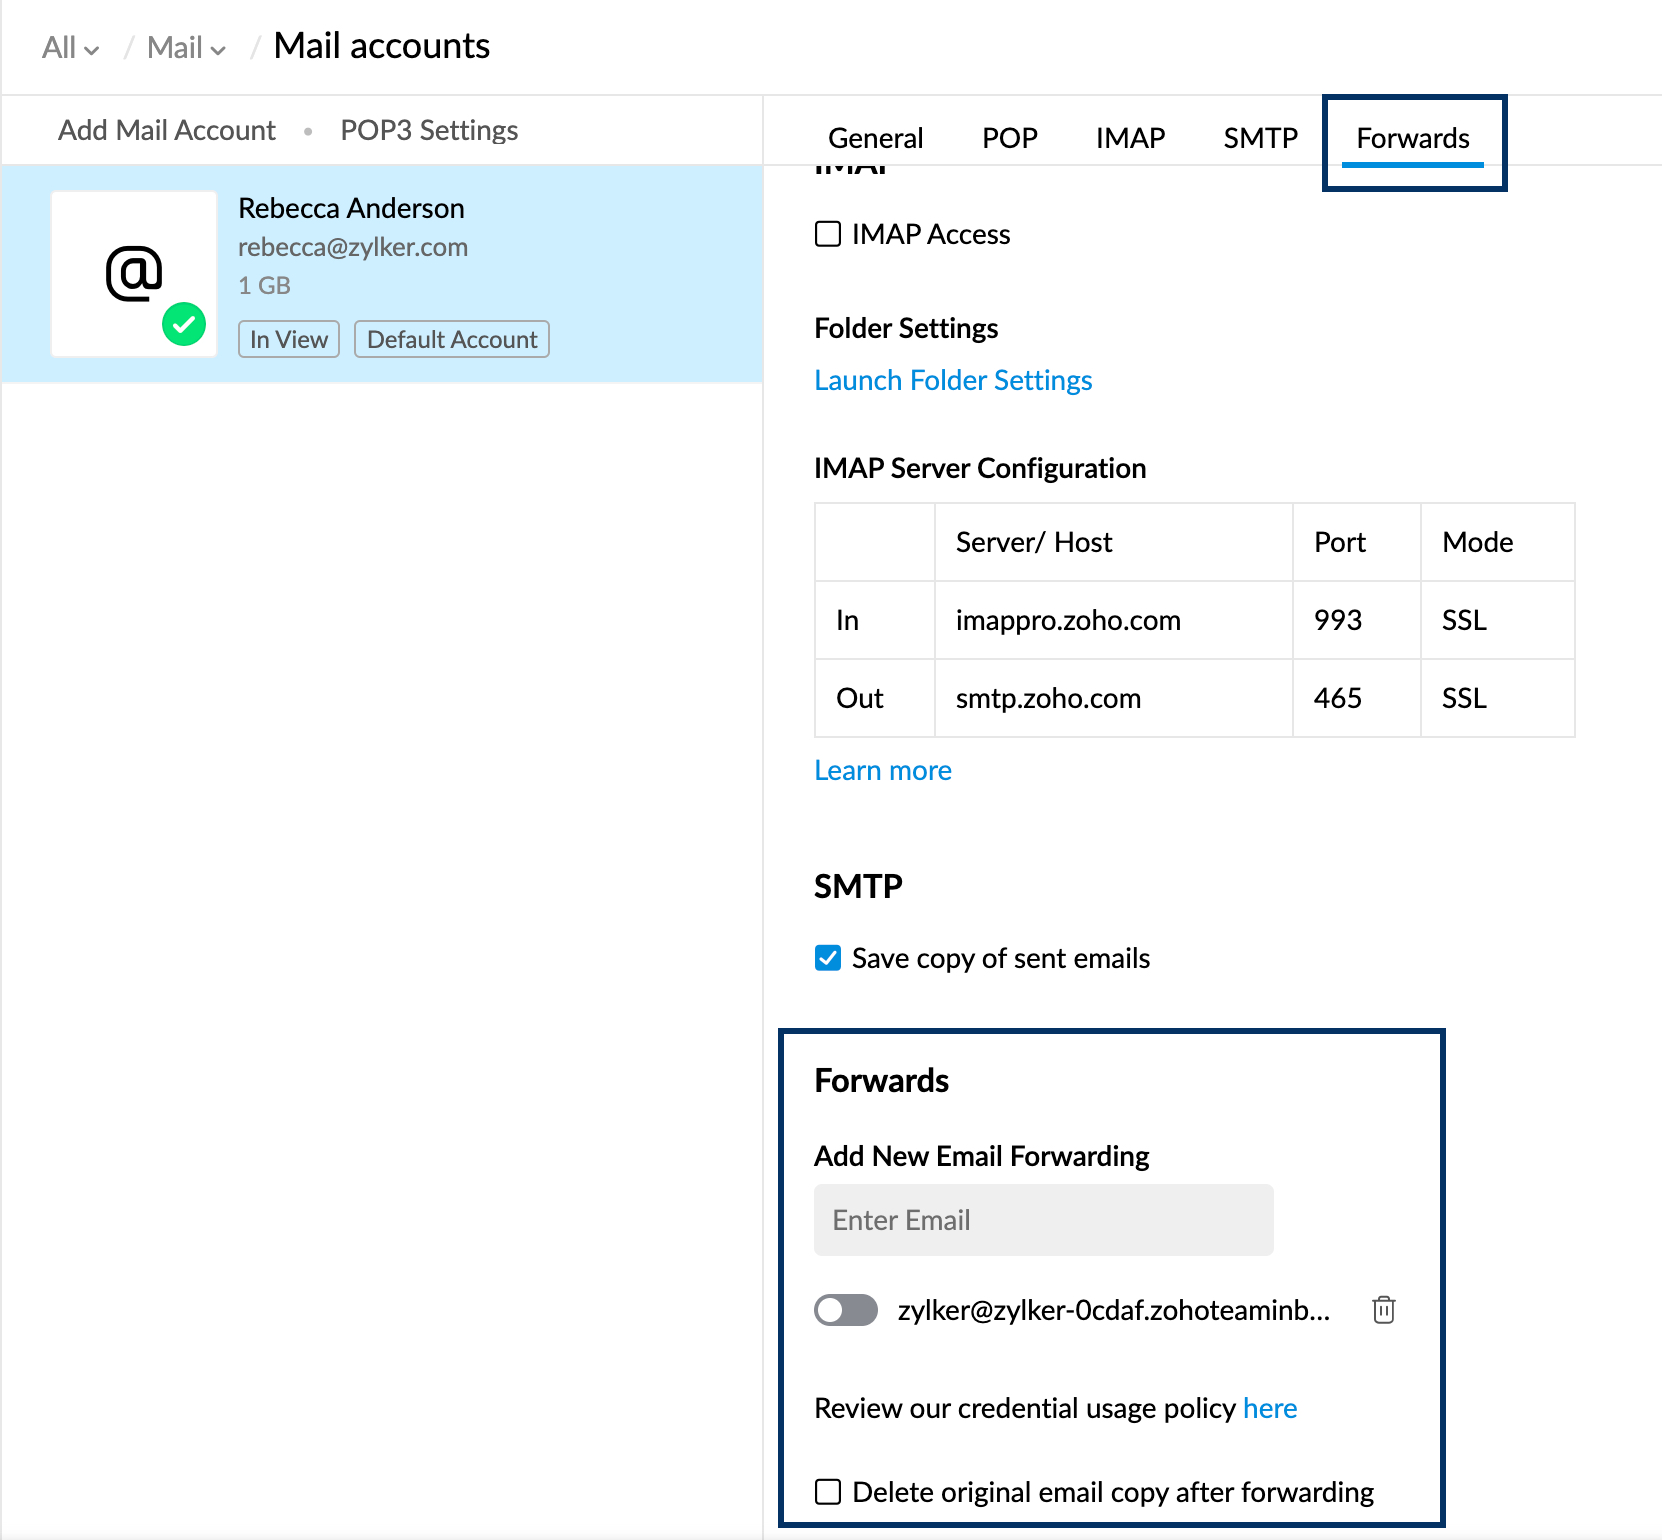
- Go to Mail Accounts. You will find a list of accounts you have configured under your Zoho Mail account.
- Select the address you would like to configure email forwarding.
- Under the Forwards section, specify the email address to which you want to forward a copy of your email.
- A confirmation email will be sent to the added email address. Email forwarding will be enabled only after you verify the account.
- Check the Delete original email copy after forwarding option to delete the original email from Zoho Mail. Leave the option unchecked if you want to retain a copy of the emails in your Zoho Mailbox.
Steps for administrators to enable email forwarding within organization accounts:
- Log in to Zoho Mail as administrator.
- Go to the Users section and select the user you want to enable Email Forwarding.
- Select the Mail settings option from the top pane and choose Email Forwarding from the list.
- Click on +Add and search for the destination email account and select Add next to the email account.
- Select Proceed to add the selected email account to the email forwarding list.
- You can find the list of all the mail forwarding addresses, Hover over any email account and select the Delete icon to remove an account from the Mail Forwarding List
points to remember for email forwarding:
- Email forwarding cannot be enabled for popup accounts.
- While an administrator enables email forwarding for a user, a maximum of 3 destination accounts can be added.
- Similarly, the user can add a maximum of 3 destination accounts for himself.
- A total of 6 forwarding addresses can be added, 3 from the administrator and 3 from the user. user.
- filter-based forwarding cannot be enabled to the same email address, which has already been added for email forwarding.
- If email forwarding fails ten consecutive times, email forwarding will be automatically disabled.
- if the received email is already an auto-forwarded email, it will not be forwarded again to avoid the loop.
email forwarding – verification
once you add the destination email address for auto forwarding, you need to continue with the verification process.
In the specified destination account, you will receive an email with a verification code to confirm the email forwarding process. In case the source and destination account holders are different, please send the email with the verification code to the source account holder to complete the verification process. Once you have obtained the verification code, follow these steps in the source account.
- Login to your Zoho Mail source account and navigate to Settings
- Go to Mail Accounts. You will find a list of accounts you have configured under your Zoho Mail account.
- Select the account for which you want to verify the Forwarding address.
- Under the Forwards section, you will find a list of email addresses you added for email forwarding.
- Click the Verify icon next to the respective email address.
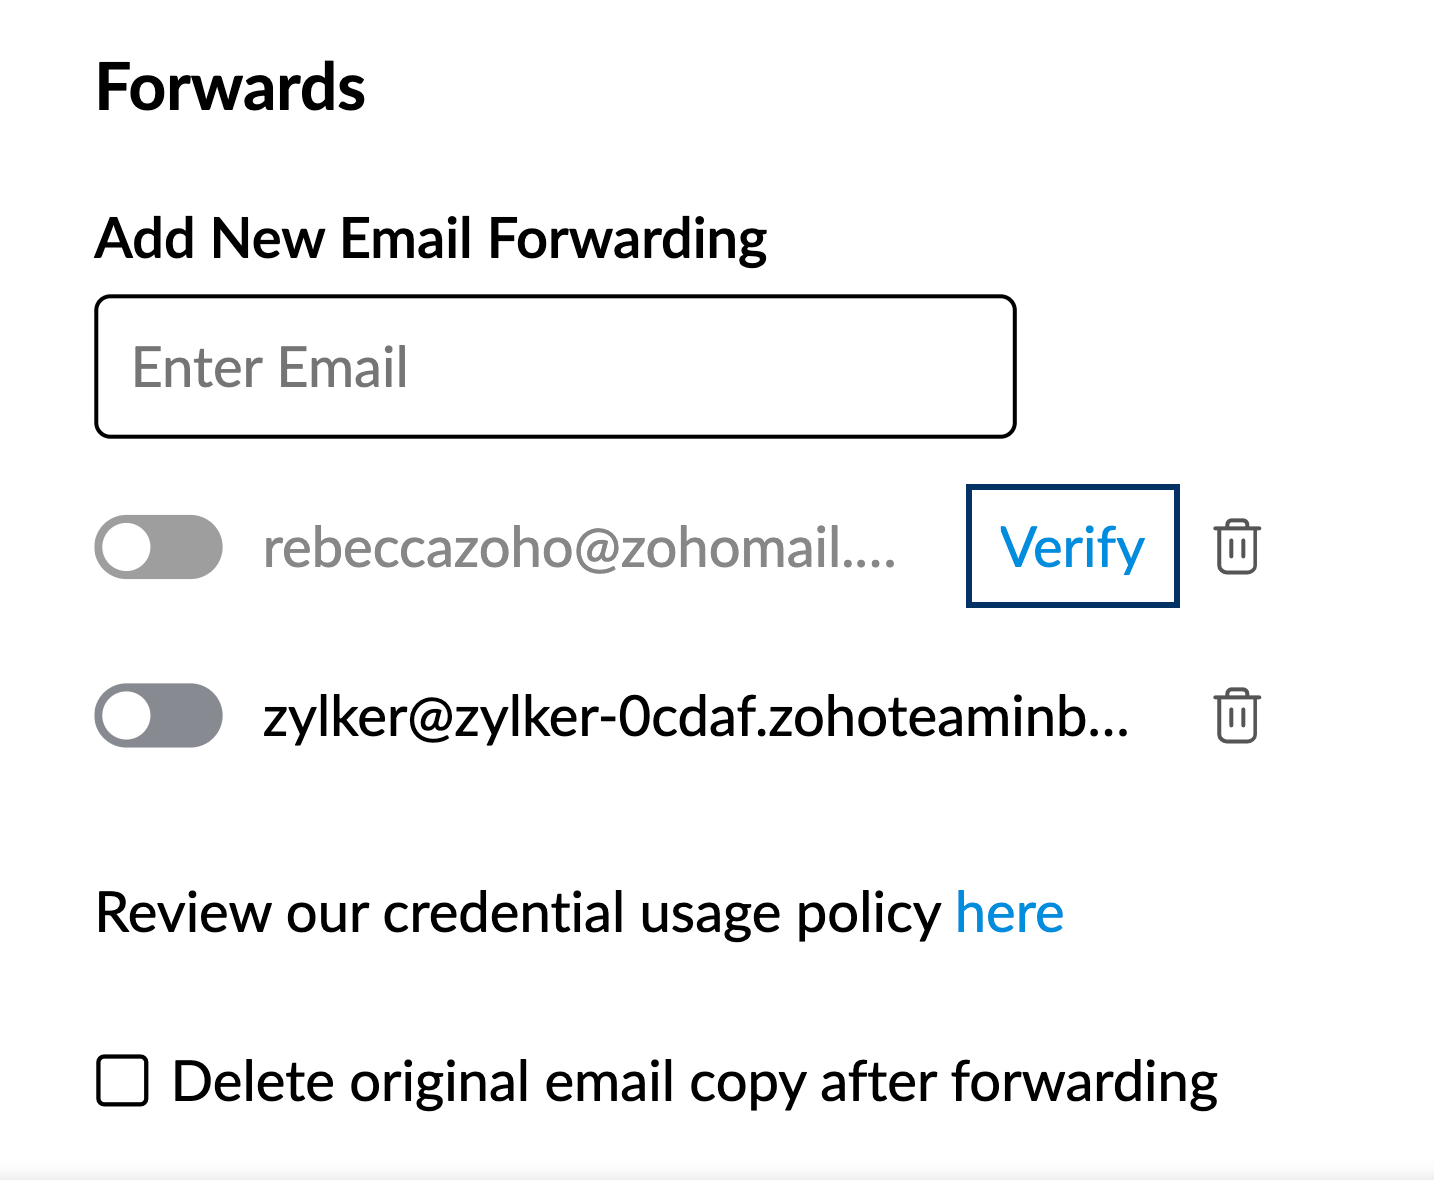
- Provide the confirmation code you received at the given email address.
- Once done, click Confirm and save the settings.
- In case you did not receive the verification code, click Resend option to receive the verification code again in the destination address.
disable/remove email forwarding
- Login to your Zoho Mail source account and navigate to Settings
- Go to Mail Accounts. You will find a list of accounts you have configured under your Zoho Mail account.
- Select the account for which you want to disable/delete a Forwarding address.
- Under the Forwards section, you will find a list of email addresses you added for email forwarding.
- Disable a forwarding address by toggling the switch to OFF. This will disable email forwarding until you enable the same. You can toggle it back to ON to enable the same.

- If you want to remove a Forwarding address, click the Delete icon.

filter-based email forwarding
You can forward only certain emails based on certain conditions, using the filter-based forwarding feature. you can set conditions based on senders or subjects and forward emails to someone else. this will be particularly useful when you want to forward only specific emails to another account, based on a specific set of rules or conditions.
- login to zoho mail in the source account
- go to settings
- navigate to filters >> ; the new filters
- provide the conditions or rules you want to specify.
- in the action, select forward to and specify the email address email
- in case you are adding the email address recently, you need to verify the email address
- click save to save the settings .
For incoming emails that meet the specified conditions, the emails will be forwarded to the email address, after the verification process. the ‘run through filters’ option does not apply to filters with ‘forward’ as the action.